:: Diary - January 2024 ::
:: Monday, 1 January 2024 ::
And so we enter another New Year… so Happy New Year to both my readers!
In the words of the late great Rev IM Jolly, “2023 has been a helluva year.” All of us in my wee TVR gang are realising that we’re not getting any
younger - it’s now close on 21 years since most of us first met, and a lot has happened in that time. We have all had health problems of some sort
or other, affect us or someone close to us, some more serious than others. We’ve had to cope with other problems too.
Who knows where this year will take us?
Well for a start, we’ve been looking at event calendars, and we are already booked up for the TVR season opener in Derbyshire in April, and we’ll
be discussing other events for the rest of the year when we next meet up.
I haven’t had much time to play with cars recently. I did spray rustproofer underneath the Porsche - the new quick jack lifts were an absolute boon
for that wee job. I need to get one jacking point welded up when I can get it to a garage without spraying the rest of the car with road salt.
The TVR isn’t needing much - just a clean up and a check over really. I think I might still change the fuel pump, although I’m pretty sure that the
cutting-out problem was a manky relay. I need to get the Porsche out of the garage first to get the TVR in, and I need to take the Porsche for that
jacking point repair before I can do that…
And that leaves the Chevrolet. I tried to sell it in September but it didn’t reach its reserve - not by much, but I decided not to go that bit lower.
Maybe I should have? I hardly used it in the last 2 years, so maybe it’s time for a change.
So let’s summarise: I’ve got a Porsche that I don’t like getting wet, and especially not salty. I’ve got a Chevy that’s not useful to me any more.
I’ve got a TVR that I’m a bit more relaxed about. It sounds like it’s really time for a change eh?
One thing that I’ve realised through my own experiences, and those of my friends, is that life is too short, and especially at our stage, you can’t
say “one day I’ll do such-and-such.” Carpe Diem! So I think I’ll be selling at least one car after the worst of the winter, and we’ll see where we
go from there - maybe I’ll get something else that I can use more regularly in Scottish weather conditions?
Yeah I know, you’ve heard it before…
:: Sunday, 7 January 2024 ::
It's TVR Car Club day!. It's also wet and damp and freezing. My TVR is along at the farm. Dave's car is a BMW 5 series, it's very comfy.and it has
a heater. So we all meet up and go through to the meeting in that.
Nobody else has come in a TVR either. Wimps.
We have the usual chat about loads of unassociated topics, including other possible meetings for the year. We are already booked for the season
opener in Derbyshire in April, and we also decide to book up for the Back Home / S Club Heaven event in Blackpool in July.
On the way home, I decide that I'm going to change the fuel pump after all, as a precaution, even although I am sure that I have fixed the problem
by changing the relay. Better to be safe than sorry! A bit of web-searching turns up the right pump at around £70 so I order it. God knows when
I'll get a chance to fit it!
There used to be a website at www.tvrsseries.com, run by a bloke called Colin (Pies on Pistonheads). It was one of the first, if not THE first,
websites dedicated to the TVR S Series. I think this tvrgit site is older by a few months (he bought his V8S about 3 months after I bought my car),
but while this site is more of a random stream of semi-consciousness, his was a mine of information he had gathered and added to over the years,
and was used by most S owners as a reference.
The domain name expired, and the site disappeared, in March 2013. I tried to contact him but didn't get any answer. I didn't want that information
to be lost to the TVR S Community, so I decided to build a website containing most of the documents and information that Colin had on his site,
data sheets for the various S models, that I managed to download from a website archive.
I forgot that I had uploaded that to a real website until Thursday or something, when somebody on Facebook posted a link to one of the articles, and
I recognised the website layout... I was surprised to find the site was still live!
So today I also updated some of the links etc, so here you go! It's available at
TVRSSeries.co.uk
:: Monday, 15 January 2024 ::
There was a very brief break in the weather on Saturday, between the past 6 weeks of bucketing rain, and the forecast arrival of snow and freezing
cold weather. The roads were dry so I took my chance and took the Porsche along to the farm, and brought the TVR back to the house.
I'm in the middle of decorating the hallway in my house, so I didn't have much time to do anything else with the car.
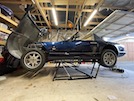 Today I was out in the garage just to get a ladder, but found myself slightly by wondering how the quickjack lifts might fit under the car. just a
wee check to put my mind at rest. Can't do any harm. 10 minutes later and I've connected up the hydraulic hoses and lifted the car to working height...
Right, back to decorating...
No wait, hang on... just before Christmas I was in Lidl or Aldi (I can't remember which it was) and I found myself browsing the "shelves of dreams"
otherwise known as the centre aisle where they put all the random shite that they have on offer for a week or so until the next crate of random
shite arrives. Well. in among all that, I saw a "brake fluid tester" for only £8 or something. As a habitual hoarder of random shite, I had to have
it.
It's easy to use - it's a pen-shaped thing with 2 electrodes that you dip in the master cylinder and press a button, and it lights up green, red or
orange lights. It says in the instructions that brake fluid should be changed when the water content exceeds 3%, unless your vehicle as ABS brakes,
or unless you're towing, driving in mountainous regions, or driving at high speeds, when the limit is 2%. None of those particularly apply, although
we try to kid ourselves that TVR S Series are fast.
I checked the Porsche - under 1%
The Range Rover - under 1%
My wife's VW beetle - 3%. Ah... no more track days and mountain trips for her then, until we get that sorted.
The TVR - less than 1%. Yay!
Right, back to decorating...
and writing websites.
:: Wednesday, 24 January 2024 ::
About this home decorating...
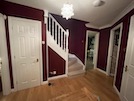 The downstairs part of the hall is finished. The stairs and the top landing need another coat and a bit of edge painting, but it's getting there.
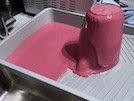 The mildly interesting thing, though, is that the paint is a lot lighter when it comes out of the tin... very reminiscent to a TVR Cerbera of my
past (expensive) acquaintance. Pushing those evil thoughts aside, I've had a day off from painting today so that I can play in the garage.
I have given the car a good inspection, and have a list of jobs to look at over the next couple of months, ready for next season.
1. Replace the fuel pump - I have a new one ready to fit;
2. At the same time, replace the fuel hose from the tank to the pump - I replaced all the rest, but for that one, I need to drain the tank;
3. Move the exhaust slightly because the centre box is touching the chassis on one side;
4. The nearside front wheel brake is sticking and dragging slightly;
5. The bracket holding the bonnet stay to the body is loose because the screw holes have enlarged;
6. The drivers door doesn't lock with the key but locks if you press the button and close it;
7. The passenger side door mirror doesn't adjust electrically;
8. Brake fluid has been leaking down the servo and has blistered the paint under the master cylinder;
9. Oil and filter change due.
Nothing too drastic - just enough to be interesting. Numbers 5, 6 and 7 have been like that for ages, so not exactly urgent.
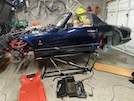 So today I start by taking the wheels off for a bit of working space...
First job is the fuel pump, so I check that the tank is nearly empty on the gauge (which is about as accurate as guessing) and then disconnect the
battery and put a brake pipe clamp on the fat hose from the tank, and then cut the cable ties holding the hose to the chassis and disconnect the
hose from the pump. I put the end of the hose into a 5-gallon jerrycan and then remove the pipe clamp. Tank empties, can fills about half-way.
Next step is to disconnect the electric feed and earth to the pump. My pump has a connector tid to the chassis before the pump itself, so that's
easy.
Then I use a 19mm spanner to remove the banjo connector on the hose to the fuel filter.
The pump is held to the chassis by 2 x 10mm bolts and nuts - I loosen those and am then able to wiggle the pump out towards the wheelarch and on
to the floor, ignoring the fuel that is pishing out of it as I do so...
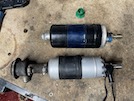 Here's the old pump (top) beside the new one (bottom!) after I have transferred the rubber padding over. I have also transferred the doo-dah on the
inlet end (I don't know what it is, but it's certainly not blocked - the pumpful of petrol on the garage floor can certify to that). I have also
transferred over the feed and earth wires by the time I took this photo.
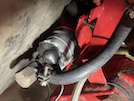 The new pump is much slimmer, though, and a trial fit shows that the clamp bracket won't grip it, so I wrap an extra layer of rubber around it and
replace it back in the car - then I can tighten the clamp, connect the banjo joint and then the wires.
I reconnect the battery and give it a wee prime - it's a lot quieter (probably helped by the extra rubber padding) but I don't run it too long because
there's no fuel in it.
Next job is to take the fat fuel hose off at the tank, so that I can measure it and order a new bit of R9 ethanol-resistant stuff. The tank's already
empty, right? So it's simple - unscrew the hose clamp and pull the hose off under the tank, right?
Wrong! What I have neglected to notice is that the hose comes out of the bottom of the tank and then goes UP over a chassis rail before coming back
down along the chassis to the pump - so it's got a wee "trap" in the very bottom of the tank and the back end of the hose - so when I pull it off,
I get covered in petrol before I put my thumb over the outlet to stop it, and my other thumb over the end of the hose to stop that. So there I am
knelt on the floor like a Dutch boy with his finger in two dykes (which strangely enough, reminds me of the rough plot of a grainy overdubbed foreign
Betamax video that I saw when I was a student in the 1970s...), my eyes stinging with petrol, and nothing within reach to stem the flow (of petrol
or tears)... bugger...
I manage to deftly (or not-so-deftly) push the hose back on enough to stop it leaking, bring back the jerrycan and another old bit of hose, push that
into the can and on to the outlet and drain the rest of the fuel.
Arseholes!
So with the hose off and measuring just under a metre, I stop and order a new bit hose for replacement.
Moving to the front of the car (out of the puddle of petrol) I mixed up some fibreglass resin and matting yesterday, and filled in the screw holes
for the bonnet strut bracket. Today I re-drill the mounting holes and screw the bracket back on - much firmer! That job has been needed since I got
the car, so it has only taken me 21 years to get round to it...
While I'm in that general area, I unscrew the inner wheel arch so that I can get a better look at the brake servo. My head tells me it's almost new,
but my online service record (this website) says that I replaced it as long ago as December 2011, so it's 12 years old, only 9 years younger than the
rusty one that I took off...
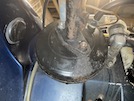 Here it is from the wheelarch. I'm pretty sure that it hasn't been leaking, I think that's overspill from every time you take the cap off the reservoir
and fluid dribbles out of the stupid level sensor that doesn't even work... It eats into the paint and lets water attack the steel.
First I spray it with brake cleaner to remove any remaining fluid, then a wee wire brush in a dremel to remove the rust from the servo and the underside
of the master cylinder. Then I give it a wee sand down and brush on some rust converter and leave it overnight.
So that's the result of a wee relaxing half-day in the garage this afternoon - Items 1 and 5 from this morning's list completed, and half-way through
item 8. Two and a half out of 9, and I've still got until the end of March to get it finished.
Then I decide to see how much fuel is in the jerrycan. I weigh an empty can on a spring balance - 7 kilograms. Then I weigh the half-full one - 16 kg,
so there's 9 kg of fuel in there. Petrol weighs about 0.8 kg per litre so that's around 11.25 litres, or just under 2.5 gallons. So now I know where
the fuel gauge is, when there's around 2.5 gallons in the tank. What I don't know is how much fuel would be left in the bottom of the tank after it
falls below that "hump" in the hose and can't reach the pump... and the engine stops!
:: Thursday, 25 January 2024 ::
It's Burns day. No, I haven't spontaneously caught fire after inhaling all that petrol yesterday, it's the birthday of Robert Burns, Scotland's
national bard. I'm going out to a Burns supper tonight so no jobs today that might leave me smelling like a burst refinery. It doesn't go well with
the burst distillery effect that I intend to achieve.
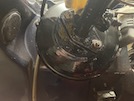 First, the brake servo. The rust converter has done its magic so it's ready for painting to give it some protection. I should really take the servo
off and spray it, but I don't want to take it to bits unless I have to, so I brush paint it in situ. It's not great, but it's not rusty!
3 jobs out of 9 completed!
Next - number 4 "sticky brake caliper". The nearside front caliper isn't retracting when you let the brake off. A bit of levering with a big
screwdriver suggests that it's the piston that's stuck, rather than the slide bolts. I need to decide whether I need a new caliper, which are
considerably more expensive than they used to be (at around £140 to £180 each), since it's 30 years since Ford stopped making Sierras) or whether
I can refurbish this one with anew piston and seals etc (hich costs around £17 each side). So I need to take this off and have a closer look. I
manage to lever it slightly open to release the brake disk. So then I can I can remove the slide bolts with a 7mm hex key, and slide the caliper
off the disk.
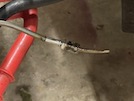 Then I loosen the brake line from the caliper, and unscrew the caliper without twisting the flexi hose. Ypu can't use those pipe clamps on braided
lines, so I already have wee bits of brake pipe with a female connector that I can tighten onto the end to stop the fluid leaking out.
 Here's the caliper, finished in a lovely satin black, carefully chipped to show the blue underneath - which in turn has been scraped away to show
the original red...
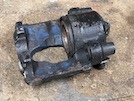 Here's the business end showing rusty piston which won't retract further even with a G-clamp on it. Let's get this apart...
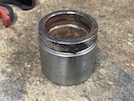 I put a bit of wood across the forks of the caliper and pop the piston out with an airline. Here's the piston - most of it is fine but the top lip
(between the seal and the brake pad) is corroded and that's the bit that's sticking in the top edge of the bore. Diagnosis - fucked.
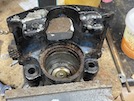 Here's the caliper after I have cleaned all of the old brake fluid out of it - the bore's ok, no scoring, although there is a matching rusty lip
where the seal goes. Diagnosis - if that lips cleans up ok, the caliper itself is probably salvageble.
So I get fired into that with a wee wire brush in a dremel, and it comes up ok. I try the piston in the bore and it moves up and down no bother, so
it looks like a wee refurbish will do the job. Inspired by this success, I decide that the outside of the caliper should be refurbed at the same
time, so I strip it with a bigger wire brush.
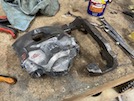 I also remember (just in time...) to remove the mounting bracket and clean that up too!
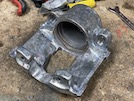 So here we are, ready for painting and rebuilding!
I'll obviously have to do the other caliper to match, so the tally for today is: one job finished, one half-started and another job added!
Right - back indoors, get cleaned up, gladrags on and off to this Burns Supper! While I'm on the train, I order two caliper refurb kits, which include
seals, dust boots, pistons, brake nipples and slider bolt covers etc - everything except the caliper body itself. £35 all in, delivered tomorrow.
:: Friday, 26 January 2024 ::
Lovely Burns Supper last night, but I'm still up early to get a few wee bits of work out of the way before garage time!
But first (or second after the wee bits of work) I nip along to the farm to get my wee blast cabinet. I also have two spare calipers - the ones that
I took after after the clapped-out seized brakes episode in June 2017 (God was it as long ago as that?)
Back to the house and while I was out, the post man has delivered the metre of fuel hose I ordered on Wednesday.
But first (or third now I suppose) - caliper restoration... I set up the blaster cabinet. It's only got wee glass beads in it, not sand or anything like
that, so it will remove paint and rust without damaging the metal.
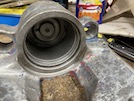 I clean up the caliper some more, especially around the dust boot and seal area, to get all the rust off.
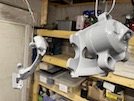 Then I give it a clean out with brake cleaner, and mask off the bore with masking tape and a wad of paper towel. Two wee blobs of paper towel mask
off the brake line inlet and the bleed screw threads. Then I can hang them up for a coat of primer.
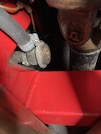 While those are drying, let's refit this fuel hose... I apply a slight coat of oil inside the end of the hose and onto the stub, and fit the front of
the hose to the right-angle elbow bend thingy on the inlet of the fuel pump. Ford call it a fuel damper, but there's nothing inside it that I can
see. Maybe there should be?
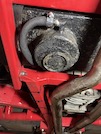 Then I route the hose along the outside of the chassis as it was before (not the inside because that would be next to the exhaust and that would be
silly) and then through the fuel tank cradle to the tank outlet. Another wee smear of lubricant and reft the hose.
Then I refill the tank from my jerrycan, and check for leaks. All OK. Then I can reconnect the battery, refit the fuel pump relay and turn ignition
on. Pump primes, check for leaks. Still OK. Then start the car up and check again for leaks. Sorted!
Then I get back under the car with two 17mm spanners and loosen the two bolts on the exhaust centre section. Lever it over to the left by 5mm or so
and re-tighten. The silencer now has clearance on both sides, so won't rattle against the chassis.
Now I can take down the caliper and bracket and give them a coat of satin black.
Right - let's have a look at these spare calipers. The left hand one is probably beyond saving - that's the one that was seized solid 7 years ago.
The other one has a bit of external rust and muck, but the piston looks clean. I think I'll refurbish that one and then just swap it for the one
on the car so that I know they have both been done. I pop the piston out with the airline, and it's not too bad. I've got a new one on the way
though, so I'm not overly bothered.
The caliper bore is fine - although again there's that rust around the rim.
So I chuck it in the blast cabinet and give it a clean up - not quite as efficient as the wire brush, but there again, doesn't cover half the garage
in rust and blue and black and red paint dust... I have to stop halfway through though, because we're going out and I have to get ready.
So where are we now with the wee list of jobs? Lets' see. These are finished:
1. Replace the fuel pump;
2. At the same time, replace the fuel hose from the tank to the pump;
3. Move the exhaust slightly because the centre box is touching the chassis on one side;
5. The bracket holding the bonnet stay to the body is loose because the screw holes have enlarged;
8. Brake fluid has been leaking down the servo and has blistered the paint under the master cylinder;
so the list is now:
4. Free up the nearside front brake caliper;
6. The drivers door doesn't lock with the key but locks if you press the button and close it;
7. The passenger side door mirror doesn't adjust electrically;
9. Oil and filter change due;
10. (Added yesterday) Refurbish offside front brake caliper.
5 down, 5 to go! That looks like progress but doing this many jobs at the same time means that the inside of the garage looks a mess - I'm going to
get the brakes back together before I start anything else I think.
:: Saturday, 27 January 2024 ::
Having received fan mail yesterday complaining about the lack of puerile innuendo - mainly based on the absence of the word "nipple" from an article
about refurbishing brake calipers, I feel compelled to try harder (see, it didn't take long...).
First job today is to finish sandblasting (or beadblasting) the "spare" caliper for the offside, ready for painting. I also clean up the mounting
bracket. Then I give them a clean out with brake cleaner and leave to dry while I tidy up a bit. Then I mask off the caliper bore and the two holes
for the inlet and bleed nipple, and give them a spray of paint.
While those are drying, I look around for something else to do - oil change!
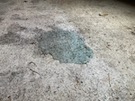 As I go under the car though, I find that it has been a bedwetter overnight - there's a wee puddle of antifreeze.
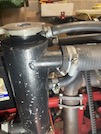 It's dripping down from the big hose connection on the swirl pot. I tighten it up - easiest repair so far!
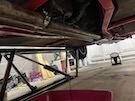 The oil change is easy at this height - put a tray underneath remove the sump plug. When that has finished draining, put the plug back in, move the
tray and unwind the oil filter. New filter on, refill with oil to correct level - sorted!
Next - a job that I think has only been done twice since I got the car - check and top up the differential. It's a real bugger to get to when the
car's on the ground, or even on axle stands. I did it once, and changed the filler plug, when I had the tank out years ago to replace the tank support
frame - then it was done again (I think) during the chassis refurb 4 years ago.
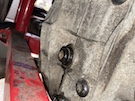 Here's the plug in the back of the diff. You can see how close it is to that chassis member.
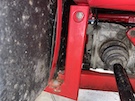 Here's the view from the offside wheelarch. You need an allen key with a "business end" that's long enough to clear the chassis, but not too long or
it doesn't fit between the diff and the tank. After trying various combinations of allen keys, allen sockets, ratchets, plain sliding bars etc, I find a
combination that is just the right length to fit, and the filler plug is out!
Next problem is - you can't get a gear oil bottle in there. I rig up a wee system using a vacuum pump (for bleeding brakes etc) in reverse - connect
the hose to the "out" side and through a wee container of gear oil to pump it along a foot of hose and into the diff. It's a slow process, and my
hand is soon getting sore with all this pumping - I could definitely (and literally) "use a hand" from someone with more prolonged pumping experience.
I get there eventually though, and eventually the oil erupts from the hole. I quickly replace the plug and lean back and savour that joy you feel
after a well-completed service...
Then I decide to tidy up a bit, but quickly get distracted by a cardboard box that has my 2017 seized brake caliper in it. Is it repairable or should
I just chuck it out (given that a refurbished one would be £150 or so and a rebuild kit would be a tenth of that)? Well, let's just see....
Same routine - pop the positon out with an airline - except that even with the compressor cranked up into the needle-quivering "danger zone" on the
pressure gauge, the piston won't budge.
OK - seeing as the piston is obviously buggered, try to grip it and twist it out. Nope.
Next step is to grip the piston end in a vice, and "gently tap" the caliper off the piston. Those of you familiar with Haynes workshop manuals will
know that "gently tap" means "batter the fuck out of it until either it breaks or you do".
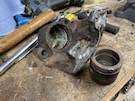 It puts up a good fight, I'll give it that, but it comes apart eventually. The piston is beyond saving but the caliper bore is ok (apart from that same
old rusty lip). Worth a go as a refurb as a spare...
So where are we now with the wee list of jobs? Let's see. These are finished:
1. Replace the fuel pump;
2. Replace the fuel hose from the tank to the pump;
3. Move the exhaust slightly away from the chassis;
5. Fix screws on the bonnet stay bracket;
8. Clean and repaint brake servo;
9. Oil and filter change;
11. (Added today) Fix coolant leak at swirl pot hose;
12. (Added today) Top up differential oil,
and the list of remaining jobs is now:
4. Reassemble and fit nearside front brake caliper;
6. Look at drivers door lock operation;
7. The passenger side door mirror doesn't adjust electrically;
10. (Added to original list) Reassemble offside front brake caliper and fit.
8 down, 4 to go! I need the brake caliper refurb kits that were supposed to be here yesterday, but it's ok because I want to let the paint dry first
before I start handling the calipers to put new seals etc in. And nipples.
:: Sunday, 28 January 2024 ::
Not much to report today - I'm still decorating the hallway and stairs, on and off, and I've also been away today on a wee mission of mercy to visit
someone who has been in hospital.
I did have time to look at the passenger side door mirror though. The driver mirror works fine, so the joystick control is obviously ok. When I move
the switch to operate the left mirror, there's nothing. After a study of the wiring diagram, I pull the "left-right" switch out of the console and
find that a wire has come off the back. Connect that up again, and we have mirror function!
So the current scores on the doors are that these jobs are completed:
1. Replace the fuel pump;
2. Replace the fuel hose from the tank to the pump;
3. Move the exhaust slightly away from the chassis;
5. Fix screws on the bonnet stay bracket;
7. The passenger side door mirror doesn't adjust electrically;
8. Clean and repaint brake servo;
9. Oil and filter change;
11. (Added today) Fix coolant leak at swirl pot hose;
12. (Added today) Top up differential oil,
and the list of remaining jobs is now:
4. Reassemble and fit nearside front brake caliper;
6. Look at drivers door lock operation;
10. (Added to original list) Reassemble offside front brake caliper and fit.
9 down, 3 left!
To celebrate completion of 7 of the 9 original jobs on the list, here's a photo for the schoolboy contingent.

:: Monday, 29 January 2024 ::
Still no sign of the caliper refurb kits, but I have a wee bit of work to do and also a wee bit of home ecorating still to finish. Changing from a
light colour to dark needs lots of coats!
Around lunch time, I decide that it's time for a bit of therapy, so it's back to the garage for the last of th non-brake jobs - the driver's door
lock. I test it a few times by shutting it and trying to lock with the key - it works occasionally but not often. Let's get in about it and try to
work out what's going on!
The first step is to remove the inner door tri. I've covered that countless times before, so no photos, but basically:
Unscrew door speaker and remove wires;
remove screw at rear door edge;
reach up behind speaker hole and remove teensy wee nut holding the armrest through the door (which I have previously replaced with a wee wing nut
for easier removal);
prise the trim off the door by pulling out the hidden plastic studs around the front and lower egde;
disengage inner door handle wire from the door lock.
I can now inspect the lock operation - the rod to the key hole opens but doesn't lock, even if you push it with a long screwdriver. Can't see why.
There are 3 remaining control rods to the door lock: one from the handle, one from the key lock and one from the inside push-button on top of the
door trim. Those are all held in place on th lock by Ford rotaty-clip things that probably have a proper name but I don't know it - the rod goes
through the centre hole then you turn it to clip over the rod to hold it in place. You need to unclip those by turning them off the rod.
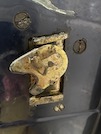 Then turn the lock to the closed position so that it fits through the hole in the door (this photo shows it "open") and undo these three very tight
screws. With a bit of fiddling, you can extract the lock into the door past the window channel - make sure that the control rods are out of the way
too!
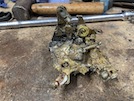 Here's the lock - covered in hardened grease (which I don't remember putting on, so it's been there for years!) - you can't even see how the lock
is supposed to work.
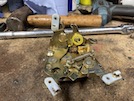 So the first step is a paraffin bath to remove all that muck to check for wear, and a wee bit of fresh spray-on grease for lubrication.
Then I can try the different control levers "in hand" - everything is free, but I still can't figure out why the door opens from the outside but doesn't
lock... I can see how the "lock-door-from-the-inside-and-hold-outside-handle-up-while-you-shut-it" routine works, but it just won't lock using the
connection from the key. Then it suddenly does - then it doesn't again. I just cannot see why.
So, I've got a 34-year-old car that I can always lock from the outside, but not always with the key. Is that a major problem?
At this point I remember the ancient mechanic's prayer, handed down by my dad from his dad before him.
Fuck it.
I put it all back together.
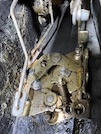 Here's the view inside the door of the re-installed lock. The yellow arrow is the door handle. The red arrow goes to the key. The orange arrow goes
to the internal lock button and the purple arrow is the connection to the inside door handle - it pulls forward to open.
Refit the door trim and good to go! (Not to stop though - still no sign of those brake parts...)
Other than the brakes, though, that's everything else on the list completed. Time for a new list!
:: Tuesday, 30 January 2024 ::
Postman Pat, Postman Pat, Postman Pat you're a dawdly twat
That box in your fat mitts
better be my brake bits
or I'll boot your arse so hard it'll be a hat.
But fear not - Pat and his buddies have managed to get my parcel here 4 days after it was supposed to be. To be fair, the supplier didn't actually
post them until the day they were due here, so Pat had no chance.
First I put down a clean plastic lid to cover the manky dusty covered-in-shit workbench. Don't want any dirt getting inside the braking system!
 So what have we got? Well for each caliper we have a new piston, seal, dust boot, bleed nipple and cover, and new mounting rubbers. a wee pack of
brake grease. And All for £17 a side!
Then I give the caliper a final blow out with the airline to remove and dust etc.
The first task then is to install the seal. I smear it all round with grease and then insert it in its groove, pushing it in all round. Then I put
a wee bit more grease around the piston and slide the dust cover on from the front (open) end all the way down until it's nearly off again at the
back. Then I push the wide side of the cover into the other groove in the caliper, make sure it's seated all round, and push the piston in. It
needs a bit off pushing past the new seal, but eventually it's back flush with the caliper. Then I put a bit of wood in the "forks" and pop the
piston out again by about an inch to make sude the dust cover is properly sealed. The first caliper works first go, the second one takes me 4 goes
to get the dust boot properly bedded in the caliper bore.
Then I refit the bleed nipple and use a wee bit more grease to push the two rubber sliding mounts into the mounting holes.
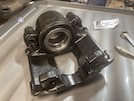 Here it is all built up, ready to go back on the car!
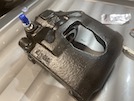
Repeat to complete the caliper for the other side!
I refit the brake disk and then the mounting bracket to the hub. Then I remove the temporary stopper on the end of the brake pipe and screw the caliper
onto the pipe until it's reasonably tight.
Then I refit the pads with a little bit of copper grease on the edges of the pads where they meet the caliper, and around the back of both pads where
they meet the piston or the caliper.
Fit that back in the bracket, install the slide pins and tighten, and then tweak up the brake pipe connection.
Finally fit the retaining spring on the outside of the caliper.
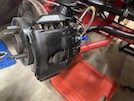 Here it is fitted!
Then I remove the caliper and bracket on the other side and fit the refurbished one.
Finally, it's just a case of bleeding both sides and making sure the reservoir is topped back up.
And that's it - this week's list is completed!
While I'm tidying up, I have a crawl under the car to wipe up some oil that has spilled - I think from the filter during that oil change. While I'm
under there, I decide that the first thing on my new list will be to top up the gearbox oil - access is so much easier with these lifts! Not today
though!
I also notice that the differential front oil seal is leaking and flinging oil out in a nice arc under the body and chassis. Replacing that seal is
a pain in the arse and needs specialist tools to reset torque and thrust between the pinion and the crown wheel. It's easier (for now) to just keep
putting oil in!
Apart from that, I need to get the wheels back on, get it out and check these brakes!
 Today I was out in the garage just to get a ladder, but found myself slightly by wondering how the quickjack lifts might fit under the car. just a
wee check to put my mind at rest. Can't do any harm. 10 minutes later and I've connected up the hydraulic hoses and lifted the car to working height...


