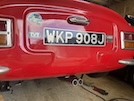
:: Diary - July 2026 ::
:: Friday, 3 July 2026 ::
I'm going stir crazy! I've hardly been out of the house (or even my jammies) for the last couple of weeks because my leg has been too sore. The
bruising around the knee has been spreading until yesterday, when it started to calm down a bit. This morning, it's mostly starting to fade,
although there's still a lot of purple around the ankle and also the original point of impact at arse level.
However, I'm going to put on my big boy pants and make a start to this exhaust.
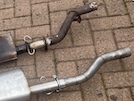
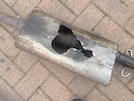 Taking the old one off isn't too difficult, mainly because I've already done that a few times. Here's the old silencer which, even for a tight-arsed
mend-it-if-you-can like me, is well past it (also like me).
Taking the old one off isn't too difficult, mainly because I've already done that a few times. Here's the old silencer which, even for a tight-arsed
mend-it-if-you-can like me, is well past it (also like me).
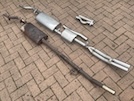 And here's the new system beside the old one. See how the new one has an extra wee silencer behind the big one. There's also a piece of pipe bend
to replace that if you want to run with only one silencer. There's also 2 extra bits of pipe - one with a hump in it which is supposedly to go over
or under the back chassis member to allow the silencer to lift further up between the chassis rails. As far as I can see, though, that would make the
exhaust too long. There's also a wee bit of straight pipe that doesn't seem to fit anywhere...
And here's the new system beside the old one. See how the new one has an extra wee silencer behind the big one. There's also a piece of pipe bend
to replace that if you want to run with only one silencer. There's also 2 extra bits of pipe - one with a hump in it which is supposedly to go over
or under the back chassis member to allow the silencer to lift further up between the chassis rails. As far as I can see, though, that would make the
exhaust too long. There's also a wee bit of straight pipe that doesn't seem to fit anywhere...
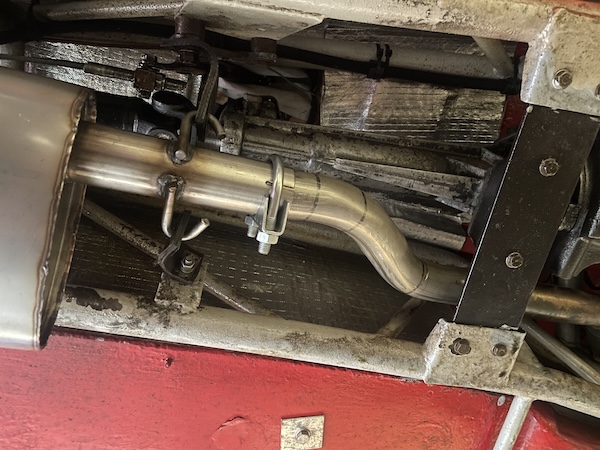
So on to fitting! I'm going to build it "dry" (without exhaust paste) until I'm sure that it all fits. So the first step is to fit the front zig-zag
double bend section loosely to the end of the engine manifold.
Then the big silencer, which appears to be too far over to the left (passenger) side of the car and is hitting the chassis rails...
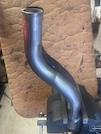
 Remove zig-zaggy bit and compare with original. it looks the same, but careful comparison shows that it zigs and zags by about a pipe width (just
under 2 inches) less than the original, so the silencer wont be as far offset as it should be.
Remove zig-zaggy bit and compare with original. it looks the same, but careful comparison shows that it zigs and zags by about a pipe width (just
under 2 inches) less than the original, so the silencer wont be as far offset as it should be.
Nothing I can do about that just now - let's see how we get on. i refit that front section and the big silencer, then fit the little silencer into
the back of that. I prop all of that up on a laerge box, and then fit exhaust straps between the back of the little silencer and the chassis rails,
to hold it as straight and central as I can get. The whole system is sitting at a slight angle along the car, because that front section isn't bent
enough and won't centralise the front silencer.
Nevertheless, I tighten it all up, along with the joint clamps (still dry) and check that it's not touching the chassis anywhere.
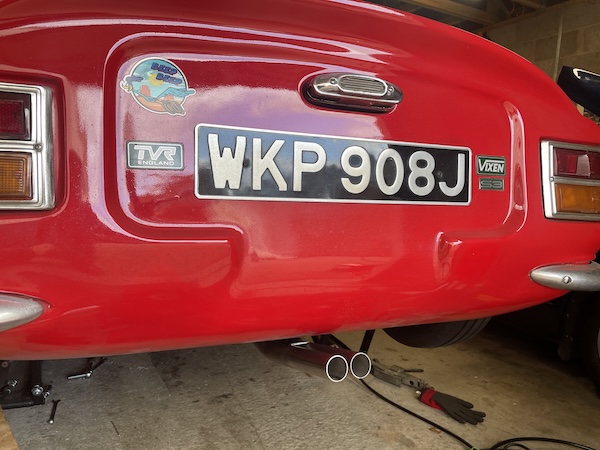
I've just got time before my dinner to start the car and listen. It's definitely quieter, but a wee bit "tinny" - maybe because of leaks at the joints.
I need to check that more carefully, and then see how I'm going to move that front silencer sideways by an inch or so, by finding someone to re-bend
that front pipe, or make another one.
Obviously I'm not going to "final fit" with joint sealer until I know how everything fits, eh?
:: Sunday, 3 July 2026 ::
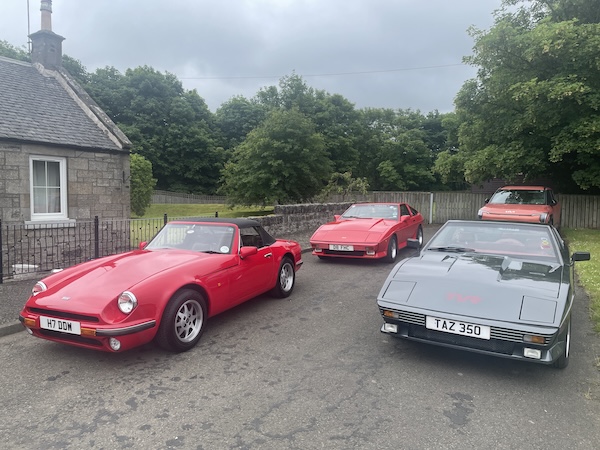
It’s TVR Car Club day! What excitement awaits us today? I think I have a fair idea…
I’m not taking a TVR though - my leg and foot are still too sore to sit in a TVR driving position for too long. I take the moon buggy to Dave’s,
and hope for a lift there and back.
 Eric and Dave are both taking their 350i, while Bobby has his V8S. What a choice! I decide to go through with Eric, because Dave will be coming
back here anyway, later. I think this might be the first time I’ve been driven in a TVR wedge, and it’s really not too bad - quite civilised
compared to the frantic experience of a Vixen!
Eric and Dave are both taking their 350i, while Bobby has his V8S. What a choice! I decide to go through with Eric, because Dave will be coming
back here anyway, later. I think this might be the first time I’ve been driven in a TVR wedge, and it’s really not too bad - quite civilised
compared to the frantic experience of a Vixen!
We spend the first part of the journey chewing over possible reasons for misfires or overheating, and what further checks can be made. We also talk
about the dying skill of diagnosing what's wrong with an engine (or anything else for that matter) before you start throwing random parts at it to
attempt to fix it. This approach is not confined to "amateurs".
The meeting itself is the usual banter, and the usual wait for food to be served. Fortunately, Dave gets his first this time, so the rest of us can
eat in peace. Service is so slow that we are finished before others have been served - and there’s only 16 of us. It’s really not good enough.
Dave wants to get home to see the Grand Prix at 3.00, so we’re not hanging around for too long. Dave’s car sounds different from Eric’s, a wee bit
more “throaty” - or maybe that’s just how he drives it. It’s still quite civilised - TVRs definitely improved over the years!
I’ve spent most of the last two weeks doing just about nothing, and my ankle and foot are just about killing me after all this activity today.
Some of the bruising has flared up again too. I had planned to get back under the Vixen to take the exhaust back off, to compare those 2 front
sections. I think I would be better to rest my leg a bit.
So instead, I sit and watch the Grand Prix after all, and am reminded why I stopped watching before, after a finish under the safety car and a
different interpretation of rules than they applied that cost Hamilton the championship in 2021. If you’re going to fuck things up, at least do it
consistently.
:: Tuesday, 7 July 2026 ::
I took yesterday off (due to a combination of sore leg and laziness). Postman Pat delivered my TVRCC Sprint magazine, and the header photo on the
News page is my Vixen, with the white one photographed at Grimsthorpe in May!
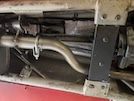
 Right, on to today, and let’s get this exhaust off the Vixen! First, here you can see how far off-centre the silencer is at the front, and that’s
pushing the back too far over to the other side.
Right, on to today, and let’s get this exhaust off the Vixen! First, here you can see how far off-centre the silencer is at the front, and that’s
pushing the back too far over to the other side.
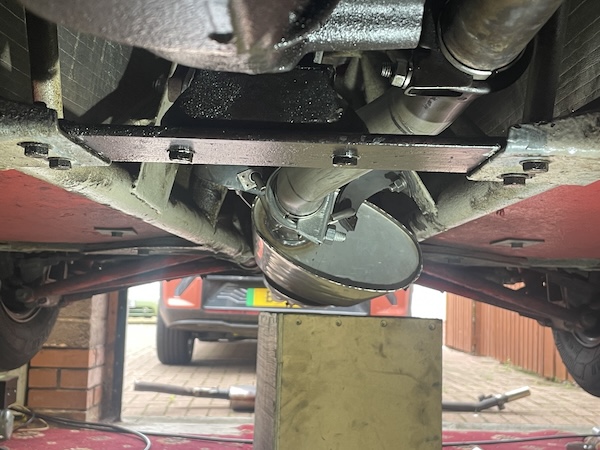
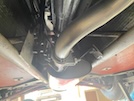
 Here’s a photo showing a big wooden box just fitting under the sump when the car's on the lifts. When the car's on the ground, the sump has just
under 4 inches clearance, and the old exhaust was about the same, under the silencer and under the tailpipe.
Here’s a photo showing a big wooden box just fitting under the sump when the car's on the lifts. When the car's on the ground, the sump has just
under 4 inches clearance, and the old exhaust was about the same, under the silencer and under the tailpipe.
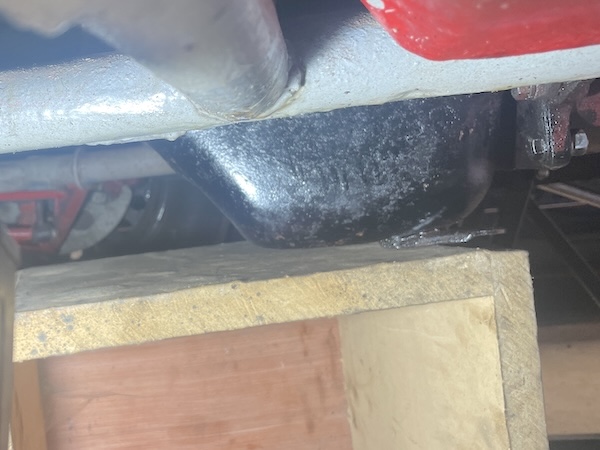
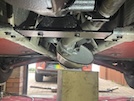 And here’s the same box under the silencer - you can see that it’s now slightly higher than the sump. There’s even more clearance at the tail pipe,
so there’s less chance of it sparking its arse on uneven roads. You can also see, though, how far off-centre the silencer is at the front, so it
has had to be rotated downwards to clear the nearside chassis rail, reducing the exhaust ground clearance. If I can get the silencer moved over so
that it's sitting flat, ground clearance will be even better.
And here’s the same box under the silencer - you can see that it’s now slightly higher than the sump. There’s even more clearance at the tail pipe,
so there’s less chance of it sparking its arse on uneven roads. You can also see, though, how far off-centre the silencer is at the front, so it
has had to be rotated downwards to clear the nearside chassis rail, reducing the exhaust ground clearance. If I can get the silencer moved over so
that it's sitting flat, ground clearance will be even better.
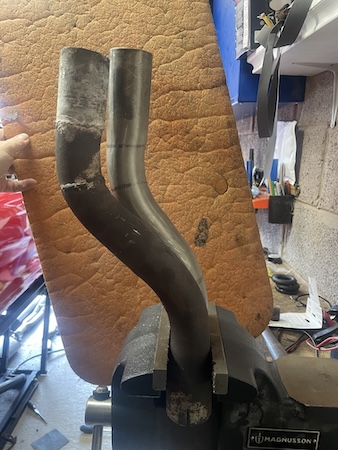
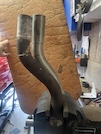 It doesn’t take too long to remove it all (I’ve had plenty practice), and with the exhaust off the car again, I can compare the two front bits by
clamping them side-by-side in the vice. Here you can see that the old one has about an inch and a half more offset than the new one. That's exactly
what I need!
It doesn’t take too long to remove it all (I’ve had plenty practice), and with the exhaust off the car again, I can compare the two front bits by
clamping them side-by-side in the vice. Here you can see that the old one has about an inch and a half more offset than the new one. That's exactly
what I need!
The old pipe has two 45 degree bends in it, while the new one has two 30 degree bends. You don't have to be Pythagoras or Euclid or Socrates or
whoever the Brazilian centre-half is, to understand why they don't match up. For a moment, I contemplate just buying two 45-degree bends and
making a new pipe up, but I'm not Pythagoras or Euclid or Socrates either, so I can't be arsed to work it all out.
No, I've decided that I’m going to take the old bit as a pattern to get a new bit made. I haven’t heard anything back from the exhaust guy I phoned
2 weeks ago, so he’s off the list. There’s another place in Falkirk, about 20 miles away, that does stainless exhausts, and Dave has used them
before. So it's off to Falkirk to drop both bits off, and explain what I need. The benefitss of having no job to go to eh?
It's 20 miles away, but takes just under an hour each way - an average of 20mph, mainly because of roadworks. They are resurfacing a bridge just
down the road from here. Then pothole repairs a few miles later. Then a major junction reconstruction with enough cones to crown every statue in
Boston, Washington and New York combined. Then another wee farty-about hole in the road...
I decide to come back a different way to avoid all that. But no... first a road narrowing to allow demolition, then a queue to get past an accident,
then traffic lights for street light repairs, then pothole repairs gain, then a lane closed for no apparent reason whatsoever, then the bridge
resurfacing again...
Anyway, that's the Vixen stationary until I can get this exhaust refitted!
:: Wednesday, 15 July 2026 ::
Not much to report on the car front. The exhaust man who was going to bend a wee bit of pipe for me by last Friday, hasn't. I phoned on Monday and
he said he would try to get around to it by today. We shall see... so work on the Vixen suspended until I get that back.
I could have - maybe should have - ordered two bits of pipe with 45 degree bends in, and a flare on one end of each. That would have let me cut and
adjust the "offset" to get the silencer in exactly the right place relative to the downpipe and the chassis. It would probably have been cheaper,
and definitely quicker. Oh well...
I haven't driven the S either, because my leg has been too sore. Today is the first day that there hasn't been a purple bit (well there is, slightly,
above my heel but inside my shoe) but it's all still a bit stiff.
There's a thing - we were talking a few weeks ago about injuries, and how they can have more serious consequences when you're older. A wee bump or
fall that you would have brushed aside when you were younger, suddenly buys you a one-way non-stop express ticket straight to destination: fucked.
This one isn't life-changing or anything, but that's been just under 4 weeks of having to do virtually nothing.
Nearly there though - both with knee and Vixen exhaust!
:: Friday, 17 July 2026 ::
Yesterday was spent helping my neighbour to fit a new drivers side window into his BMW 5-series. When I say “new” I mean “still in one piece, not a
million tiny crystals like the old one”. His lawnmower chucked up a wee stone that flew 20 feet across his garden, straight through the window.
We cover the outside and inside of the window with parcel tape to hold most of it together, then pull it out. After a bit of hoovering and
glass-pickery, the new glass goes straight in, then I leave him to refit the door panel etc.
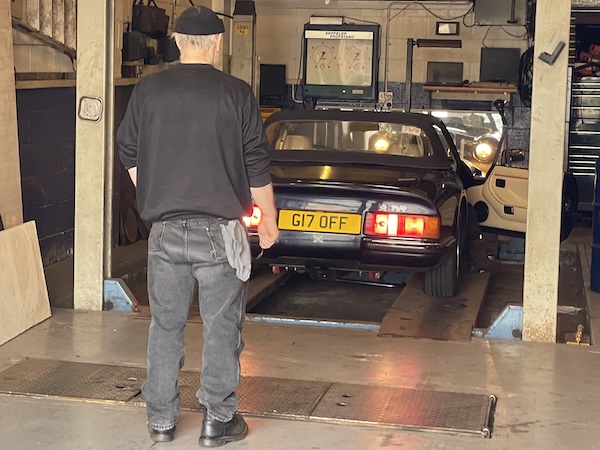
It’s that time of the year again - MOT time for the trusty old S, the 24th in the time I’ve owned it. To be fair, it’s not due until August, but get
in early in case there’s stuff to be done and bits to be ordered.
 After a bit of a drive-around and Italian tune up, it’s a PASS though (even the wheel bearings have survived a whole year) so everybody’s happy.
He does ask if I’ve had any battery problems, because it barely started after they had checked the lights etc. Funny enough, there was that time at
Eric’s at the start of May, when the battery went flat after 10 minutes with the side lights on. Methinks I need a new battery!
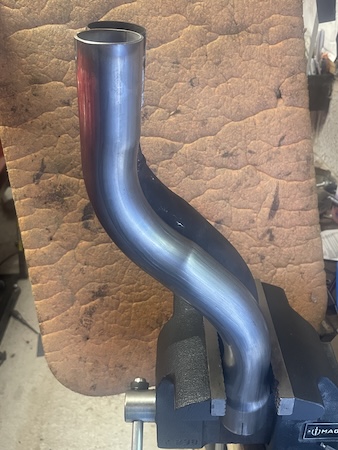
What else - oh yes, the wee bend for the Vixen’s exhaust. I took it in last Tuesday, he said it should be ready last Friday. Then I phoned on Monday
and he said Wednesday… So today, I just turned up unannounced, and asked nicely just to take back the bits I took in, that he was using as a pattern.
He must have detected my Olympic qualifying levels of pissed-offness, because suddenly he’s on it, and 20 minutes later, I have the new bit that I
need…
 It seems to be a much better match for the original…
I’ve just realised that I’ve got no exhaust assembly paste, and I would prefer to use the high-temp silicon stuff that I used on the S - that white
Holts stuff can go all crumbly and end up rattling around inside silencers etc. So I order some of that, for delivery tomorrow. I've had 2 weeks to
discover this, and still manage to hit the last minute...
That should give me time to dry-fit the system and make sure it all fits, before I add the sealer.
:: Saturday, 18 July 2026 ::
TVRs are bastards. I may have mentioned this before several times, but only because it's true. Every time you feel elated that you've sorted
something out, something else comes along and boots you full square up the arse. Allow me to elucidate...
The day started well enough - crawl under the car with 4 spanners and 4 bits of exhaust and an assortment of exhaust clamps. I'm going to fit it
first without any sealer, to make sure that everything fits in place.
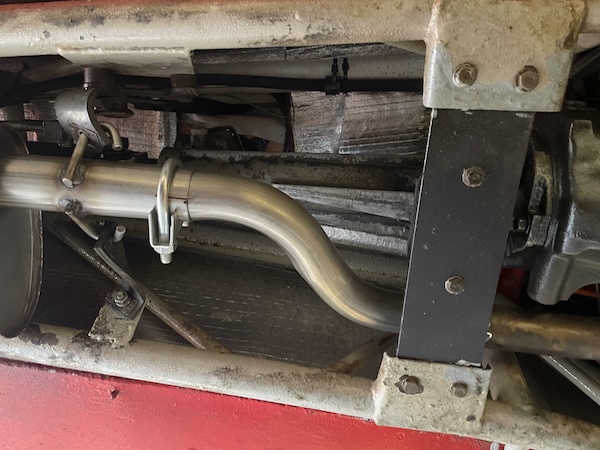
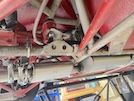
 First the front section that I got made up yesterday. It joins the exhaust manifold downpipe (above that gearbox mounting plate) to the big
silencer.
First the front section that I got made up yesterday. It joins the exhaust manifold downpipe (above that gearbox mounting plate) to the big
silencer.
 Then you can push the big silencer up between the chassiss rails (just about) but being careful not to catch the handbrake mechanism in the side of
the tunnel.
Then you can push the big silencer up between the chassiss rails (just about) but being careful not to catch the handbrake mechanism in the side of
the tunnel.
 I've decided to also fit the smaller rear silencer, just to calm the racket down on longer journeys. I've got a bypass pipe, so I can remove that
silencer if it turns out to be too quiet. You can also see there a couple of clamps with hooks on, to connect to a pair of mounting straps.
I've decided to also fit the smaller rear silencer, just to calm the racket down on longer journeys. I've got a bypass pipe, so I can remove that
silencer if it turns out to be too quiet. You can also see there a couple of clamps with hooks on, to connect to a pair of mounting straps.
 And then finally, the tailpipe.
I start it up and have a listen, and a feel around all the joints. None of them seem to be leaking, but I'll still seal them when my order
arrives.
Jubilation! Just as I extract myself from under the car, the Amazon man arrives with the sealer. Absolutely perfect timing! Everything is going to
plan!
I remove the exhaust again, and reassemble with joint sealer, and adjust everything back into position. I start the car for another leak test (and
because it sounds good). Perfect!
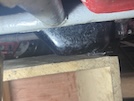
I switch it off, so there's one last thing to do - go end to end and check that every clamp is still tight, now that it has been running and warmed
up. As I am tightening under the big silencer, I feel something drip on to my head. A wee rub confirms that it smells like petrol... it's dripping
on to the propshaft and then on to the top of the silencer, and from there, on to me. The burny-burny potential is strong!
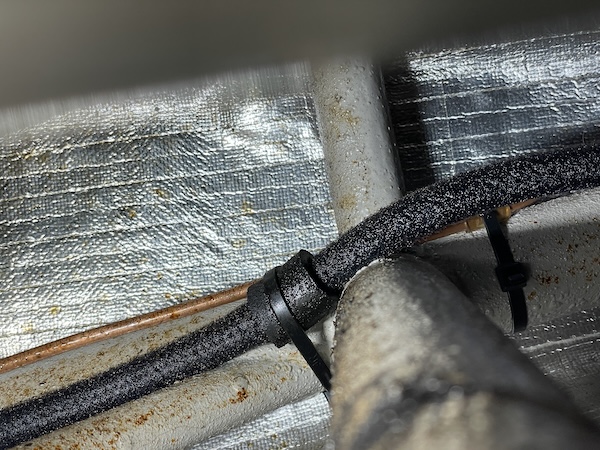
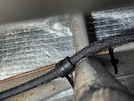 The main fuel feed hose, from the tank to the engine, is soaked in fuel, just behind the handbrake and just under where your left elbow would be. It's
a braided hose, so probably pre-ethanol.
The main fuel feed hose, from the tank to the engine, is soaked in fuel, just behind the handbrake and just under where your left elbow would be. It's
a braided hose, so probably pre-ethanol.
The TVR gods eh? They always decide to have a bit of a laugh, just when you think you're happy. Or is that just life in general?
I need to order a length of hose between the pump and the fuel filter in the engine bay. I can't remember what spec of hose to buy, but fortunately
I looked into all this when I put new hoses on the S during COVID (June 2020) and wrote a whole boring essay on the subject. Good job I can look
back, because I can't remember any of it.
I'm not ordering new hose today, though, because I'm going on holiday for a week, and I don't want it dumped at the front door for days.
So progress on the Vixen, looking so promising, crashes to a halt.
Never mind - I go out and buy a battery for the S - an 069 pattern, like the one that was in it, but with more Ampiness and more crankinessability.
Fitting it takes 10 minutes, and is suspiciously easy. Car starts, car runs, everything works. Watch this space...
 Taking the old one off isn't too difficult, mainly because I've already done that a few times. Here's the old silencer which, even for a tight-arsed
mend-it-if-you-can like me, is well past it (also like me).
Taking the old one off isn't too difficult, mainly because I've already done that a few times. Here's the old silencer which, even for a tight-arsed
mend-it-if-you-can like me, is well past it (also like me).
 And here's the new system beside the old one. See how the new one has an extra wee silencer behind the big one. There's also a piece of pipe bend
to replace that if you want to run with only one silencer. There's also 2 extra bits of pipe - one with a hump in it which is supposedly to go over
or under the back chassis member to allow the silencer to lift further up between the chassis rails. As far as I can see, though, that would make the
exhaust too long. There's also a wee bit of straight pipe that doesn't seem to fit anywhere...
And here's the new system beside the old one. See how the new one has an extra wee silencer behind the big one. There's also a piece of pipe bend
to replace that if you want to run with only one silencer. There's also 2 extra bits of pipe - one with a hump in it which is supposedly to go over
or under the back chassis member to allow the silencer to lift further up between the chassis rails. As far as I can see, though, that would make the
exhaust too long. There's also a wee bit of straight pipe that doesn't seem to fit anywhere...
 Remove zig-zaggy bit and compare with original. it looks the same, but careful comparison shows that it zigs and zags by about a pipe width (just
under 2 inches) less than the original, so the silencer wont be as far offset as it should be.
Remove zig-zaggy bit and compare with original. it looks the same, but careful comparison shows that it zigs and zags by about a pipe width (just
under 2 inches) less than the original, so the silencer wont be as far offset as it should be.