:: Diary - May 2025 ::
:: Thursday, 1 May 2025 ::
Vixen bonnet repair - day 7.
I found out something very important today. Unfortunately, I didn't find it out until the day after I needed to know it. More of that in a minute,
but first, you'll be desperate to know how we got on with the trial fitting of the bonnet.
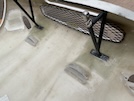
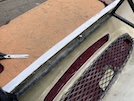
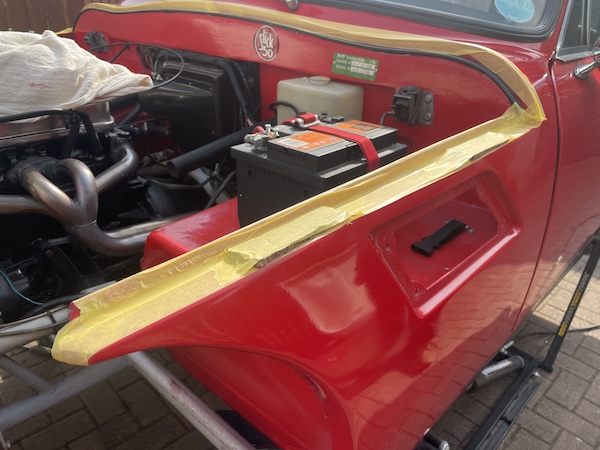
 The first step is to run masking tape along the edges of the body, to protect the paint. Then we tape narrow stips of plywood to that to create
the correct bonnet gap.
The first step is to run masking tape along the edges of the body, to protect the paint. Then we tape narrow stips of plywood to that to create
the correct bonnet gap.
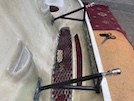
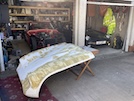
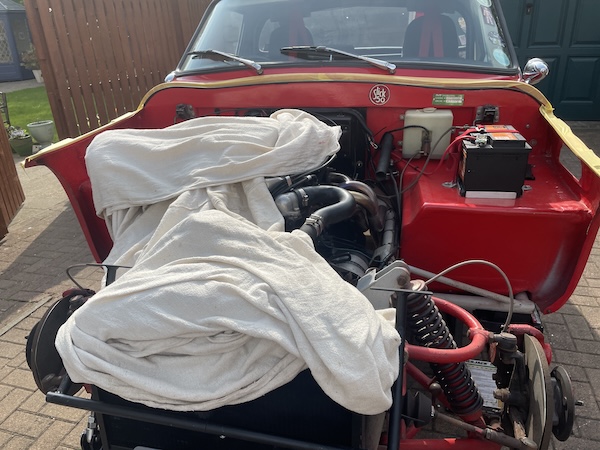
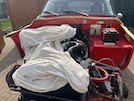 Then we put a couple of layers of dust sheet over the engine and radiator so that there are no sharp corners to dig into the underside
of the bonnet.
Then we put a couple of layers of dust sheet over the engine and radiator so that there are no sharp corners to dig into the underside
of the bonnet.
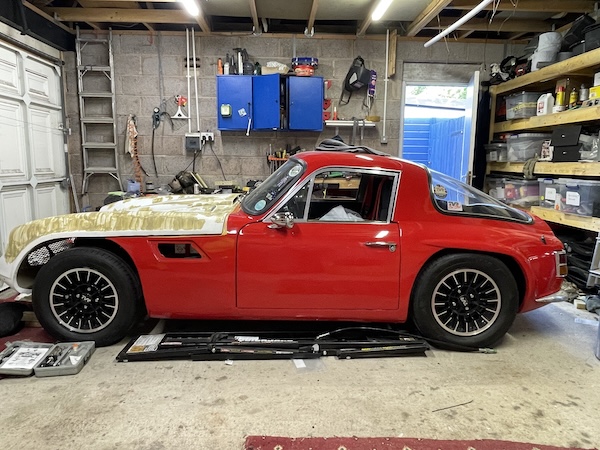
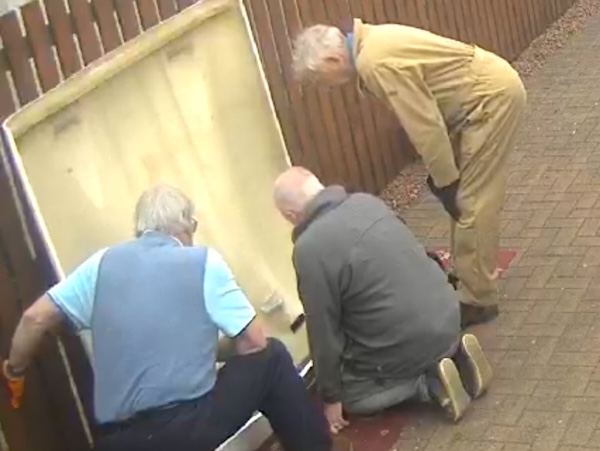
 Then Dave and Eric move the bonnet into place, and we check all the gaps, including along the back, under the windscreen scuttle. This needs a
couple of goes, while I go underneath to check the fit of the hinge frame. Lift off - adjust frame - replace a couple of times before it seems to be
right. Then I mark the inside of the bonnet with a pencil, to show where the frame has to be mounted.
Then Dave and Eric move the bonnet into place, and we check all the gaps, including along the back, under the windscreen scuttle. This needs a
couple of goes, while I go underneath to check the fit of the hinge frame. Lift off - adjust frame - replace a couple of times before it seems to be
right. Then I mark the inside of the bonnet with a pencil, to show where the frame has to be mounted.
 This also requires some "off-the-car" discussion and deliberation! We also bend the wee tabs slightly to maximise the contact area with the bonnet,
to try to eliminate any "stress points".
This also requires some "off-the-car" discussion and deliberation! We also bend the wee tabs slightly to maximise the contact area with the bonnet,
to try to eliminate any "stress points".
We then have a wee rest and cakes prepared by my glamorous Technical Director, for nearly as long as we spent doing the job.
They depart, and I tidy up a bit and then decide to visit the paint shop to confirm a date for painting. This is where I receive 3 bits of information:
1. Although he said that he would only need around 2 weeks notice, he now says he has no available time until June;
2. Eric has just been in before me and has taken the last available slot for June; and
3. It's not a good idea to use knifing stopper for pinholes in glassfibre because it doesn't set properly. Too late, I've covered the car in the
bloody stuff. It's not the end of ther world, as it goes brittle when it's baked, and he'll be able to remove it when he dries out the glassfibre
before painting. He suggests that I leave it alone for him to deal with (which I suspect is his way of saying "don't make it even feckin' worse you
thick bastard".)
I book it in for the first week in July...
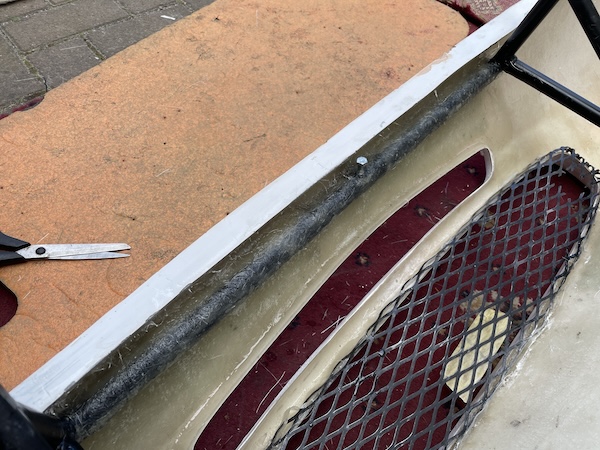
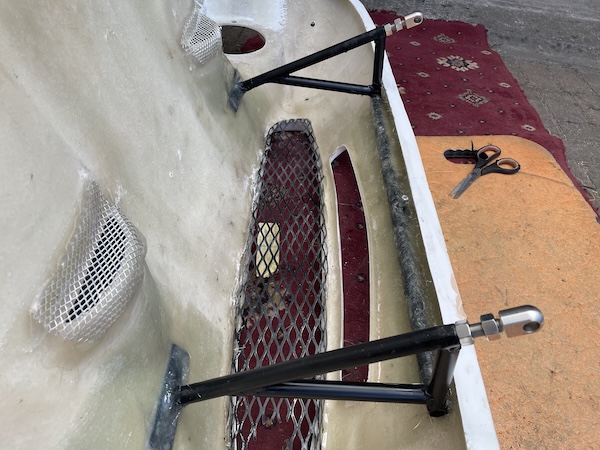
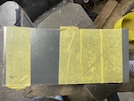
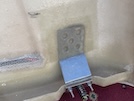
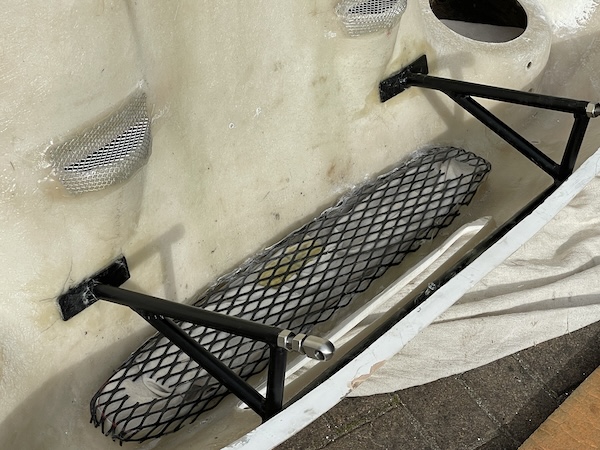
 Anyway - home again after a consolation sausage roll, and I decide to start to fix this hinge frame in place. I'm going to stick it in place with
glassfibre filler (again to spread loads and to fill in any gaps between the metal frame and the bonnet shell). This shows stage 1 complete!
Anyway - home again after a consolation sausage roll, and I decide to start to fix this hinge frame in place. I'm going to stick it in place with
glassfibre filler (again to spread loads and to fill in any gaps between the metal frame and the bonnet shell). This shows stage 1 complete!
Now I plan to leave that to dry for a day or two, before I glassfibe the frame in properly.
That's another 2 hours today, bringing the total to 25 hours.
:: Friday, 2 May 2025 ::
Vixen bonnet repair - day 8.
Now that I now that I have 8 weeks left to get this ready for paint, there's no great rush. Today, though, I'm going to fix that hinge frame to
the bonnet so that it has time to set before I try fitting it.
The front legs of the frame are embeddded in fibreglass filler, which has set since yesterday. The frame is already pretty firmly attached! I cut
enough matting for both sides - first a square with a slot in it for the leg to poke through, then 2 to overlap that, front to rear, then 2 more
strips sideways. Each layer is brushed down then pressed with a wee aluminium roller to get the air out and ensure good adhesion.
 I mixed just enough resin to finish that bit!
 Then I cut another 3 layers of matting to glass in the tube across the front - one layer overlapping the next and again, trying to get all the air
out.
Then I cut another 3 layers of matting to glass in the tube across the front - one layer overlapping the next and again, trying to get all the air
out.
 That looks not too bad!
I've now used all of the fibreglass resin that I bought, so I'll need to get more - unless resin has a shelf life of around 20 years after you've
opened the tin. I think that old tin can go in the bin. I'll need to get more though, because I still have to glass in the bonnet lock pins and
also the wee hoops for the windscreen washer tubes.
Those bonnet pins are supported by metal bracing plates, that don't come with the bonnet, or with the new pins. I cut 2 bits of 1mm sheet steel to
the right size (measured from the old bonnet), then realise that I can't drill them and position them until I have tried the bonnet on the car so
that I can mark the right positions for the pins to meet the bonnet catches on the bulkhead.
That's enough for today though - another 2 hours bringing the total to 27 so far.
:: Saturday, 3 May 2025 ::
Vixen bonnet repair - day 9.
I had a few things to do today, so didn't get on to the bonnet repair until late afternoon.
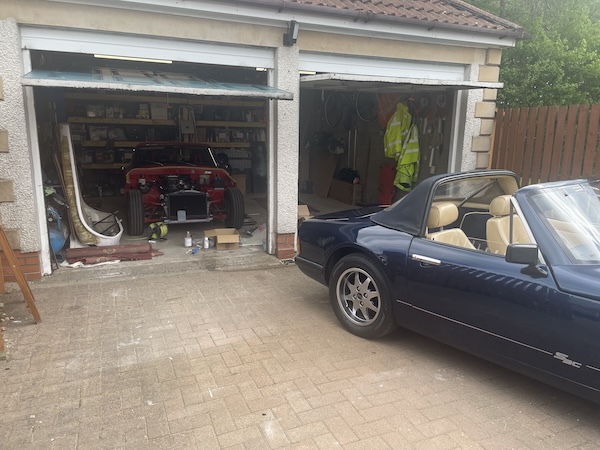
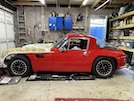
 First though, I moved the S out of the garage so that I could give it a bit of a clean before the TVR car club meeting tomorrow. Then I decided to
waste more time going for fuel, not necessarily by the most direct route... What a brilliant wee car!
First though, I moved the S out of the garage so that I could give it a bit of a clean before the TVR car club meeting tomorrow. Then I decided to
waste more time going for fuel, not necessarily by the most direct route... What a brilliant wee car!
I thought about these bonnet catch pins last night, and worked out how to fit them, I think, by installing the pins in the catches and then marking
the inside of the bonnet frame to show where I have to drill. However, I'm sure that the plates need to be pre-drilled off the car to fit the pins,
and that whole assembly has to be lined up.
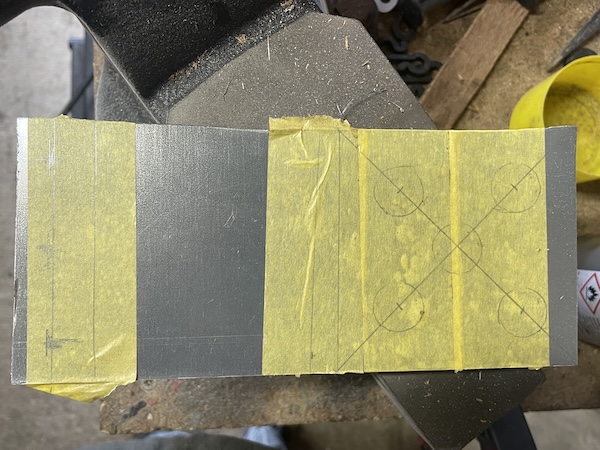
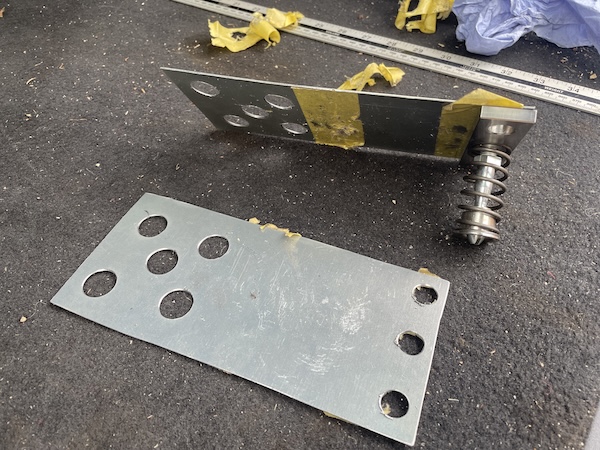
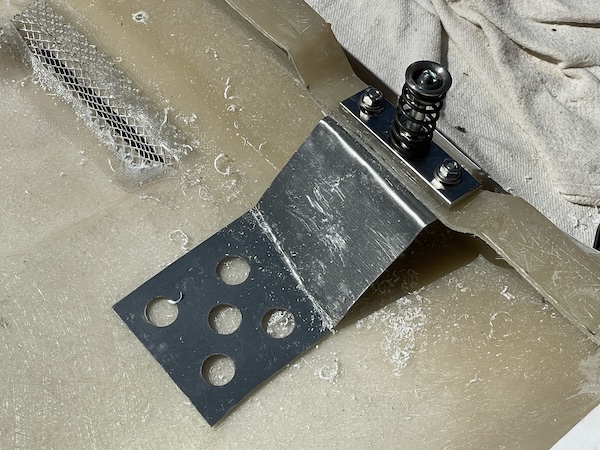
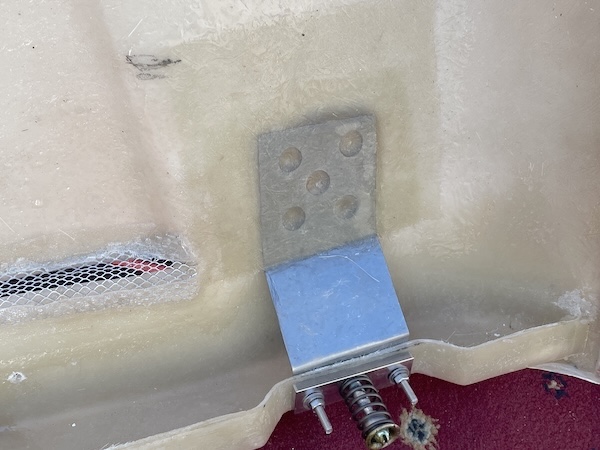
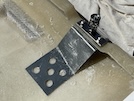
 So I'm going to make up the plates before dinner time. First I mark up the 3 mounting holes for the bonnet pins, and then 5 holes where it is
fibreglassed to the inside of the bonnet - those will allow the fibreglass to bond through the holes and create a better joint. I drill out those
holes using a succession of increasing drill sizes and a hole-cutter, then I use that first plate as a template to mark and drill the second plate.
So I'm going to make up the plates before dinner time. First I mark up the 3 mounting holes for the bonnet pins, and then 5 holes where it is
fibreglassed to the inside of the bonnet - those will allow the fibreglass to bond through the holes and create a better joint. I drill out those
holes using a succession of increasing drill sizes and a hole-cutter, then I use that first plate as a template to mark and drill the second plate.
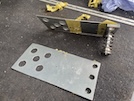 Here's the two plates, all drilled out out.
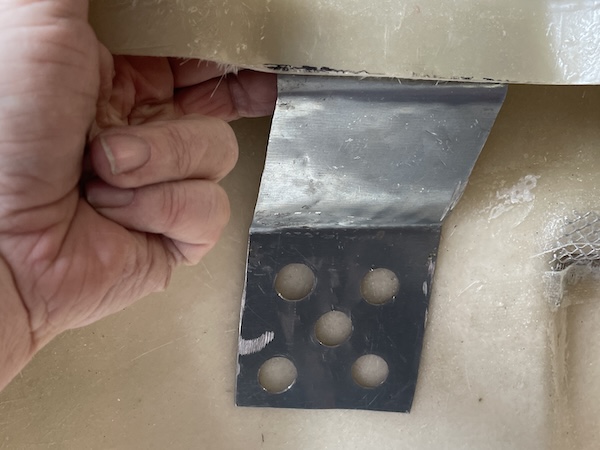
The plate needs a double bend in it, to mount behind the bonnet pin, then bend up to the level of the bonnet, then flatten out to stick to the
underside of the bonnet. That proves to be trickier than it looks, because the bonnet profile means that the plate needs a twist in it, as well as
the up-and-down bend to meet the bonnet at the right angle. It also needs a slight curve across its width to try to eliminate any air gap.
 This means bleedin' ages of "bend-a-bit, try it out, bend it more (or less), try it out, twist it a bit, no not that much", ad infinitum (or ad
nauseam) just for the first plate, as I gradually bend it into the right shape.
This means bleedin' ages of "bend-a-bit, try it out, bend it more (or less), try it out, twist it a bit, no not that much", ad infinitum (or ad
nauseam) just for the first plate, as I gradually bend it into the right shape.
By this time, I don't have time to shape the second one - a wee task for tomorrow.
I think I spent 2 hours at this, bringing the total to 29 so far.
:: Sunday, 4 May 2025 ::
No bonnet repair work today - it's the TVR Car Club meeting!
I meet up with Dave and Eric for a wee run before the meeting. We set off over the Forth, and round by the Ochil Hills back to the venue. The S is
running brilliantly - I'm really enjoying our wee drive. I don't drive TVRs enough, in relation to the amount of time that I spend playing with them.
The meeting is good - Hugh and John join us for the usual chat, while Dave and Eric obsess about TVR wedges for sale. Bonus - it was Dave's birthday
on Friday and he's brought cake.
Then a chap turns up who spoke to me a couple of months ago about buying an S Series, and he wants to have a look at one or two, and see where common
problems might be.
Then I get a text from the guy who bought my Porsche - he saw the TVRs outside the hotel, and wonders if I want to see the Porsche again. It's nearly
leaving time though, and because I'm travelling in a group, I don't have time today.
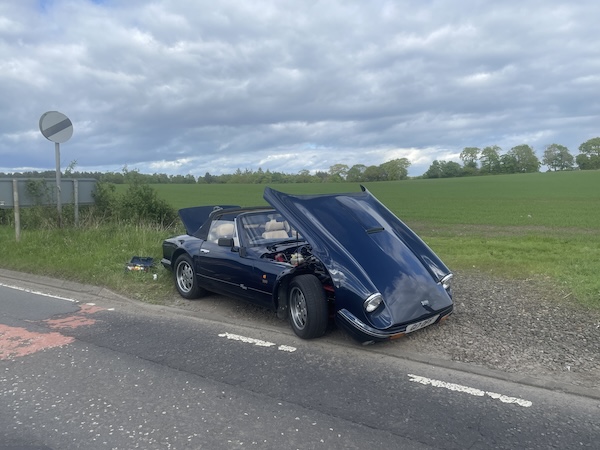
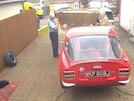
The three of us leave in convoty, along the motorway this time. I turn off first, and about a mile further on, I stop at temporary traffic signals
for roadworks. As the car stops, disaster strikes!
Loud pop. Engine stops. Hiss. Smoke. Fuck.
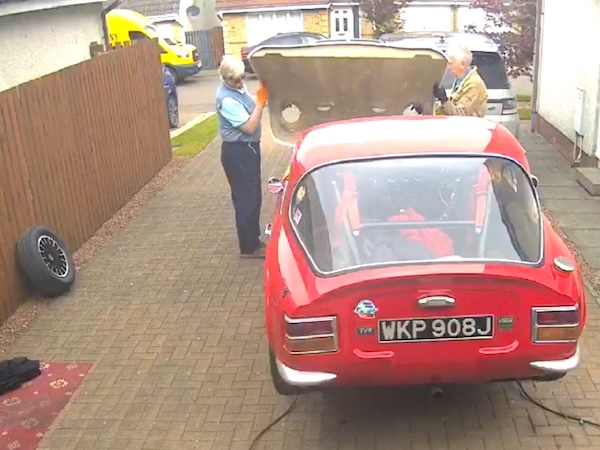
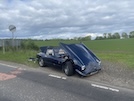 I roll the car backwards from the lights, and open the bonnet to isolate the battery.
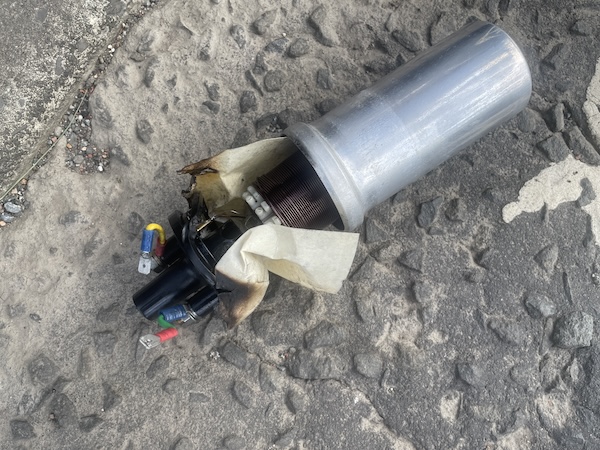
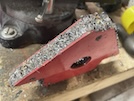
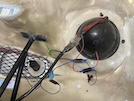
The cause is immediately apparent - the ignition coil has blown apart, the oil inside has dropped over the engine and exhaust (hence the smoke) and
the internal paper insulator is on fire where the wiring has been shorting against the casing. It's only a tiny fire though, so I put that out with
my hand.
I phone Dave, who has just arrived home, 5 minutes down the road, to ask if he has a spare coil. He has, and arrives with it 10 minutes later.
 While I'm waiting, I remove the busted coil and terminals. I've never seen (or heard of) a coil failing like this... I'll have to check that the car
isn't overcharging or something. Anyway, a quick swap, with limited tools, and I'm mobile again!
While I'm waiting, I remove the busted coil and terminals. I've never seen (or heard of) a coil failing like this... I'll have to check that the car
isn't overcharging or something. Anyway, a quick swap, with limited tools, and I'm mobile again!
That aside, I've had a great day with my wee car, as we go into our 23rd year. Monir setbacks are forgiven!
:: Tuesday, 6 May 2025 ::
No bonnet repair work again yesterday today - just other stuff to do.
Today, though, we're on to day 10!
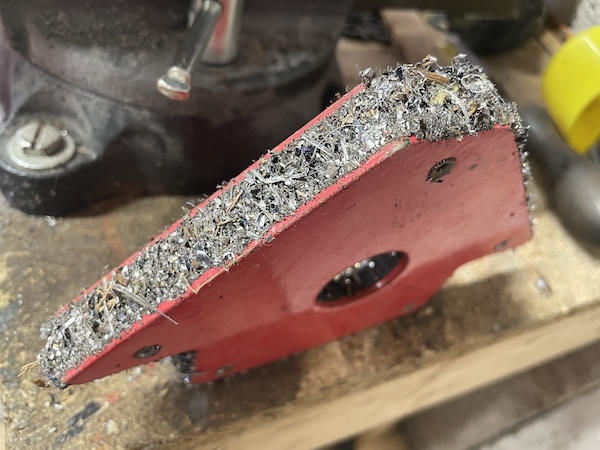
 First, I think I had better pick up all these metal shavings and filings from the workbench and garage floor. The easiest way is by waving a
welding magnet over it, then I scrape that off with a plastic trim tool.
First, I think I had better pick up all these metal shavings and filings from the workbench and garage floor. The easiest way is by waving a
welding magnet over it, then I scrape that off with a plastic trim tool.
On to the bonnet... I start by bending the second bracing plate to shape - this is a bit easier than the first one, but still a case of frequent
trial and error.
 I lift the bonnet to the front of the car, and with my Technical Director holding it up, I manage to get the hinge pins in.
 Car and bonnet reunited!
Now for the bonnet catches. The old latches are still attached to the car, so I need to position the new pins into the rear of the bonnet to match
up.
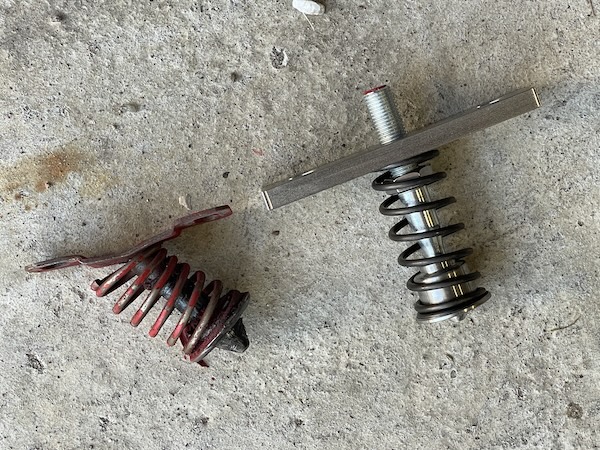
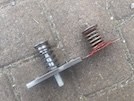
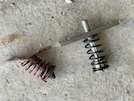 The spring pins are considerably more robust than the ones that were on the car before, so I have to drill bigger holes into the the rear of the
bonnet to match up. They are also slightly longer, even when tightened right up.
The spring pins are considerably more robust than the ones that were on the car before, so I have to drill bigger holes into the the rear of the
bonnet to match up. They are also slightly longer, even when tightened right up.
I fit the pins into the catches, and put a wee blob of red paint on the back end of the spring bolt. Then I lower the bonnet so that the paint marks
the fibreglass. Then with the bonnet back off the car, I drill a larger hole for the central bolt, and smaller holes for the fixing bolts.
 Then I can fix those all together, along with the bracing plates. The plates wuill be glassfibred to the underside of the bonnet once I know that I
have the catches adjusted properly.
Then I can fix those all together, along with the bracing plates. The plates wuill be glassfibred to the underside of the bonnet once I know that I
have the catches adjusted properly.
Bonnet back on the car, and I am able to adjust the left-hand catch. The right-hand one, though, needs more adjustment than is available - only a
couple of mm I think, so I need to drill out the holes a fraction more. First attempt helps but not quite enough. I also try adjusting the hinge
pins backwards, but it's just not playing. I think I also need to adjust the front of the bonnet downwards at the hinge, to improve the bonnet gap,
but I don't have time today.
I've spent 4 hours at this, with decent progress but still with adjustments to make. That brings the total to around 33 hours. I'll admit I'm not
exactly grafting hard - it's a bleeding hobby so I'm just tinkering along. Plus, half of my time is spent looking for the spanner / socket / drill
etc that I just laid down a minute ago. I also had an intermission to put up a hanging basket and a garden decoration. And another one for scones.
And one for lunch. And one just because I'm an old lazy git.
:: Wednesday, 7 May 2025 ::
Vixen bonnet, day 11...
These bonnet catches are a nightmare... the left hand catch engages, but the bonnet is about 5mm to high, even with the pin wound right in. I can't
get the right-hand pin to engage at all - it seems to be lined up, but it just won't engage. I faff around for ages taking it off, adjusting the
mounting holes and putting it back, and also adjusting the hinges, and eventually it goes into place. The left hand side is still too high though...
 The main problem is that the new pins are much longer than the old ones. I manage to straighten one of the old ones, but the other one snaps off...
Eventually I take the left hand catch apart and take off the lock nut, so that I can wind it in an extra couple of turns. That does the trick, for
that side anyway.
 Eventually, it does all fit into place, but the right-hand catch is still very tricky to engage - further adjustment required.
Being justifiably pissed off, I abandon the Vixen bonnet because the postman has just delivered a new ignition coil - so I fit that to the S so that
I can give Dave his Griffith coil back. I have to go to B&Q and Morrisons so I take the S for a wee drive - lovely! When I park, a lad gets out of a
car opposite and starts to take some photos as I'm walking away. Then when I get back, there's another lad with a camera phone. You forget how
unusual these cars are, when you've had one for 20-odd years!
Very frustrating day trying to adjust hinges and bonnet pins, and it's better but still not finished... 35 hours total so far.
:: Thursday, 8 May 2025 ::
I've now spent 4 days in Conclave with a garage full of tools, and no feckin' clue... black smoke from the chimney as the latest bonnet-adjusting
plan goes up in smoke. However today, "Habemus Bonnetus Perfecto"! I realised that the bonnet catches on the bulkhead aren't vertical, and I assumed
that was to accommodate the "angle of entry" of the bonnet pin, but it turns out that the pins need to be angle slightly backwards.
So... a new "plan" emerges (if you can call it a plan). I make an angled shim out of a spare bit of 1mm plate to go under the catch to tip it
backwards slightly, fit it under the pin, bolt it up and... it works perfectly! 1 feckin millimetre equals 4 days of grief...
No white smoke though, because that would mean "head gasket" and we're not encouraging that kind of negativity.
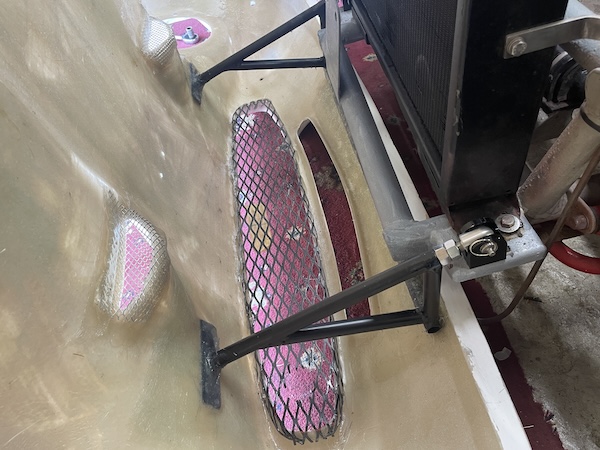
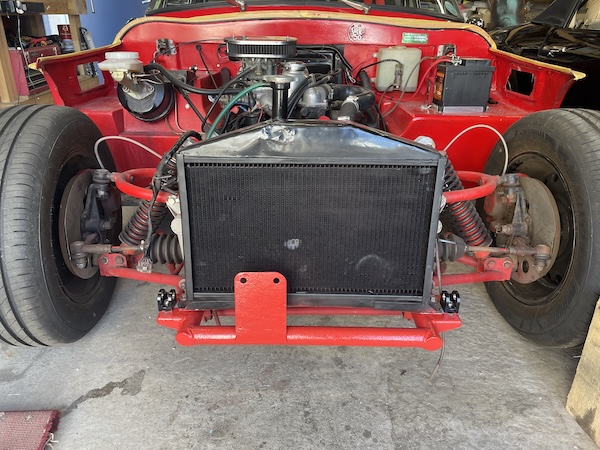
On to the next task. The old bonnet has wee bulkheads on each side to guide any air coming in the grille, through the radiator, not around it. The
new bonnet doesn't have those, and I'm not sure if I need them or not - photos online show that they're not standard, some cars have them, some don't.
Another plan - I can make them so that they fit to the hinge frame, but not glass them in.
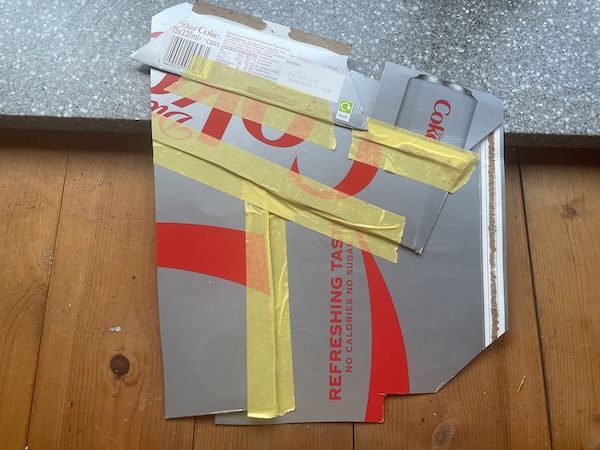
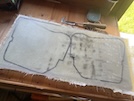
The first step is to make a cardboard template, starting with a big bit roughly the right shape, and then stick bits onto it to align all the edges.
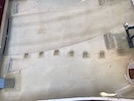
 And it looks like this! The shorter right-hand edge goes behind the grille, the cut-out in the top is where the frame mounts to the bonnet, the
cut-out in the bottom fits round the hinge frame tube, and the back edge aligns with the side of the radiator. I can make two of these in fibreglass,
and fit them after the car is painted.
And it looks like this! The shorter right-hand edge goes behind the grille, the cut-out in the top is where the frame mounts to the bonnet, the
cut-out in the bottom fits round the hinge frame tube, and the back edge aligns with the side of the radiator. I can make two of these in fibreglass,
and fit them after the car is painted.
So the next steps will be glassing in the bonnet pin support plates and the wee clips for the windscreen washer pipes. To do those, I need to take
the bonnet off again, without affecting its adjustment. Quick-release hinges help! Then I'll make these air deflectors for the radiator.
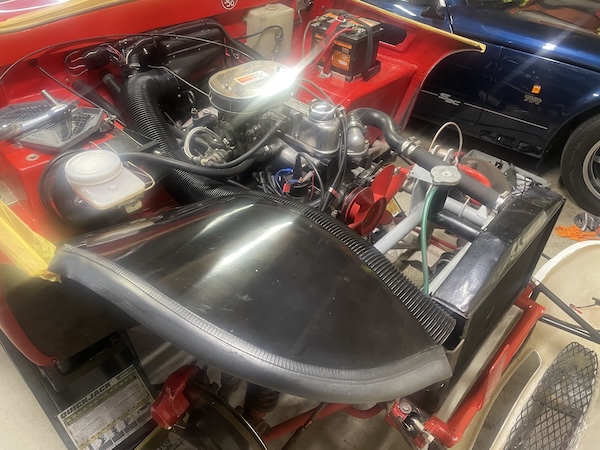
I'm also going to paint the front tube of the chassis red - it's currently grey like the rest of the chassis, but it's quite prominent under the
bonnet when you look from the front, and looks like it's just primer. Red would be better!
At least it feels like progress, after 2 hours today - 37 hours total so far.
:: Friday, 9 May 2025 ::
Vixen bonnet, day 13...
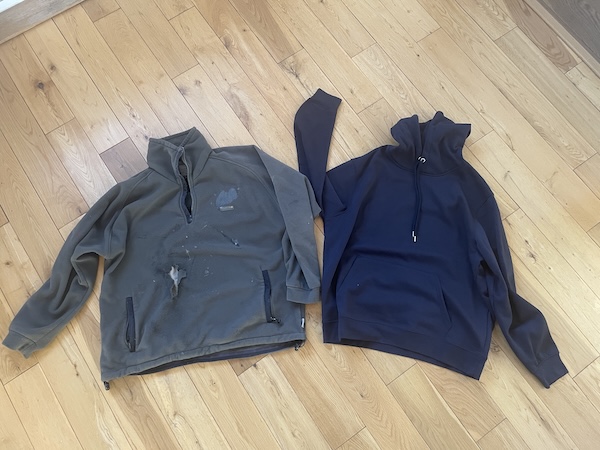
 As we move forward into a new era, today starts with the ceremonial disposal of the old robes - aka the scabby old fleece that I have been wearing
for years, for working on the car, home decorating, and any other activity that involves getting covered in random shit. It now also has a hole
melted through the front of it (caused I think by angle grinder sparks). The "Technical Director" noticed that Dave and Eric had nice clean "old
clothes" last week (mainly because she doesn't have to wash theirs. I wouldn't wash mine either if I had the choice...) Anyway, it's time for
replacement. I don't have any "old ones" so £9 in Primark does the job.
As we move forward into a new era, today starts with the ceremonial disposal of the old robes - aka the scabby old fleece that I have been wearing
for years, for working on the car, home decorating, and any other activity that involves getting covered in random shit. It now also has a hole
melted through the front of it (caused I think by angle grinder sparks). The "Technical Director" noticed that Dave and Eric had nice clean "old
clothes" last week (mainly because she doesn't have to wash theirs. I wouldn't wash mine either if I had the choice...) Anyway, it's time for
replacement. I don't have any "old ones" so £9 in Primark does the job.
 Its first task will be the painting of the front of the chassis so that it doesn't look like grey primer when you see it under the front of the bonnet.
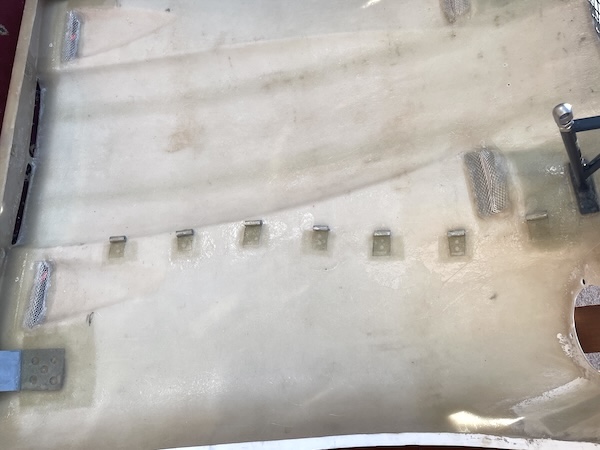
 Then it's on to fibre glassing - first the brace plates for the bonnet pins (I've still to cut down all of those bolts!)...
 and then fix the wee clips for the windscreen washer tube.
I also intended to make the wee air deflectors between the front grille and the radiator, but the resin I bought at the weekend came with an empty
wee activator bottle. I was able to use some of the activator from the original kit, but I don't think that I have enough to make a big enough
batch to make those sheets. I don't have enough glass fibre mat either, so they will have to wait. That doeesn't hold up other progress - those can
be fitted later.
That's another 3 hour shift put in today, and it's only lunch time - 40 hours total so far.
:: Monday, 12 May 2025 ::
Vixen bonnet, day 14...
After a whole weekend off for family-type stuff, I get back to the Vixen today.
First task is to lift the car and remove the front wheels, so that I can replace the front wheel arches. These are much bigger and more substantial
(i.e. less bendy) than the ones in the S, so it's fiddly and takes a while.
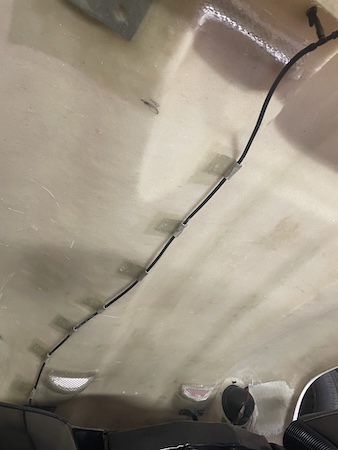
The right hand arch also has a bolt supporting the heater hose, and two wee bolted clips holding the wiring loom.
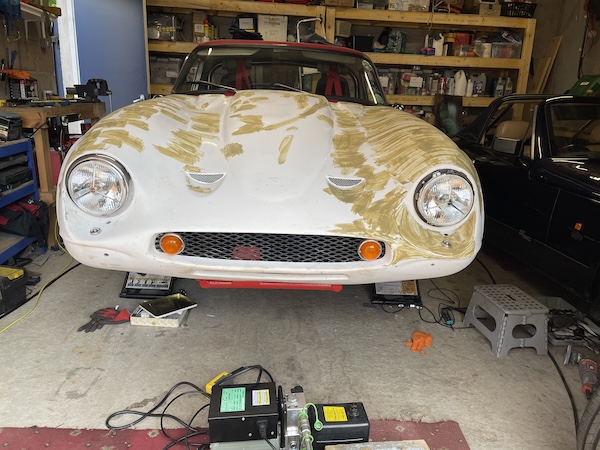
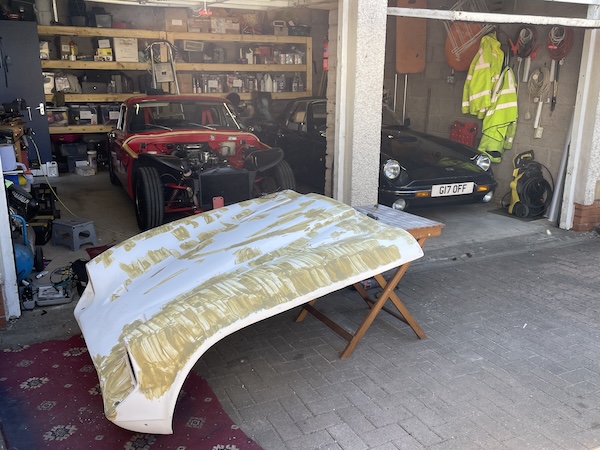
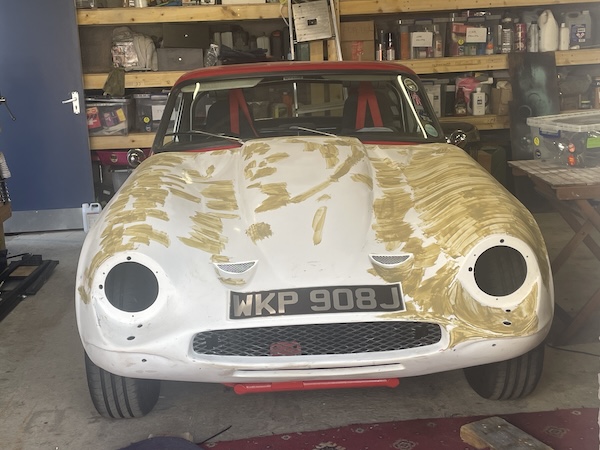
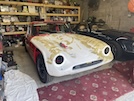
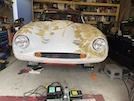
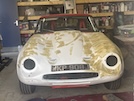
 But it's in! This is how the car is going to go in for painting
In addition, I'm going to make sure that everything else definitely goes together before I send the car off for painting. First it's on to replacing
the wiring loom to the front lights etc. I've got new headlights, new sidelights and new indicators, so there's a bit of re-wiring to be done!
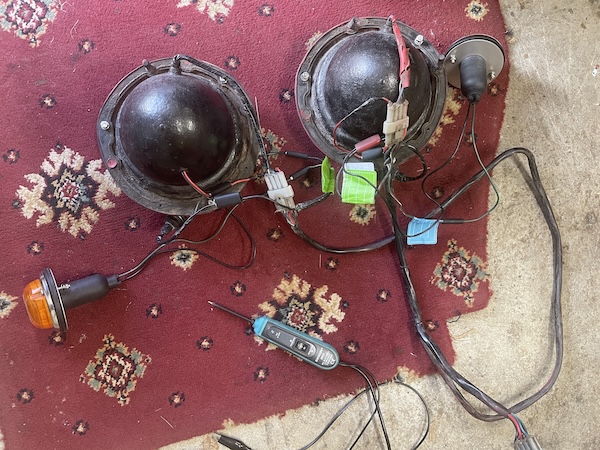
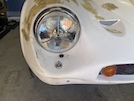
First the headlights. The new headlights have built-in side lights or pilot lights, so I need to make a new hole through the headlight bowl and put
a wee grommet in. Then I insert the bowl, connect up the new headlight and install it into the bowl. A wee check with a test probe to make sure that
main, dip and side lights are all working.
I'm also going to install the original tiny Royal Enfield side lights just for the right look, so I fit those into the hole.
Then I wire up the indicators (which come without bulbs or wiring) and install them in the holes I made in the grille.
 So, after a bit of graft, the front lights are all installed and working!
 The wiring is a bit of a mess though - I need to tidy that all up before I can call it "finished" - I think I'll maybe replace the connectors
with tidier waterproof ones as well.
The wiring is a bit of a mess though - I need to tidy that all up before I can call it "finished" - I think I'll maybe replace the connectors
with tidier waterproof ones as well.
Those few sentences sound easy - but the nearside lights put up a fair old challenge. First, I used a common earth cable that turned out not to be
earthed at all... then the indicator live had a bad connection. Tracking and rectifying these faults took longer than it should have (partly because
I was wary about setting the whole bleeding thing up in flames in the garage and burning both cars to a crisp... and me to a greasy puddle)
Fortunately, it has a battery isolator switch, so there's less chance of everything going frazzle overnight.
4 hours today, 44 hours total so far.
 Oh and another thing happened today - the postman delivered an iron-on badge that I ordered last week, to complete the "Escuderia Beep-beep" garage
workwear uniform. You can't hide class!
Oh and another thing happened today - the postman delivered an iron-on badge that I ordered last week, to complete the "Escuderia Beep-beep" garage
workwear uniform. You can't hide class!
:: Wednesday, 14 May 2025 ::
Vixen bonnet, day 15!
Right, today I'm going to finish building everything on to the car to make sure that it all fits, before I take it apart again for painting.
 Next, the windscreen washers. I install the nozzles in the rear of the bonnet, and then run the hose up the wee tube brackets I made.
 I also install the little brackets for the webbing straps that prevent the front of the bonnet hitting the ground when it's open.
I take out each of the bonnet catch bolts (one at a time so that I don't move them!) and cut about half an inch off each of the bolts, then check
that the bonnet still closes ok.
I tape up some of the wiring to the front lights and indicators, but I don't like those crimpy-on connectors - I think I'll replace them all with
soldered bullets once I take the loom back off.
Front wheels back on, and lower the car to the ground.
 Last little thing - the rubber grommets under the headlights, that allow you to tighten the screw that holds on the headlight trim ring. The
grommets won't fit, because the fibreglass is too thick - much thicker than the old bonnet. I grind away the rear of the hole with a ball grinder
(which should NOT be used without reading the instructions to clarify its exact purpose), and then insert the grommet using a bit of thin string
around it to pull it through from the rear.
Last little thing - the rubber grommets under the headlights, that allow you to tighten the screw that holds on the headlight trim ring. The
grommets won't fit, because the fibreglass is too thick - much thicker than the old bonnet. I grind away the rear of the hole with a ball grinder
(which should NOT be used without reading the instructions to clarify its exact purpose), and then insert the grommet using a bit of thin string
around it to pull it through from the rear.
And that, I think, is it! I've already tried the badge and bumpers and removed them again, but otherwise, everything is back together as it should
be!
Just needs painted now!
I've got 6 weeks until it's booked in, so I need to take all the fittings back off the bonnet before then.
(Edit) Forgot the time sheet! Only about 2 hours today, so that's around 46 hours.
:: Thursday, 14 May 2025 ::
Vixen bonnet, day 16!
The first part of today involves removing the washers and tubes, the brackets for the webbing straps, and then the headlights, sidelights and
indicators ready for painting (and to facilitate changing all those bullet connectors).
I'm not happy with one of the rear-facing vents at the back off the bonnet, where I filled in the double-skin - the bottom edge is still much lower
than the other side and not quite straight. I decide to take the bonnet back off, to give good access for filling and sanding. I give it a wee spread
of filler in the morning, and then another at lunchtime. That seems to build it up to the right height, so I file it flat and sand it, then apply a
slight skim of filler and another sand just to finish it.
 It's much better but still needs a wee bit of shaping on the internal corners. I'm not going to touch the brown knifing stopper though - the paint
man told me to leave it alone!
It's much better but still needs a wee bit of shaping on the internal corners. I'm not going to touch the brown knifing stopper though - the paint
man told me to leave it alone!
Today's time sheet, about 2 hours again, so that's around 48 hours in total.
Not a lot more that I can do, except put the bonnet back on and get those wiring connections sorted out!
:: Saturday, 17 May 2025 ::
Vixen bonnet, day 17!
I finish off shaping the inside of the rear-facing vent, much happier with how it looks.
With that finished, I put the bonnet back on the car, just in time for the postman to arrive with a packet of bullet connectors
 Izzy Wizzy let's get busy. Be gone, tacky-slacky crimpy-wimpy connectors that are falling loose before you're even installed in the car. Take
yourselves from here unto a place of damnation, where your utter shityness can do no harm. I cut off (or just let them fall apart) the crimped
bullets, and solder on proper bullets to each wire on the lights and indicators, and on the loom that goes to them from the connector at the bonnet
hinge. I have to do this in the new workshop shed because there isn't a square inch of working space available in the garage...
Izzy Wizzy let's get busy. Be gone, tacky-slacky crimpy-wimpy connectors that are falling loose before you're even installed in the car. Take
yourselves from here unto a place of damnation, where your utter shityness can do no harm. I cut off (or just let them fall apart) the crimped
bullets, and solder on proper bullets to each wire on the lights and indicators, and on the loom that goes to them from the connector at the bonnet
hinge. I have to do this in the new workshop shed because there isn't a square inch of working space available in the garage...
That's around 2 hours today, so we're now on 50 hours in total.
:: Sunday, 18 May 2025 ::
I'm not going to count this as an official "Vixen bonnet" day, it's more of a leisure faff-about.
First I tidy up a tonne of random tools, files, brushes, plus angle grinder, multi-tool, rotary tool and other random shite which is cluttering
every work surface in the garage, including a good proportion of the floor. I will ned to buy a new rotary tool because the one I have has been
fucked for some time (with the bit lock held together with masking tape) and is now even fucked-er because it randomly cuts out if you hold it at
a funny angle. It decides at random what that cut-out angle will be, it might not be the same as it was yesterday or even 2 minutes ago.
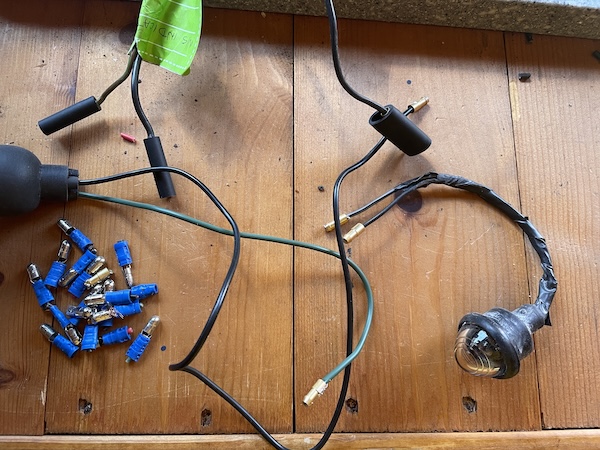
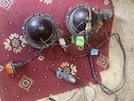 Then I spread out the front lights and the loom that goes to them. First I test each light with my trusty probe, to make sure they all work
individually, then I plug them into the loom and test them with the probe, from the main multiplug. All working and in order!
Then I spread out the front lights and the loom that goes to them. First I test each light with my trusty probe, to make sure they all work
individually, then I plug them into the loom and test them with the probe, from the main multiplug. All working and in order!
I've also had a thought about the front registration, which wasn't on a plate, but was individual plastic letters fixed to the front grille. The
old grille wasn't standard, it had a horizontal mesh which looked wrong, but now, I realise, made it easy to line up the registration letters and
numbers. The new grille is the "proper" larger diagonal mesh, which looks better, and lets more cooling air through, but I've discovered that you
can't line up the letters using the fixed pegs on the back - the grille mesh gets in the way of correct spacing and alignment.
I can fix this by cutting off the moulded pegs and drilling the back of the numbers or letters, (not all the way through!) and gluing in new pegs,
or using 4mm self-tapping screws from behind, with a spacer plate. The letters are plastic and only 3mm thick, so careful drill control would be
required, because you can't get new letters if you bugger it up (because they're not legal on any car later than 1973). Each peg or screw would have
to be individually marked to fit in a specific hole in the grille.
The other option is to cut little bits out of the grille to position the pegs where they need to be, but I don't want to do that.
 I think I might go for a stick-on black and silver number plate. They're legal provided that the car was registered before January 1973, and is now
registered as "historic". I've seen a few Vixens and Granturas with them, and they look nice. Plus, and it's a big plus, they're easy to fit!
I think I might go for a stick-on black and silver number plate. They're legal provided that the car was registered before January 1973, and is now
registered as "historic". I've seen a few Vixens and Granturas with them, and they look nice. Plus, and it's a big plus, they're easy to fit!
In the afternoon, we have a family visit to do, so I decide to take the S for its first run since the exploding ignition coil episode. It's warm,
the sun is shining, it's brilliant! The clock reaches 114,000 miles just as I get home.
:: Saturday, 24 May 2025 ::
Dave and I have agreed to help Hugh out by taking our cars to a wee family day in Perth and Kinross, about an hour fom the house. We meet up at
Dave's house first. We've had about 6 weeks without rain, until it bucketed down last night. and before I even reach Dave's house, I realise that
the roads are as slippery as hell, with that build-up of oil, diesel and rubber that you get in dry weather.
So we set off, up through Fife along a route that we've taken many times to our monthly meeting, before turning off up a wee glen that we've never
driven before. It's narrow and twisty, and it's fantastic. The only thing that would make it better would be knowing that nothing is coming the other
way. Brilliiant drive!
 We're shown to our parking spots where we're told that bacon rolls will be ready soon. We start to clean the cars, then it's announced that the bacon
rolls are ready. Dave decides "I'll just clean this bit... and this bit... oh and this bit... and under here..." and the bacon rolls are all
finished, and we don't get one...
We're shown to our parking spots where we're told that bacon rolls will be ready soon. We start to clean the cars, then it's announced that the bacon
rolls are ready. Dave decides "I'll just clean this bit... and this bit... oh and this bit... and under here..." and the bacon rolls are all
finished, and we don't get one...
Hugh has, however, decided to show his gratitude by donating doughnuts and biscuits, so we have a cream doughnut each instead.
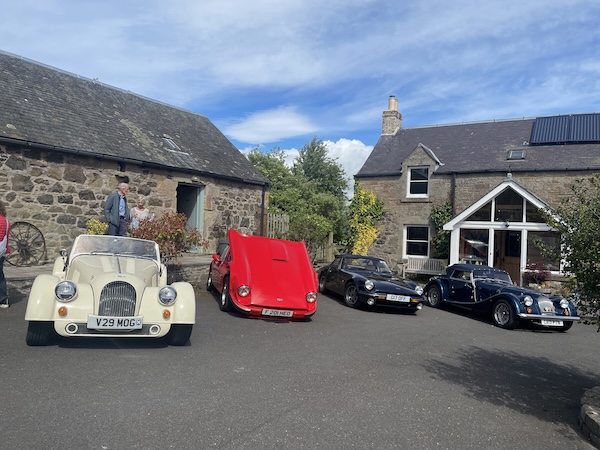
 It's a wee limited car show in a courtyard.
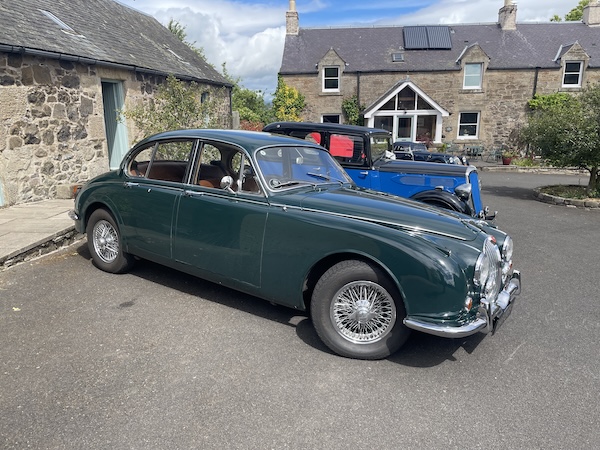
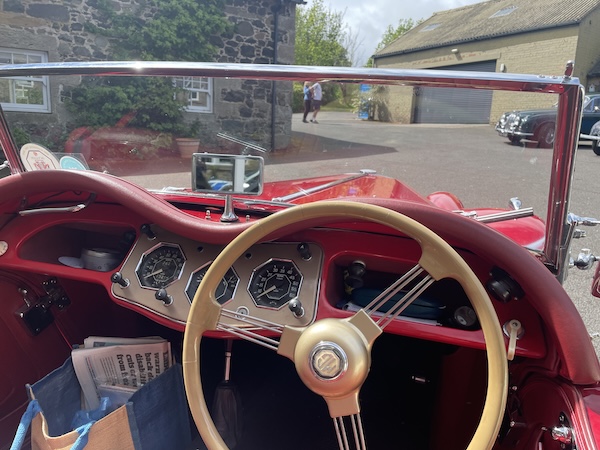
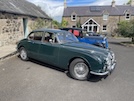 I like this Jaguar, it's lovely.
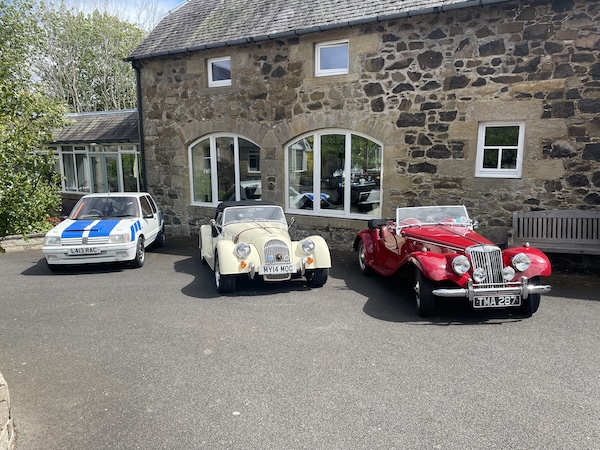
 The Peugeot 206 rally car belongs to the owner of the farm. The Morgan is one of 3 attending today, and the 1953 MG is beautiful.
 Another photo of the MG.
Then it's lunch time and there are burgers! Dave and I are off the blocks like Usain Bolt, we're not missing out a second time!
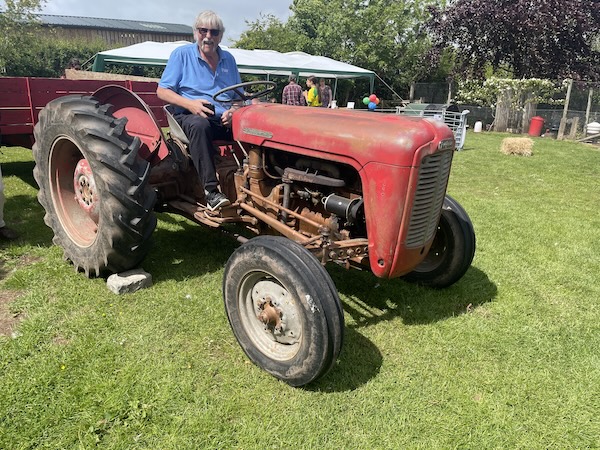
 With those polished off, Dave wants a play on the tractor in the kids play area. We manage to resist the face-painting table though.
At this point we notice that one of my back tyres looks a bit soft. I thought that earlier, but it's more obvious now. By the end of the day, it's
definitely half the profile it should be. Fortunately the farm has an airline so it's pumped up for the journey home.
We set off for home with Dave in the lead, back down the wee glen road. Near the bottom, a bunch of bikers come round a bend, and the front two are
right over our side of the road, and nearly spread themselves over Dave's bonnet. Good job that at least 2 of us are slowing down enough to be able
to stop!
And so on to home, all intact but with one tyre to check!
:: Tuesday, 27 May 2025 ::
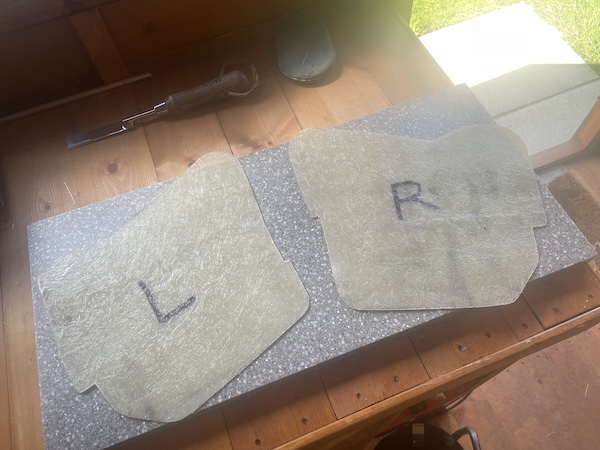
I still intend to make wee air deflectors between the front grille and the radiator, to guide air through the radiator and not out into the front
wheelarches. I'm not going to glass them in though - I'll just fix them to the hinge frame. I made a cardboard template on 8 May, so on Sunday I
used that to make a single-piece template, which doesn't fold so easily. That confirms that I can make both sides out of a singke sheet of fibreglass,
the size of my piece of corian worktop!
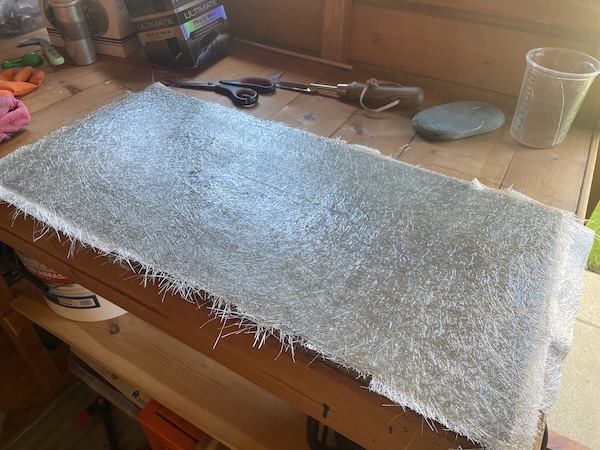
I cleaned up the worktop and gave it 4 coats wax as a releasing agent. Then I cut enough matting to cover it in 3 layers, and mixed up the resin. I
brushed down a coat of resin, and then stippled the matting in, rolling the air out between each layer.
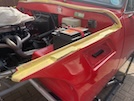
 So on Sunday night, I got to here...
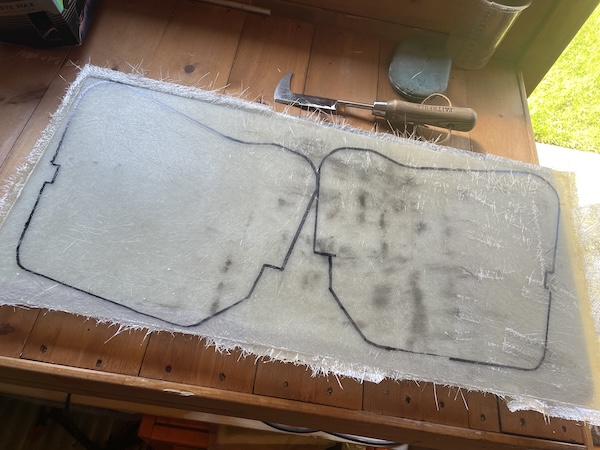
 Yesterday, I didn't have much time because of work, but I used the template to mark out the shapes (making sure to reverse it for the left side!).
 So today, I use an angle grinder with cutting disc to cut out both sides, and sand down the edges. After a bot of trial and error, I have the right
hand side fitting r4easnoably well.
So today, I use an angle grinder with cutting disc to cut out both sides, and sand down the edges. After a bot of trial and error, I have the right
hand side fitting r4easnoably well.
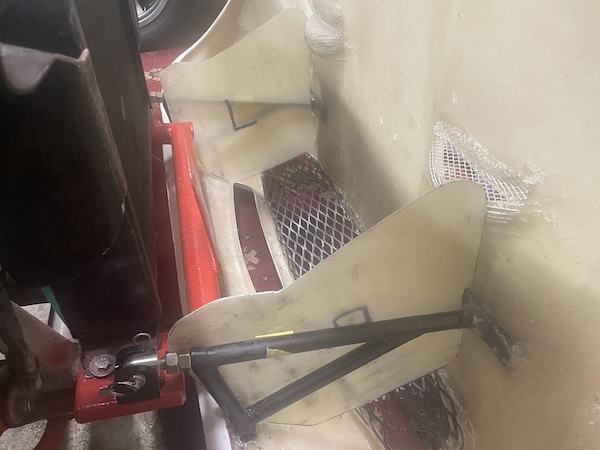
At this point I discover that both sides are slightly different, so I have to do a bit of re-shaping of the left side to get it to fit.
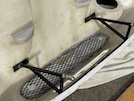
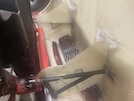 And here they are in place! I'll have to decide how to fix them to the frame - probably tie wraps but I might have a look for p-clips the right size
to hold them a little more firmly. They won't be fitted until after the rest of the bonnet is painted, so there's no rush.
And here they are in place! I'll have to decide how to fix them to the frame - probably tie wraps but I might have a look for p-clips the right size
to hold them a little more firmly. They won't be fitted until after the rest of the bonnet is painted, so there's no rush.
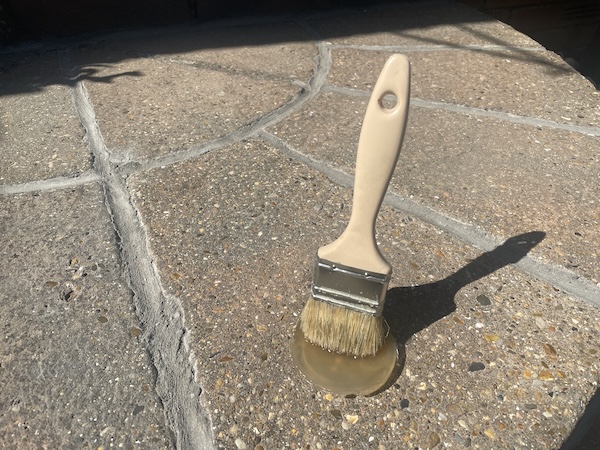
 When you're cleaning up, don't forget your resin brush in the mixing pot... Makes a nice scuplture though eh?
How many hours is that now? There was probably around 3 hours in that, over the 3 days, so if we add that to, what was it, 50? So that's 53 hours
in total.
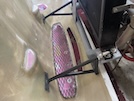
I also decide to have a look at this slow puncture on the S. I jack it up and take off the back wheel. With the wheel flat on the floor, I pump it
up to around 30psi (I usually run it at 24) and spray around the valve with soapy water... no leaks there. Then I spray right around the outside
rim, and watch closely... nope, no leaks there either. Same with the inside rim. Then I lift the tyre up, and go around the tread one section at a
time. Not a single air bubble... Very strange!
Set the pressure back to 24 and put it back on the car. I'll need to keep an eye on that!
 The first step is to run masking tape along the edges of the body, to protect the paint. Then we tape narrow stips of plywood to that to create
the correct bonnet gap.
The first step is to run masking tape along the edges of the body, to protect the paint. Then we tape narrow stips of plywood to that to create
the correct bonnet gap.
 Then we put a couple of layers of dust sheet over the engine and radiator so that there are no sharp corners to dig into the underside
of the bonnet.
Then we put a couple of layers of dust sheet over the engine and radiator so that there are no sharp corners to dig into the underside
of the bonnet.
 Then Dave and Eric move the bonnet into place, and we check all the gaps, including along the back, under the windscreen scuttle. This needs a
couple of goes, while I go underneath to check the fit of the hinge frame. Lift off - adjust frame - replace a couple of times before it seems to be
right. Then I mark the inside of the bonnet with a pencil, to show where the frame has to be mounted.
Then Dave and Eric move the bonnet into place, and we check all the gaps, including along the back, under the windscreen scuttle. This needs a
couple of goes, while I go underneath to check the fit of the hinge frame. Lift off - adjust frame - replace a couple of times before it seems to be
right. Then I mark the inside of the bonnet with a pencil, to show where the frame has to be mounted.
 This also requires some "off-the-car" discussion and deliberation! We also bend the wee tabs slightly to maximise the contact area with the bonnet,
to try to eliminate any "stress points".
This also requires some "off-the-car" discussion and deliberation! We also bend the wee tabs slightly to maximise the contact area with the bonnet,
to try to eliminate any "stress points".
 Anyway - home again after a consolation sausage roll, and I decide to start to fix this hinge frame in place. I'm going to stick it in place with
glassfibre filler (again to spread loads and to fill in any gaps between the metal frame and the bonnet shell). This shows stage 1 complete!
Anyway - home again after a consolation sausage roll, and I decide to start to fix this hinge frame in place. I'm going to stick it in place with
glassfibre filler (again to spread loads and to fill in any gaps between the metal frame and the bonnet shell). This shows stage 1 complete!