:: Diary - October 2011 ::
:: Sunday, October 2, 2011 ::
Well once again it's time for the TVR Car Club monthly meeting - so naturally it's been pishing rain all night and all morning. The rain goes off,
though, about an hour before I have to leave. So we won't be putting the roof on just yet... I drive over to Dave's house to see how many people are
coming out to play today - and there's yet another new boy, but in a car I recognise - it's the one James sold last month! There are 5 of us this month,
others are on holiday or are not allowed out when it's raining.
So we set off for the meeting, with me at the front. We're soon broken up by traffic though, and then traffic signals, but we manage to regroup in time
to catch up to the number 38 bus leading a small convoy of its own. I might be imagining it, but it feels as if the car is going better than it was on
Thursday. When we arrive at the meeting, we notice a trail of oil drops leading to the front of Jim's car. Jim, in his usual inimitable style, has a
quick look after he's switched off, then decides a fag, coffee then lunch is more important so we go inside.
There's another new S (an S3C) belonging to a man who lives in Muckhart, so we spend a bit of time looking at that. It has the spare on a bracket under
the bonnet, beside the engine, to save space in the boot. Good idea but I'm not sure if, once you've changed the wheel, the full size wheel will fit back
in there, so how do you get it home when you've put the spare on?
I also meet the man with the Griffith who was at Knockhill - he says his car is going better as well. A good old "Italian tune-up" (ie drive its bollocks
off)!
Then I get involved in a discussion about VW Karmann Ghias, when I say that Karmann were responsible for the design of the Triumph TR6, but somebody else
says that the TR6 was a Michelotti design - now I'm sure that's not right, I'm sure he did up to the TR4 but Leyland went to Karmann for the TR5 and 6 -
that's why it's so drastically different from the rest of the Triumph range. I don't say anything though in case I am suffering a Senior Moment and I've
got it all wrong. I've checked tonight though, and right enough, Michelotti designed the Herald, the Spitfire and GT6, the 1500, 2000 and 2500, the
Toledo etc, and the Stag, but the TR6 was indeed a Karmann house design. My anorak is intact.
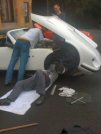 Anyway, soon it's time to set off. Jim starts his engine and looks for the oil leak - and it looks like it's pishing out under the oil filter. It could be
the filter seal, the sump gasket, or the filter itself. Jim says at the last service, they sucked the oil out of the dipstick hole and didn't change the
filter - so it's 2 years old. We manage to borrow a trolley jack and lift the car, and Dave gets under, and diagnoses a small pinhole in the rusty oil filter.
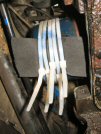 Dave uses a bit of self-adhesive neoprene foam, and sticks it over the hole, then fixes it in place with a handful of cable ties. Jim starts it up and
hooray - no leaky no more!
We still drive home nice and easy though, to keep the revs down.
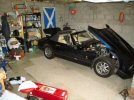 When I get home, I put the car in the garage. That's probably it off the road now for a bit - I want to renew the carpets, fix the dash veneer, refurbish
the steering wheel, repaint the front of the chassis and the front suspension wishbones, and replace the brake servo and master cylinder. That should fill
the long dark winter nights!
:: Monday, October 3, 2011 ::
A man from South Lanarkshire posted on Pistonheads yesterday that he has running problems with his S, and I went down today to see him and see if I could
help.
It turns out that the S in question is John's old car - it has been with us to S Club a few times. John sold it to a man in Dundee and now he's sold it on to
the man who has it now. So... the problem when I got there was that the car was hunting badly, running rich, backfiring etc. He has replaced the injectors,
plugs, leads, dizzy cap, air flow meters, and even substituted another ecu. No difference.
So he starts it up and it's running lige a bag of farts. The idle is really lumpy and uneven, with the revs rising and falling all the time. I found that
unplugging the idle speed control valve made the car run evenly. Now I know that doesn't mean that it's the ISCV that's at fault, it just means that the
ecu can't then bleed air to compensate for another fault, but at least it shows that the engine is basically fine, it was probably an ecu signal somewhere.
So - we disconnect the air flow meters, the coolant sensor, the fuel temp sensor, and the big connector under the coil, clean up the terminals with emery,
then a spray of contact cleaner then some of the waterproof dielectric grease I used on the Cerb's Llamda sensors, and put them back together. Then we take
the ISCV apart and clean it out with carb cleaner. We also check that the plug leads are in the right order!
After all that, the engine is idling perfectly - smooth as a baby's. We think we've cracked it. The radiator fan cuts in, then off again - perfect. We're
standing chatting, and the fan cuts in a second time, then as it goes off, the engine hunts and stumbles to a complete stop. Eh?
It starts right away though, and soon settles down smooth. Fan cuts in twice, and as it goes off the second time, the engine again stumbles and hunts to a
halt.
When the engine is going perfectly, a vacuum gauge plugged into the servo connection on the plenum, gives a reading of 18" Hg, which is right in the range
for a healthy engine. When it's hunting and farting about, the reading drops to 15 - which indicates an air leak (or faulty ignition timing - but I can't
see why the ignition timing would be related to engine temperature at idle - unless the ignition module was breaking down under heat - but only the second
time it gets hot!).
We do find that when it was hunting one time, wiggling the non-retun vacuum valve at the servo restored normal operation - but later, with the vacuum gauge
connected and that hose therefore out of the equation, it's still doing it, so we're not sure if that was a coincidence. I also try unplugging the ISCV now,
while it's hunting, and it makes no difference - it still stumbles to a halt - maybe there's more to this than just an ecu signal.
The other thing I noticed - he says he can't remember which way round the AFMs had been connected before he changed them, and I can't help because mine is
an S3C and doesn't have any. He has the white connector to the top one, black connector to the bottom - I am not sure if it makes any difference but I
think I read somewhere that it does.
I think that we have fixed whatever the ECU signal problem was, but there is still some intermittent more fundamental fault. He's happy enough that the car
is at least running right for a while, so it's much better than it was. He's going to get it MOTd so that he can try it on the road.
I suggest that he tries spraying "Easy Start" around all the inlet joints and see if the revs rise momentarily - either that or trickle redex on, and see
if it gets sucked into the joint. He's also going to change the coolant sensor.
Other than that, I'm stumped - why would a fault occur as the fans switch off for the second time - 3 times it did exactly that?
Suggestions on Pistonheads include the yellow connector, the wiring loom in the passenger footwell, or the earth of the alternator - if it doesn't have a
good earth, then the ecu signals could be jumping about all over the place. That makes sense, although I would never have thought of it.
Anyway - I'll have a think and then maybe another visit, and we'll see how it goes. We will get there though - I'm not letting the bloody thing beat me.
:: Tuesday, October 4, 2011 ::
Well the plan today was to get my own car up on stands and make a start to the interior restoration. Unfortunately, I get distracted by "Wheeler Dealers"
and "An MG is Born" on the TV, and decide that the vicarious pleasure of watching somebody else repairing cars, while I stay warm, is preferable to
crawling about on a freezing garage floor trying to balance a TVR on 4 axle stands.
I've also got an iphone which has started to tell me every 10 bleeding seconds that "the device isn't connected properly" even although there's no device
attached to it. Apparently the connection fills up with belly button fluff or something, and gives some erroneous signal across the terminals. I fucking
hate computers. Apparently the cure is to clean out the connection with an old toothbrush and an airline, so I do. It sorts it for a bit, but if I hold
the phone in my hand, the magnetic signal or maybe moisture from my greasy sweaty palm seems to set it off again. It works fine as long as I don't use it
though. It's old and out of contract so I'm going for a new phone tomorrow. Iphones are pish.
I do eventually get out to the garage for an hour though, just before dinner time, and manage to get the car lifted and get the wheels off. That's enough
of a start for today, I think. You can't rush these things.
Next steps - drop exhaust, disconnect handbrake, remove seats and centre console.
I'll need to organise the bits I need - carpets, wood veneer, a black leather colourer (for the steering wheel) and a new brake servo and master cylinder.
Plus, no doubt, another million bits and pieces as I go along.
Next steps after that - well we'll see, you can over-plan these things, right? And that just leads to stress. Don't want that.
:: Wednesday, October 12, 2011 ::
Remember I said last week that iphones are pish? Well I went out on Thursday and got a Blackberry. It took me most of Friday to set the bloody thing up.
Worth it though, I thought - come Monday, I'll be able to get all my work emails and work much better even when I'm not at the house. So what happens
halfway through Monday morning? I'll tell you - Blackberry's world wide system falls over and dies, and after a bried resuscitation overnight on Monday,
it has a relapse on Tuesday morning, and it's still not fixed. Marvellous.
Anyway, back to TVRs. I'm not making the mistake of last year, so I've booked the Cerbera in for an MOT on Saturday, before the old MOT expires this time.
I don't think it needs any work apart from a bit of a run beforehand to make sure everything is warmed up properly. But we'll see...
The S is still sitting on stands, and I haven't touched it for over a week. I've just been busy with other stuff, work, meetings, wine, women and songs.
I meant to get out to it today, but a half hour of work started at 8am and lasted till nearly 4 pm, so that was the end of that idea.
I did find time to do a bit of research and buy a brand new brake master cylinder and reservoir on ebay, for half the price the TVR specialists sell them
for. It's off a Fiesta Courier diesel van, and should be winging its way to me tomorrow. I probably won't need it for weeks yet so that's ok.
I couldn't find a new servo though. I'm not so worried about getting a new one, a good used one would do, but the 4 or 5 used ones I found were either of
uncertain part number, or were in worse condition than the one I'm replacing. The TVR specialist is expensive. I think I moght go scrappy-hunting, and if
that fails, I'll try the Ford dealer - again, Ford Fiesta. That should give me all the bits I need to convert the master cylinder from the existing remote
reservoir arrangement.
I've also been looking at options for new carpets. You can buy carpet off the roll, and cut them to shape yourself. Some of the carpeting around the rear
shelf and along the sills needs some sewing. You also need to sew beading around all the edges. Carpet sewing machines cost a mint, I have discovered.
Sewing them all by hand doesn't appeal.
There is a place in Belgium which sells pre-fitted carpet sets, and I've been told that they are a good fit. So I have ordered a set, and although they
are expensive, at least it should save a lot of cutting, fitting and sewing time.
Then I have a cry when I find a euro converter and realise how much I have spent.
:: Friday, October 14, 2011 ::
The nights are fair drawing in. So was my breath when I went to the Ford dealer to see if they could get me a servo. £196! I made my excuses and left,
then remembered I meant to ask for a new dipstick, but didn't want to go back in case he had a mask and a gun this time.
So - to the git-cave, after almost a fortnight of distractions like work and life and stuff. The car is already up on stands, so I start by removing the
exhaust: 6 nuts and bolts at the downpipes, then a jack and block of wood to hold the front of the exhaust up till I remove the two silencer bolts, then
lower the front a wee bit and release the single bolt at the rear - and that's the exhaust off.
 Next job - remove seats. A quick dive underneath with a power wrench quickly removes all 8 nuts (how glad am I that I locked the bolts into the frames
when I refitted the seats?) and the seats are out. Then another 5 minutes with the electric spanner, and the seat belts are all out. So far so easy. This
photo doesn't really show the state of the carpets.
Then it's time to remove the centre console. First remove the radio, then remove two screws at the rear of the transmission tunnel, lift the rear of the
console upwards and back, and then I can just get my hand in and pull the corrugated ducting off the back of the two eyeball vents. Pull it out a wee bit
further, and then snip through a cable tie that hold the wiring loom on to the front left corner of the console.
 That lets me lift the console and turn it onto its side, and after noting the order of all the wiring connectors, by photographing them (with a few more
photos than just this one) and writing them down on a whiteboard on the wall, I disconnect all of the loom and remove the console.
 Here's the wiring loom for the 4 switches in the panel (heater fan, font fogs, rear fogs, panel lights), the two window switches, the electric mirror
switches, the immobiliser and the cigar lighter (or sat-nav power source so that mapless followers don't get lost, as I prefer to call it).
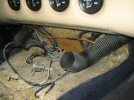 At this stage, the two bolts that hold the transmission tunnel to the chassis are revealed - you can see them here under the bits of plastic ducting. Just
out of interest, I decide to see how tight they are - the right hand one isn't too bad, but the left side takes over two turns to tighten. Note to self -
next time you lift the body off (eh?) take the console right off first!
Then I remove the gear knob (jees it was tight!) and gaiter, and the rubber gaiter underneath. Then it's another dive underneath the car to loosen the
handbrake cable adjuster by a dozen turns (that's why the exhaust had to come off, you can't reach it with the exhaust in place unless you break your
forearm and insert another elbow back-to-front) and then remove the clamp bolt that holds the cable on to the handbrake lever, and then the little bolt
that holds the lever on to the tunnel, and pull the lever assembly out of the tunnel. I also remove the handbrake warning light switch, because it's
screwed through the carpets.
 So that gets me to this stage. You can see 5 different colours of carpet in this photo. The mats in the footwell were never really meant to match, but
the rest of that should all be the same colour!
 Then I remove the roof stays - I can just reach if I use a socket and extension on the nut inside the boot, and the electric spanner on the head of the
bolt. Then I remove the two domed nuts holding the stays on to the roof hoop.
 I'm getting knackered now. I'll have a wee sit down on a box and remove the front offside wheel arch. The screws are rusty, I meant to buy stainless ones
but didn't get around to it. Once the wheelarch is off, I have a look at the underside of the servo - it looks like surface rust in this photo, but it's
flaking off in chunks.
 Here's the servo and master cylinder from above. Looks ok eh?
Anyway, the purpose of removing the wheelarch wasn't to take photos of rusty servos, it was to disconnect the steering column. I cut off the cable tie
and pull back the gaiter I installed, then loosen the pinch bolt and disconnect the steering joint. Then inside the car, I remove the steering cowl,
disconnect the wiring to the lights and indicator and wiper switches, and the dreaded ignition block connector, then remove the two 17mm bolts that hold
the column up under the dash and remove the column from the car and add it to my increasing pile of bits.

 So now I've got to here.
 Here's the brake servo bolts inside the car. You can see from this that the bolts aren't in a square, two of them (the ones at 10 o'clock and 4 o'clock
in the photo) are closer to the centre than the other two. This design feature is intended to prevent spanner-monkeys fitting the servo in its side so
that the master cyinder is then also sideways, and all the brake fluid falls out. Unfortunately, Saab (who made this servo) and Ford (who made the servo I
will be fitting) didn't adopt a universal approach on what way was "sideways" so I will probably have to re-drill those holes when I come to fit my servo
of choice. We shall see.
Then, in a final fit of enthusiasm, I decide to try to remove the wood-effect bit from the dash. I know that there are a number of tiny nuts up behind
the panel, about 5 or 6 I think, although I'm not sure because my dash is different from most (mine has a separate bit on the glove box, most have a
continuous wood panel and the glove box drops down underneath). I find one of the nuts and remove it, but I can't find any more - not without that extra
forearm joint that I talked about earlier. It's getting on for tea time anyway, and I have to get reasonably spruced up because I am going out to another
birthday party tonight.
:: Saturday, October 15, 2011 ::
First job today is to take the Cerbera for an MOT. I collect it from the garage, have a bit of a drive to warm it up, and then deliver it to the mercy of
the tester. It passed!
While I am there, Brian (with the Chimaera) turns up with a van to get tyres swapped over on to swanky wheels, so more blethering ensues.
Then it's back home, to browse the internet looking for servos. There are none available at any on-line motor factors I can find. I check out the TVR
specialists but theirs are even more expensive than Ford. I nip out to the local motor factor but they don't do servos at all apparently. So I decide that
I'll just buy the Ford one (I'm not very keen on second hand brake parts), and arrive at the dealers at 10 past 12. Parts department shuts at 12.00.
So it's back to the S and the removal of fake wood trim.
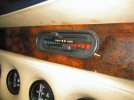
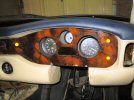 After much contortion and inspection, I work out that the right hand side of the dash is held on with 3 nuts - 2 to the right of the rev counter, and one
above the oil pressure gauge. That last one is a right bugger to reach, but I get there eventually.
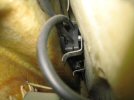
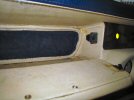 This photo shows where I think there's another bolt. I can't see how to reach it though - the glove box is moulded into one piece with the rest of the dash.
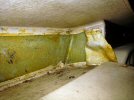 Even when I peel back the trim, there's no obvious way to reach that bolt.
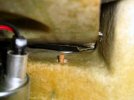 When I look up from underneath, it looks like the bolt doesn't have a nut on it in any case.
 So I deduce that it's only the heater control holding that side on. It comes out from the front, but it's held in from behind by two u-clamps with bolts
through. They are almost impossibe to reach. I prise the bottom of the dash out and wedge some bits of wood in, to leave space to get my hand up. I also
have to remove the oil pressure gauge - two 8mm nuts hold it in from behind. Now at last I can get my hand up behind the heater controls and undo the two
7mm nuts and remove the brackets. Just - it's dead fiddly and you have to do it by touch alone.
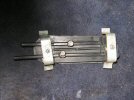 That lets me pull the control panel out, and disconnect the cables (after marking the top one with blue tape)
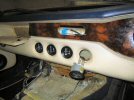 So that should be all the bolts out. But still, the panel won't come off on that left-hand end.
After more contortion, I work out that there's a second bolt beside the glove box, above the first one, that goes through not just the fibreglass of the
dash, but also another panel behind. I just cannot see how to get anywhere near it. I start to undo the cable ties holding the wiring loom up in the
passenger footwell, but it's now dinner time so I give up for today.
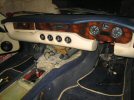 So this shows the location of the 6 bolts holding the dash on, plus another 2 in the glove box lid. The top left one is the one I can't see.
My hands and arms are scratched to ribbons...
:: Sunday, October 16, 2011 ::
The Cerbera is still at the house, and I want to take it back to the barn. This takes about 3 hours - 2 hours of driving, and then an hour walking back
home (the barn is 3 or 4 miles from the house).
After procrastinating by watching various forms of motor racing (F1, then V8s at Bathurst, then BTCC and the Goodwood Revival are all on today, but I'm
not going to watch them all, obviously), I get back out to the gitcave. I need to get that last nut out of the big panel. I just can't get to it from
behind - I check with an endoscope thing, and I can't even see the nut. Eventually with the aid of the endoscope, I realise that it doesn't go through
both panels at all - it's sandwiched between the dash and the body in a really tight wee space. It's obscured from view from underneath by excess blue vinyl
along the inside edge of the dash top.
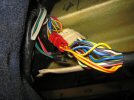 So now I know where I need to get to. It's away up at the top of this photo, where the loom disappears.
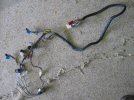 So the first step is to disconnect the loom at the red and white connectors. That bit of the loom goes to the centre console, so I remove it. You can see
here the two window switch connections (with the blue tape), the four switch connectors, and the wiring to the cigar lighter and the mirror switch.
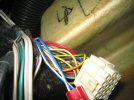 Now we can almost see what we're doing. The nut I am trying to reach is behind that heater duct, where the yellow arrow points. You can see the glove box
above the white connector, and the two self-tappers holding the glove box hinge.
The nut is still not easy to reach - I can just get a finger tip on it, but I can't see it. I wedge myself upside down in the footwell so that I can get
my arm up round the various obstructions, with a stubby 10 mm spanner. I can only get about 1/12th of a turn at a time, so the process is - fiddle about
blindly till the spanner goes on the nut, turn it 1/12 of a turn, remove the spanner and turn it over, fiddle about blindly till the spanner goes on the
nut, turn it 1/12 of a turn, remove the spanner and turn it over... you get the idea - and all the time using a spare finger to hold back the excess
leathercloth so that the spanner doesn't scrunch it up against the nut.
The nut isn't tight, but it's too tight to remove with fingers only (especially as I can't really get my fingers on it, between the two panels) so it's a
slow and laborious process, a bit like performing dentistry on a giraffe by shoving your arm up its arse, so it's not long before my arm is killing me -
between the upside-down muscle pains, the needles and pins in my hand, and the skin flaying off my arm, I have to stop for a rest every wee while.
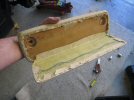 While I'm waiting for circulation to recover, I can get on with other things. I remove the glove box lid with a stubby screwdriver, and then remove the
internal leather trim from the back of the lid - it's only glued on so it's just a case of gently prising it off with a flat blade. When I lift that up,
I can remove the two nuts holding the wood trim panel on.
Back to the car and fiddle another two or 3 turns on that nut.
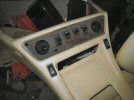 Then I remove the switch panel from the centre console. Again, that'e easy - 4 nuts through the holes you see here, and it's off. Then I note the order
of the switches, and then take them out of the panel, and give them a clean with some WD40 and a toothbrush.
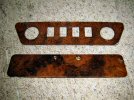 Here's the switch panel and the glove box lid. This photo doesn't really do justice to how shite they look - you can see the missing chunk, but you can't
see the flaking lacquer or the "ploughed field" gloss finish. I still haven't got the other nut off the big panel either - 3 hours I've been out here,
footering with one bloody nut... and all I've got to show for it is arms that feel like I've been cuddling nettles.
I suppose I'd better start looking for some suitable veneer. I haven't decided what to go for - I quite like the dark walnut finish on mine, rather than
the more usual lighter wood I've seen in some cars - but I don't know.
:: Monday, October 17, 2011 ::
I go back to the Ford dealer and order a servo. And a dipstick. He says they should be here at the end of the week.
Then when I get home, I start to look for veneer panels - there's a wide choice but not locally, and I'm a wee bit reluctant to order unseen - you're more
likely to get the bit with uneven burrs or some other defect. I've also been looking at vinyl wrap film (which looks pretty good to be honest, and is
probably what most car manufacturers use). and also wood paint finishes. I'm still more drawn towards the real veneer option though.
I also need to find some kind of kit to restore the colour to the steering wheel.
:: Tuesday, October 18, 2011 ::
It's off! It's off! It's off! Itsoff! Itsoff! Itsoffitsoffitsoffitsoffitsoffitsoffitsoff!
Another session of 12ths of a turn for about another half-hour, and finally the nut drops off the back and the panel comes off. Then I gently prise the
plastic warning light panel off the back of the dash panel, and put it away carefully.
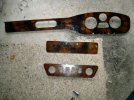 Here's the three panels together - you can just see how rough the finish is. That's because I brush-varnished it on the car, to prevent it getting chipped.
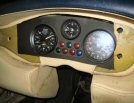 This shows how the instruments are mounted into a separate panel which is held in place with 3 of the 5 bolts.
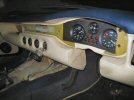 And this shows the whole dash with the facing panel removed.
I was doing a bit of reading last night about guys trying to veneer panels and just not getting the right conditions, so either the veneer splits when it
dries, or it absorbs the glue and looks crap, or it doesn't come up nice when it's lacquered. Now I am sure that a lot of people have done it with no
difficulty, but I am a wee bit put off. Also, I have to say that I've looked at burr walnut veneers, and while some of them are really nice, quite a lot
more have patterns that I think would look horrible. Or they are too grey.
So I have decided that I am going to try a vinyl finish and see what it looks like. If it's crap, I'll peel it off and think again.
After a browse around various web sites, including classic car and kit car forums, I find a very nice gloss finished wood effect, a bit sized 120cm by
40 cm - more than enough. My concern though is that if it's a bit off the end of a roll, the grain might lie vertically instead of horizontally, and that
would look silly. Eventually I decide on a red cedar burr finish that looks quite nice, not too dark, and not too expensive. So I order plenty, so that
the direction of the underlying grain doesn't matter - I'll be able to cut the bit I need lengthways or sideways.
Back out to the car and I need to remove the existing wood finish, so I brush on some nitromors. While it dissolves and removes the brush-on lacquer, it
doesn't even start to look at the wood finish. It must be a coating that's not paint, then, so I'll have to sand it off.
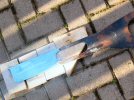 So it's out with a flat sheet sander and some 60-grit paper. I find some wee bits of wood that are slightly thicker than the length of the threaded studs
on the back of the panels, and put them underneath to support the panels so that I don't bend them while sanding (remember the bits of wood I used to prop
the body off the chassis a year ago? Never throw anything away!) I've chosen to do this outside because it's windy and that helps with the disposal of the
sanded off material (after checking that my neighbour hasn't got her washing out, obviously - I'm just a considerate kinda guy).
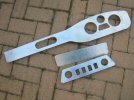 After half an hour of sanding, and then another 10 minutes with a Dremel to clean off the edges of the panels and the inside edges of the instrument and
switch holes, they look like this. Maybe a brushed metal finish wouldn't look so bad eh? I notice a number of neighbours looking out to see what all the
racket was. Maybe I'm not as considerate as I thought...
:: Wednesday, October 19, 2011 ::
I had to pitch up for work today so not a lot of time for car fiddling.
When I get home, though, I decide to fill in the two holes on the glove box lid. I fitted a wee handle to it, not long after I got the car, but after that,
I found the original "push to close / push to open" catch, so I don't need the handle any more - in fact I'd be better without it, because passengers just
pull the bloody thing and pull the catch off the back of the lid.
So to fill it, I screw a couple of large self tappers in until they are tight, then cut the screw off at the surface. A wee grind with the trusty Dremel
and they are both dead smooth. Maybe need just a touch of filler to take any unevenness out. Then I cut the tips of the screws off the back and grind those
flush as well.
I can't do a lot more just now. I need to cover the dash trims before I put them back, and I don't have the covering yet. I'm going to fix it in place
with wing nuts so that I don't have to fiddle with wee spanners.
I don't want to remove the servo and master cylinder till I have the new ones - they should be here this weekend if Ford extract the digit.
The instructions say I shouldn't remove the carpets till I have the new ones, so I can see how they go together - but I think I'll rip them out anyway. I
meant to take some photos today to show the state of the old carpets, but I forgot. Maybe tomorrow.
I had a look at the steering wheel and it's not too bad. I think I'll leave that for now.
:: Thursday, October 20, 2011 ::
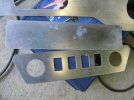 I bought some metal filler today (Chemical Metal I think it's called - it's out in the garage and I'm in here and it's raining). A wee smear over each
screw hole, leave it to dry out, and then sand it smooth. The right hand one is a bit uneven - I had to hammer the plate a bit to close the hole up to get
the screw to fit tightly, and it's left a tiny raised bit. It should be ok when it's covered though.
 While it was drying out I took some photos of the servo, to show the Saab arrangement with the remote reservoir connected by two pipes. I think I might
also try to relocate the radiator expansion bottle to a clamp on the swirl pot, to try to tidy that bit of the bulkhead up (and improve access to the oil
filter and spark plugs). I'll see what it's like once the brake reservoir is out of the way.
 This is from the other side, and shows the state of the master cylinder.
I forgot to photograph the state of the carpets.
:: Friday, October 21, 2011 ::
See the lengths (and depths) I go to to keep my faithful readers happy? well I've had a bit of a setback today so all donations of cash in lieu of
sympathy will be gratefully received.
First I went down to the Ford dealer to collect the brake servo I ordered on Monday. "I've got bad news," he said (although he didn't look particularly
sad about it, not like Huw Edwards announcing the death of the Queen Mother or anything), "they got back to me yesterday and say that the servo is
discontinued. We canny get them." So that's that then. On to plan B. Except there isn't a plan B.
On the way home, I have a different idea so I drop by a local upholstery firm, and buy a couple of square metres of cream leathercloth to re-trim the
inside of the roof panels. Yes I know that wasn't on my list of things to do, but I'm doing it now, ok?
When I get home, the Royal Mail add insult to injury by delivering the master cylinder I ordered, to fit the servo I can't get any more. Which is nice.
When I open the box, I find that it doesn't include the fluid reservoir, whereas the advert said it does. A couple of phone calls to the supplier and he
says sorry, and refunds me the price of a reservoir. Which is nice.
Never mind though, while I've been dealing with that, I've come up with a plan B. Suffice to say that a phone call establishes that the TVR specialists
can't get them either, they've been discontinued by Ford last week, doncha know. So it's on to Plan C. One of the problems with writing a web site for
owners of similar cars is that if I say too much about Plan C, I'm likely to find that somebody else gets in first. So all I'll say is that I think I
might get good news in a couple of weeks or so.
Then a second postman arrives to add a second insult to the first one. He's delivered the roll of vinyl I ordered for the dash panels.
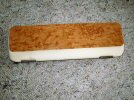 I've got enough to cover the big panel three times and the small panels twice (or various other permutations are available). I decide to start with the
easiest panel - the glove box lid, because it's got no holes in it. So I cut a bit of vinyl along the grain, and clean off the panel. Then I peel off the
backing and lay the vinyl on, pushing it into place with a rubber spreader that's meant for grouting tiles. It's not too bad but the curved corners are a
bit tricky.
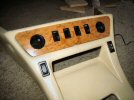 So now it's on to the switch panel. Again, I lay the vinyl on with my rubber spreader doodah, then stretch the vinyl over the edges. Then I cross cut the
switch holes and stretch the vinyl back through and stick it to the back. Then it's on to the round holes - but they're difficult, they end up like old
threepenny bits, rather than round. They're not too bad but you can definitely see they have been cut in segments.

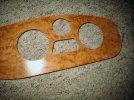 Now for the big panel. I decide to try a bit of heat to soften the vinyl as I stretch it, so I get the 2kw electric fan heater going on full blast, and
work in front of that. Again, lay the vinyl on with the spreader, then heat the vinyl as I stretch it over the curved edges, It goes on perfectly. Now for
the hole for the heater controls - at least that one is covered by the control so it's a good one to practice on. I cut out the centre, put in a few nicks
almost to the edge of the hole, and then heat and stretch the vinyl through the hole and stick it to the rear of the panel,
I do the speedo and rev counter holes, the wee hole for the clock and the hole for the warning lights in exactly the same way - heat to soften the vinyl,
run my finger round the hole edge pushing and stretching the vinyl back, them cut the centres into segments, stopping 2 or 3 mm from the edge of the hole,
then more heat and stretch the material through the hole and stick it down. It looks not too bad at all.
I think I'll go back and do the switch panel again though, this time with a bit of heat.
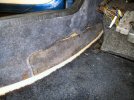
I also remembered to photograph my scabby carpets.
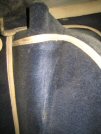
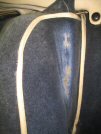
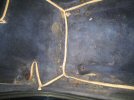 See? They're grim. The carpets on the floor are in bits - only the edging is still intact. All the bits are stuck to the floor though so I'll probably
have to use a scraper. Or a flamethrower.
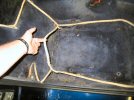
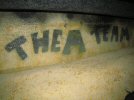 I also find a little message from the car builders, under the boot carpet.
Then I dismantle the heater control, take off the knobs and sliders, and clean it up with WD40.
:: Saturday, October 22, 2011 ::
I was passing B&Q just before it shut last night, so I nipped in to buy some M6 wing nuts (for the dash) and some M4 ones (for the bracket that holds the
heater control in). I also bought a tin of carpet adhesive.
So this morning I am meeting with William from Northern Ireland, who wants to see if he can work out how the main dash comes out. After perusing the "Bible"
and the parts catalogue, with a bit of help from Pistonheads, we deduce that there are 4 screws upwards under the front of the windscreen. After wriggling
about under the dash for ages like a politician on Question Time, I manage to see one of those screws - it's visible but not readily accessible. The other
3 are completely invisible, even when you know where they should be. William decides that maybe he won't fix his heater just yet, an extra jumper might be
a cheaper and easier option.
Then I got a phone call from somebody else asking for a bit of technical help, but he's asked me not to mention that, so I won't.
So it's back to finding a servo. Somebody posted on Pistonheads last night that the servo is no longer available from Ford, which I already knew, but I
was hoping to get one before everybody else did, and prices shoot up like they did with indicators etc. There are a fair number of "enthusiasts" who are
making a fair bit of money from supplying stuff that is no longer available, and while I don't want to stockpile the world's remaining supply and hold
the rest of the TVR world to ransom, I do want to get mine first. I find one on-line, only slightly dearer than the Ford price, and they say they have
it in stock, so I order it. We'll see if they were kidding about the "in-stock" bit in a day or so, eh? I still have another couple of plans in reserve
in case that doesn't turn out.
First I get somne glue and stick the warning light panel onto the back of the dash, and leave it to dry.
I take the switch panel back off the centre console, peel off the cover, and recover it more carefully (after my self-training session yesterday) using
the heat from the fan heater. It's a lot better!
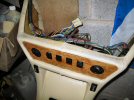 Then I refit the panel to the console, and replace the console wiring loom while I still have my notes (and some memory of how it came apart). That's it
ready to go back on the car - connect up the fresh air hoses, plug the loom in under the dash, and it's sorted!
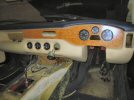 Now I think I'll replace the main dash panel. It slots into place easily, and then I lift the instrument cluster onto the back of the thread. The wing
nut idea doesn't work here, the threads are too close to the side of the rev counter, but it's easy to get standard nuts on and do them up with a long
socket. Then the single bolt in the centre - I slip a washer and wing nut on and tighten it up. Same with the bolts beside the glove bos. That was easy!
It's looking pretty good, I think.
Then it's on to replacing the heater control, Connecting up the cables is easy, especially since I marked which one was top. The cables each have a loop
in the end that slips over a thread on the back of the control, then a nut and lock nut holds each inner cable in place. Then the outers are clamped to
the edge of the control. I put the controls into the dash, but I need to fit the brackets to the back and I've got a couple of other things to do so I'll
leave it for now (and also because I can only take so much rummaging about behind dashboards in the one session).
:: Sunday, October 23, 2011 ::
This is doing my head in. I was lying in my bed at 2am last night and all I could think about was how to get two tiny wee nuts on to the back of the heater
control, while holding a bracket in place at the same time, all with one hand that can barely reach except with fingertips. It seems impossible
Well I spent the morning performing car improvements by proxy, by watching a whole series of "A 4x4 is Born". Then I had some breakfast. When I finally
went out to the garage this afternoon, the reality of fitting the heater control turns out to be much worse than last night's nightmare. They are as fiddly
as a band of fiddlers fiddling in comcert while thinking of ways to fiddle their expenses too. It's just not going to fit.
So - a bit of lateral thinking. How about if I just fix the control to the front panel, and then push the whole assembly through the hole in the dash? I
remove the trim panel again (surprisingly it only takes about 5 minutes, not 3 days - practice makes perfect!) so that I can pull the trim panel forward.
I have to re-shape the bracket a bit because it's too wide to fit through the dash hole, but a couple of minutes with a vice and a hammer sorts that bit.
I also have to straighten out the legs of the bracket because now it'll be pacing only on the front trim panel, not the double thickness of the trim and
dash. I manage to get the brackets and nuts on, and tighten them up. Then I wriggle the whole lot back into the dash and refit the dash mounting bolts.
Sorted!
Then I refit the oil pressure gauge and finally check up the back of the dash for any loose wires, or hanging bits of skin - my arms are shredded again.
Then it's time to refit the glove box lid. First I stick the trim back down on the back of the door, and clamp it together with a couple of bits of wood
and a couple of g-cramps. When it's dried I refit the hinges and the locking catch.
Now I've reached a position where I can't start the brakes till I have a servo, I don't get the new carpets delivered for a couple of weeks, so I can't
do those, so I'm a bit stuck. I think I'll re-trim the inside of the roof panels, but first I need to get the trim off round the back edge of the hood,
because the carpets are glued up behind it. It's held on with 5 long cross-headed set screws that go into the boot. I need to figure out how to prevent
the screws turning while I loosen the bolts, without cutting holes in the hood.
:: Tuesday, October 25, 2011 ::
Postman Pat's just been, and see what he brought in his van!
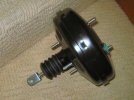 It's a brand new straight-out-of-the-box Fiesta Mk3 brake servo, as discontinued by Ford 2 weeks ago. Since this same servo is fitted to Chimaeras,
Griffiths and Cerberas, somebody is going to have to come up with a suitable replacement before too long.
Now I need to find a plastic brake fluid reservoir, and I'm ready to start fitting it all.
I also had a look at the Saab system on the car, and the rust that I could feel flaking off is just the paint around the seal between the two halves. I
think that might tidy up quite nicely for anybody who needs one desperately enough.
:: Friday, October 28, 2011 ::
So much work, so little time... I haven't been able to get near the car for a couple of days, but today looks more promising.
First priority is a brake fluid reservoir. I've had a look on ebay, and there's only one and it looks pretty tatty. The Mk 4 Fiesta ones look the same
though, so maybe that would do. I get a bit card and mark the critical dimensions - distance between the two reservoir ports, distance from the back of
the servo etc, then I pack some hammers (and a few other tools) into a tool box and set off for the local Previously Enjoyed Spare Parts Emporium. When
I get there, they say they don't have anything as old as a Mk3 Fiesta (posh bastards) but let me have a rummage. Right enough, no Mk3s but the Mk4 one
looks the same, and the dimensions are the same - no reason why it won't fit. I part with a fiver.
When I get home I find that it's exactly the right size and everything. Unfortunately, the actual connections into the master cylinder are different -
not a lot, but enough to make sure it doesn't bloody fit. Curses. I go indoors and buy a used master cylinder and reservoir on ebay. At least I'll have
a spare master cylinder (or I might be able to sell it for the same price as I paid for the lot, eh?).
Throughout all this, my phone's being going mental, it says I've got dozens of emails. I decide to answer some work ones for half an hour, but that takes
almost 4 hours.
But on the bright side, a parcel arrives. I've got no idea what it is, but it turns out to be the new carpets, over a week early! Exciting or what?
 There are 24 separate bits of carpet, so I lay them out so that I can figure out where they will all go. Then I put them back in the box in the reverse
order to the way I'll fit them, so that the first bits (the trims around the upper seat belt mount) are on the top and the floor mats are on the bottom.
I wasn't expecting them yet and I'm not ready - I haven't pulled the old carpets out yet. So the next tasks are: remove old carpets, swap servo
and master cylinder, and then put the new carpets in - and then fit the new brake reservoir when it arrives.
:: Saturday, October 29, 2011 ::
I make a start to removing the old carpets. I didn't think it waould take very long, but it's another nightmare.
I need to take them out in the right order, because they are tucked under each other. So first it's the footmats, which come out easy because they were
never glued in. Then the floor carpets under the seats - now these are rotten, having been soaked through several times - and they were rotten when I got
the car, before I spent months tracking down various tiny leaks. So the floor carpets have to be scraped off in tiny bits with an old blunt screwdriver,
and it takes bloody ages.
Next, the mat on the parcel shelf. I replaced mine 8 years ago so that at least comes off easily.
Next off are the carpets on the sides of the transmission tunnel. I've got the driver side off ok, but the passenger side rips off at the front of the
gear lever, because I need to work around the hatch above the footwell for the fusebox and ecu etc. I'll get to that as I work forwards.
Then I remove the base of the wee cubbyhole in the transmission tunnel, and then the bit of carpet that goes round the sides.
Next, the two vertical bits just behind the doors (where the roof hoop bolts through). I remove the rubber door seals, then I rip the caerpet off, and
undo the roof bolts which are not into captive nuts - you need to get a hand up inside the rear panel behind the door, to hold a 13mm spanner on the nut
inside. Note to self - remember this before you stick these new bits down!
Next step is to remove the bits along the sills. My sill carpets were so rotten 8 years ago that I had to get new bits grafted in, and the carpet tears
off at the edges of the patch, just in front of the front edge of the doors.
Then it's on to the vertical panels behind the seats. I lever the edge away, in front of the top seat belt mount, and the carpets come off more or less
in one piece, except for the bottom 4 inches or so which have been soaked and are falling to bits. These can't be scraped off, because there is a foam
backing, so the old carpet has to be picked off in tiny bits.
Then it's the big panel across the back of the parcel shelf. Now the book (and the instructions) say that you have to remove the roof entirely, and that
involves removing 5 bolts, under the rear window, that go through the interior trim piece, then the cloth roof, then the tub and into the front edge of
the boot. They have a cross-headed screw head, and it's impossible to get a screwdriver on without cutting through the roof. I have a set of offset
screwdrivers (William's idea!) but even then, it's almost impossible.
I decide to see how much of the carpet I can remove with the hoop in place - and it turn out that if I'm careful, it all just tugs out in one piece across
the back. The sides are a bit more piecemeal, and I have to dig bits of carpet out with the blunt screwdriver. I remove the two bits of velcro just behind
the doors, that hold the edge of the roof down. I'll have to replace those. I think that if I trim the top edge of the carpet slightly, I should be able
to tuck it back up behind the trim hoop with a wallpaper scraper or something, and it should look ok.
Next step is the wheelarches. I see that the old carpets have been cut and stitched to shape them a bit, but the new bits are just single piece, so I
want to get at least one of the arch carpets off in one piece in case I need to cut a pattern. I manage to carefully remove the driver's side panel from
the foam backing, except for about an inch around the bottom edge (which is glued to the floor) so that'll do!
Next, I remove the wee bit of carpet around the upper seat belt mount, again trying to keep it in one piece in case I need a pattern.

 All of that has taken me about 3 hours, and I've still got the other rear wheelarch to do, and then the sides of both footwells, before I'm finished
removing carpets.
:: Sunday, October 30, 2011 ::
I need to finish removing the old carpets, starting with the other rear wheel arch.
 First, I need to find a way to hold the rear bit of the hood up - it's in the way when it's down, and it will be impossible to glue the new carpet in,
and hold the roof up at the same time. So I get a couple of cable ties and make two loops, then loop a ratchet strap through the cable ties, and under
the windscreen wiper. If I loop the cable ties round the front nuts for the roof struts, and adjust the length of the strap, I can hold the roof up out
of the way.

 Then another note of how the area around the upper seat belt mount is carpeted, before I strip that off.
That only leaves the sides of the footwells. The dribers side is easy = the carpet just rips out once I get hold of an edge. There is a single screw up
behind the dash, which seems to be an instrument earth, but I can't get to it. I rip the carpet around it.
 Then rge carpet on the bulkhead, in front of the pedals = that just peels off. That leaves me with this - you can see that the foam lining on the
transmission tunnel is loose, I'll need to stick that back down before I put the carpet on top. You can also see a lot of marks down the bulkhead, which
I think are a legacy of when the bulkhead was leaking around the clutch master cylinder and the servo, a few years ago. I don't think it can be brake
fluid - there's never been any sign of a leak, I can't remember the last time I had to refill the brake or clutch reservoirs.
I still have to scrape all the glued-down edges off the bare floor - it takes ages and access is terrible.
Then it's on to the passenger side, which is a bit more awkward, because first I have to remove the drop-down flap that holds all the elecrical wiring,
fusebox etc up. It's fixed in with a tiny hinge that's held on with 2 bolts behind the washer bottle. I het an open spanner down onto the bolts, and then
undo the nuts under the dash, to remove the hinge and the flap.
 That lets me remove the carpets from the transmission tunnel, and the inside of the sill. That leaves me with this. The two hinge bolts are near the top,
behind that black wire.
 Then I sweep all the debris up, and vacuum clean the whole of the interior, and then scrape off the lsst tiny bits of carpet.
 Here's what left of the old carpets. There's a couple of shovelful of wee bits that I swept up, but they went straight in the bin!
So it's on to fitting the new carpets. I start with the seat belt mount. There are two wee pentangles of carpet, and I trial fit one, folding it over the
supporting fillet, and checking that it fits. Then I spray the mount and the back of the carpet with adhesive, and fold the carpet over the fillet and
clamp it in place. Then I roll the carpet round the front, so that the joint is on the outside (beside the roof hoop). Then I trim round the top with a
stanley knife, and stick it all in place, stretching it into shape with a block of rubber in the palm of my hand (OK, it was a rubber hammer, held by the
head, not the shaft).
 Then it's on to the wheelarch itself. Again, a wee trial fit, then spray both surfaces and stick it down, starting with the front edge round the seat belt
mount, working backwards till I reach the rear bulkhead, then down to the parcel shelf. I use the rubber hammer to tap over the front edges, and the shaft
of the hammer to push the edge into place along the back and sides. Then I work over the whole surface with the rubber to puxh it into the revers curve of
the wheelarch. The old ones were two bits sewn together to follow the curve, but these are one piece.
That's as much as I get done today. Apart from it getting late, I'm aldso knackered - I am getting too old for this, I hurt everywhere. Anyway, next is
the other wheelarch, then the panels behind the seats, then the wee panels behind the doors, and then the rear nbulkhead. Once I've done those, I'm going
to change the servo before I do the front carpets.
 Anyway, soon it's time to set off. Jim starts his engine and looks for the oil leak - and it looks like it's pishing out under the oil filter. It could be
the filter seal, the sump gasket, or the filter itself. Jim says at the last service, they sucked the oil out of the dipstick hole and didn't change the
filter - so it's 2 years old. We manage to borrow a trolley jack and lift the car, and Dave gets under, and diagnoses a small pinhole in the rusty oil filter.
 Dave uses a bit of self-adhesive neoprene foam, and sticks it over the hole, then fixes it in place with a handful of cable ties. Jim starts it up and
hooray - no leaky no more!
 When I get home, I put the car in the garage. That's probably it off the road now for a bit - I want to renew the carpets, fix the dash veneer, refurbish
the steering wheel, repaint the front of the chassis and the front suspension wishbones, and replace the brake servo and master cylinder. That should fill
the long dark winter nights!


