:: Diary - November 2024 ::
:: Tuesday, 5 November 2024 ::
Yesterday, we said our goodbyes to our friend Jim Tully.
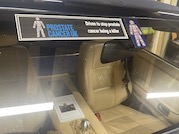 Dave, Adrian and I were honoured to be invited with our TVRs - the S of course, as that was our first introduction -to join Jim and his family as
he arrived at his funeral, and to say a few words about him, and what he meant to us. It was a beautiful service and a fitting tribute to a man
whose friendship started with silly wee TVRS, but which grew into something far more. Our wee group will never be the same.
This was read at his funeral yesterday. Says it all.
Death is Nothing At All
By Henry Scott-Holland
Death is nothing at all.
It does not count.
I have only slipped away into the next room.
Nothing has happened.
Everything remains exactly as it was.
I am I, and you are you,
and the old life that we lived so fondly together is untouched, unchanged.
Whatever we were to each other, that we are still.
Call me by the old familiar name.
Speak of me in the easy way which you always used.
Put no difference into your tone.
Wear no forced air of solemnity or sorrow.
Laugh as we always laughed at the little jokes that we enjoyed together.
Play, smile, think of me, pray for me.
Let my name be ever the household word that it always was.
Let it be spoken without an effort, without the ghost of a shadow upon it.
Life means all that it ever meant.
It is the same as it ever was.
There is absolute and unbroken continuity.
What is this death but a negligible accident?
Why should I be out of mind because I am out of sight?
I am but waiting for you, for an interval,
somewhere very near,
just round the corner.
All is well.
Nothing is hurt; nothing is lost.
One brief moment and all will be as it was before.
How we shall laugh at the trouble of parting when we meet again!
:: Wednesday, 6 November 2024 ::
I haven't been updating the website over the last 2 weeks, because, well, who cares about hearing about cars when there are far more important
things to think about.
For me, though, thinking is always better if it's accompanied by some occupational therapy. That was the reason that I set about fitting power
steering to the S 2 years ago, over the first annversary of my son's death. It's a distraction but also an opportunity to contemplate, remember
and be grateful for the times you had, rather than what you've lost.
This time, in defiance of my normal rule of "if it isn't broke, don't fix it", I decided to rebuild the Vixen's carburettor. It's normally idling
slightly too high, and there's no more adjustment left. I think it's just sticky linkages and bushes etc, because occasionally, the idle speed
drops right down until it hardly runs at all.
So last Tuesday, I took the carburettor off the car - a simple operation compared to the multiple complex surgery involved in removing a fuel
injection system. Disconnect the throttle cable and the choke cable, pull off the fuel hose, and take off 4 bolts that hold it onto the
manifold. Off.
I'm not even going to start to explain the intricacies of stripping a carburettor. It's been years since I did this, but Youtube and an exploded
parts diagram are your friends. The carb itself is relatively easy - it's the assortment of springs, washers and linkages that are the tricky bit
to get back in the right order!
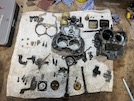 Here's all the bits laid out in order of removal, starting at the top left.
I cleaned up all the bits with carb cleaner and a wee brass brush, to remove all of the soot deposits. I also squirted it through all the jets and
internal passageways, to get them as clean as possible.
Reassembly then starts at the bottom right of the photo! I have a carb rebuild kit with all of the necessary gaskets and o-rings, and a new power
valve and accelerator pump, so those are fitted as I go along.
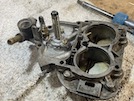 This shows the new power valve and needle valve fitted to the top part of the carb, with nice cleaned-up choke mechanism and flaps.
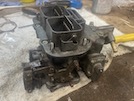 And here's the rebuilt carb. I should maybe have cleaned it better visually, with a bead blaster or something, but it didn't occur to me at the
time, and I'm not taking it apart again to do it now.
Next task is to get all that fitted back on to the car - again, relatively simple.
Then it's just a matter of getting it started and letting it warm up, and then setting the idle mixture and idle speed.
:: Wednesday, 6 November 2024 Part 2 ::
Let's move on to today...
As part of Jim’s funeral on Monday, Dave, Adrian and I were asked to follow him on his final journey. I can still hardly believe those words…
On the way there, and afterwards coming home, I find great difficulty in getting the car (the S) into first gear, then there’s a huge loud grindy
crunchy gear moment as I reverse into the driveway…
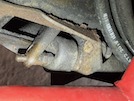 So today, I decide to check the clutch operation. The actuating lever at the gearbox has two holes - a large inner hole, and a smaller outer hole.
Research on Pistonheads on the ggood old internet suggests that the inner hole is for hydraulic clutches, and the outer hole is for cable clutches,
like on the Granada. The operating rod seems to be in the outside hole, and to be at a fair angle, It moves when you press the pedal, but it’s well
out of line!
Further research, however, unveils another PH page where somebody who knows what he's talking about (there are a few...) clarifies that the small
hole is for a clutch cable, and the big hole is to let the nipple on the end of the cable pass through before you fit it. That makes sense. Then he
says that the TVR clutch actuator rod should be fitted in the small hole. Confused again!
Now, I’ve never changed the clutch. I bought the car at 15 years old and 56,000 miles so chances are it was the original clutch. I’ve added another
48,000 miles, and I certainly haven’t changed it.
I have photos of the chassis refurb in 2019, the only work that has been carried out by anyone else in all the time I’ve owned it. They show the
engine and gearbox going in the chassis together, so as far as I can see, they weren’t split at the time. If they were, that would be an ideal time,
you would think, to stick a new clutch in. The invoices, though, list a lot of parts, but no clutch… so I’m pretty sure it’s still the original.
The slave cylinder and mounting bolts also look original - i.e. they are rusted to buggery.
I don’t want to pull the gearbox out unless I have to, because it’s a laborious job for one person, so I’m going to check that operating arm first.
First step is to empty the master cylinder. I could use a syringe (if I had one) or the vacuum bleeder, but I see an empty spray bottle within arms
reach, so I take off the top, pull out the nozzle and pipe, stick it in the cylinder, and use the trigger spray to suck fluid out of the cylinder
and into the neck of the bottle.
Then I remove the clutch pipe at both ends.
The slave cylinder is held on to the mounting plate with 2 bolts which, as I say above, are very rusty, and also pretty inaccessible. The mounting
plate, though, is held on with only one bolt through the bell housing, which is oily, but not rusty. It’s underneath the exhaust manifold though,
so that has to come off first.
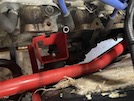 There’s three nuts and bolts at the front of the manifold, then 6 bolts holding the manifold to the cylinder head. Fortunately, they all come out
relatively freely. By “relatively freely” I mean that they are as fiddly as Emperor Nero during a fire, or Jimmy Carr doing his accounts, but at
least they’re not seized.
Then I can undo that one 17mm bolt and pull the slave cylinder out from underneath. It's out!
The next job is to undo the two mounting bolts and separate the cylinder from the bracket,
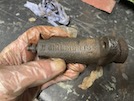 Here's the slave cylinder....
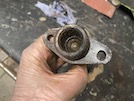 And here's how manky it is inside. I decide I'm just going to change that while it's off, so I order a new one.
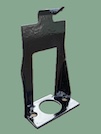 Then I clean up the mounting bracket, rub it down and give it a coat of primer, and then satin black paint.
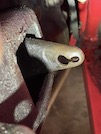 Then I examine the clutch release arm - it doesn't look as if it has worn through, it looks more like the clutch rod has always been in the wrong
place (or at least, for a long time...) the big hole is still round and not elongated, so I think that it doesn't need any repair - I would have
to take the gearbox out first to get at it, so let's try a new slave cylinder and re-adjusted rod first eh?
:: Thursday, 7 November 2024 ::
I decide to use a vernier to measure the clutch pushrod and the holes in the clutch arm.
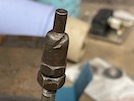 The diameter of the "ball" on the end of the rod is 11.5mm. The wee "nipple" on the end is 6mm diameter.
The small hole in the clutch arm is just over 6mm. Thee big hole is 11mm diameter. That means that the ball is only 0.5mm bigger than the big hole,
so that's going to wear through in no time. I think the actuator should be in the small hole, as it was.
Dave then sends me photos of his clutch arm which shows the rod in the smaller hole, and the arm at the same jaunty angle as mine was.
That seems to confirm how it should go back together then!
You can also see in that photo that over the last 113,000 miles, the actuator arm has worn a groove into the end of the rod. That's not good, and
also needs to be fixed.
Need the new slave cylinder first though!
:: Sunday, 10 November 2024 ::
Slave cylinder arrived yesterday! Didn't have time to fit it though...
First though, this actuator rod. I remove the ball-end and locknut, and look through my boxes of assorted shit to find a bolt with the same thread
- it's not metric, its 3/8 UNF I think. Whatever it is, I find that it's the same as a 1957 Chevrolet's valve cover bolts, of which I have a few
spare allen bolts. I tighten the end and locknut onto one of those, clamp it in the vice, and fill the groove with weld.
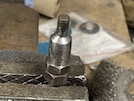 Then I clamp the bolt into an electric drill, clamp the drill in the vice, and use a hand file to re-shape the end. There's lovely for you.
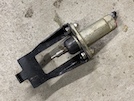 I adjust the rod to the length that it was (6 unused threads showing under the locknut) and refit it to the new slave cyinder, then bolt the cylinder
to the mounting bracket.
Oddly, although it came off like that, it doesn't look as if it's going to go back the same way... it just doesn't fit behind the clutch pivot arm.
So I separate them, and fit the bracket to the gearbox, and then fit the cylinder to the bracket. This is another fiddly job because accesss is
very limited between the gearbox, the body and the chassis, but eventually it's in place.
Problem is, that the clutch arm is now depressed around half an inch, even with the actuator rod wound in to its shortest, so there's absolutely
no play in the actuator rod, and the arm is obviously holding in the thrust bearing - which isn't going to last long if it's under constant pressure.
It seems that the clutch arm isn't properly engaged in the bellhousing pivot.
A second problem is that I can't get the clutch hydraulic pipe connector to engage in the threads in the slave cylinder. Is the thread damaged?
Is it the right thread? I can't see when the cylinder is on the car...
I need to start again. I've been at this for bleeding (literally) hours today, I'm covered in muck, grease and bruises, and I've got absolutely
bloody nowhere. Fuck, fuck and thrice fuck.
I briefly contemplate the jerrycan full of fuel, and the nearby barbecue lighter, but decide to resist that particular temptation (just!), and go
inside for an extensive wash-up.
Tomorrow's a new day (already filled with other stuff to do mind, but hey-ho...)
:: Wednesday, 13 November 2024 ::
There is a type of man who courts danger. Not for him, the day-to-day boredom of watching TV and getting pished. No, this man seeks opportunities
to test his mettle - even if only against himself. This man's life is constant challenge of tests and trials, each to be completed before moving on
to the next.
This type of man maintains his own TVR.
But only because all the petrol had evaporated before I could get the matches to light...
I removed the clutch slave cylinder and bracket again today, and then had a peek inside the bellhousing with a wee light and a mirror. I discovered
that the clutch arm has detached itself from the back of the thrust bearing.
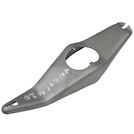 This shows a clutch arm (off a Cortina but the principle is the same) with two wee prongs in the centre that are supposed to clip into slots in the
bearing.
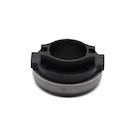 And this shows the bearing.
If the arm isn't in the slots, it's too far back, and won't engage with the slave cylinder at the outer end. The only way to fix this is... to remove
the gearbox to get inside the bellhousing. This is, as they say in polite dinner parties, a right bugger.
I also try the pipe connector now that I can see what I'm doing. I discover that the pipe has different connectrs on each end. They are the same
diameter, but the master cylinder end has 20 threads per inch, and the slave end has 25 or 26 turns per inch. The new slave cylinder has 20 tpi. I
need to change that connector before I put it back together. Which might be a while...
And in this manner, new challenges are created - and all because the slave cylinder was originally rusted inside, and not reachng full travel to
disengage the clutch.
I need to take the gearbox out...
On the bright side, I already have a new clutch and plate, that I would be as well to fix at the same time. I will also have better access to change
the gear lever saddle, which is worn and rattling a wee bit, and I couldn't get at it with the box in the car.
Every cloud has a silver lining I suppose!
:: Friday, 15 November 2024 ::
There is a type of man who has procrastinated for long enough, and needs to get on with fixing this clutch. Gearbox removal mode: ON.
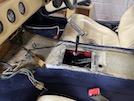 First the easy bit, before lying upside-down. I remove the centre console - two wee screws at the back, unplug 3 electric connections and the aerial
from the back of the radio, and that's done! Then I can remove the gearknob, the leather gaiter and then 6 screws holding the rubber gaiter
underneath.
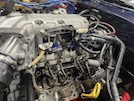 Then round to the engine bay - I remove the left-hand spark plug leads, then remove the distributor cap, the rotor arm and the left-hand valve cover.
This is all to allow the engine to tilt backard if necessary when I'm wagggling the gearbox off the back.
Right - next task is to remove the exhaust. I remove the 3 nuts and bolts holding the right hand side to the manifold (the left manifold is already
off, remember, to give access to the clutch slave). Now it's crawl underneath time! I prop up the front of the exhaust on a box, then undo the two
middle bolts holding the silencer up, and then the single bolt at the rear, holdig the exhaust up first, then lowering the front and the rear, and
pulling it out the back.
The joints at the "hockey sticks" are both loose - too many speed bumps scraped over!
Next I remove the starter motor - disconnect the battery and then the two cable connections to the starter motor. The motor is held to the bellhousing
with 2 x 13mm bolts. The top one is a pain to access but I get it with a socket, a ratchet and an assortment of extension bars - not too long or you
hit the chassis, not to short or you don't clear the motor.
Right - next are the propshaft bolts. They need a 15mm spanner and they are very very effing tight. You have to jam the propshaft with a bar or
something to stop it turning while you welly some torque into loosening the bolts, one at a time. Remember to mark the position of the propshaft
and pinion so that you can put them back together in the same place. I should have mentioned that first, eh?
With the bolts all off, you simply pull the shaft out of the gearbox, like you did with the Vixen. Except no, wait - there's a crossbrace on the
chassis that's in the way! I didn't read this up earlier, so I don't know whether to drop the diff to extract the propshaft above it, or lift the
diff to pull the propshaft back underneath it. The first way looks more likely (and easier).
My dilemma is resolved by the proximity of dinner time, which permits another few hours of procrastination until tomorrow at least...
A quick check online suggests that dropping the diff slightly is indeed the preferred option though!
Then all that remains will be disconnecting the speedo sensor and reverse light, removing the gearbox mounting and disconnecting the box from the back
of the engine. Time to phone a friend!
:: Sunday, 17 November 2024 ::
You know how I said on Friday that "All that remains will be "disconnecting the speedo sensor and reverse light, removing the gearbox mounting and
disconnecting the box from the back of the engine"? I may have slighty underestimated what was involved...
The first preliminary, incidental, should only take a minute task, is taking out the propshaft. It's already disconnected, how hard can it be?
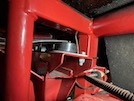 The online advice is to drop the front of the diff. This sounds easy - I put a jack under the nose of the diff to support it, then undo the two big
bushes holding the diff frame to the chassis. Then I can lower the diff nose, and lift the back of the propshaft over the frame.
No, I can't - the frame tips forward with the diff, then wedges against the chassis and the propshaft doesn't fit over it.
So next, I decide to loosen the diff in the frame - it's held in with two bolts on each side. I loosen the top rear bolts, and remove the bottom
front bolts. The offside one fouls against the chassis - I have to remove that top mount in the photo, jack the diff up slightly higher, remove the
bolt and then let the jack down again. I can then pull the diff down a couple of inches, the frame tips back, push the diff half-way back up and
the propshaaft (just) wiggles backwards into the space above the frame.
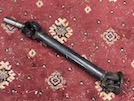 It's off! It's off! The bastard's off! This simple task has taken me bleeding hours and exhausted my poor wee engineering brain...
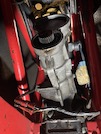 Here's the back of the gearbox. The seal looks ok but I know it's been leaking, so given the amount of effort so far to get to it, it's getting
changed before the gearbox goes back in!
Then I disconnect the wiring to the reverse light switch and the speedo sensor, and tuck the wires out of the way for now.
So now the back of the gearbox is held up by the chassis mounting. Fortunately, because mine is an S3C, I have the removable mounting crossmember,
so I don't need an angle grinder for this bit. The bracket is held in place by two bolts on each end, then the mounting is held to the bracket by
two long bolts through a spacer. I support the gearbox with the jack and take all of those out.
At this point, I was expecting the bracket to just fall out, but it doesn't - it's held in tighter than a 50p piece in an Aberdonian's hand on poppy
day. I try pulling on it and levering it with a variety of crowbars of ever-increasing different sizes, but nope...
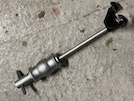 I end up employing this - it's a slide hammer for removing internal bearings, with half of a spring compressor bolted to the business end. That
does the trick!
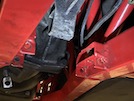 Then I remove the big bolt through the bottom of the mounting, and remove that from the gearbox.
I support the back of the gearbox with a thick bit of wood under the tailshaft, sitting on the chassis.
Now the box is only held on with a few bolts to the back of the engine, so NOW I'm ready for gearbox removal when I can employ a glamorous assistant.
Maybe I'll phone Adrian and just say that I need help bleeding the clutch...
:: Thursday, 21 November 2024 ::
I remember many years ago, watching BBC Sports Personality of the Year, and one of the guests (or maybe a winner in one of the categories) was a
rally driver, can't remember who it was... this was before Colin McRae and I don't think it was his dad Jimmy. No, it was a Ford driver - not Roger
Clark, he was earlier. Maybe Malcolm Wilson? Dunno, can't remember.
What I do remember, is that as part of that spot, they had the Ford rally team change a Mk 2 Escort's gearbox in 8 and a half minutes. There was
about a dozen of them on it, mind, but they drove the car in, then disppeaared under it and whipped that gearbox out in no time.,,
Well, today, Dave came out to help me with the TVR's. We took slightly longer than 8 minutes, but that was only because of lack of practice... On
the other hand, I had already removed every bolt except 3 by the time he got here, so it should have been a piece of piss.
Wrong.
We got the 3 remaining bellhousing bolts out easy enough.
We dropped the gearbox down and then removed the reverse light switch because it was catching on the bottom of the handbrake lever when you pulled
the gearbox back.
Then we had to remove the gearlever which was a catch-22 - you need to take the gear lever off to get the box out, you need to take the bolts out
to get the lever out, and you need to take the box out to get at the stupid torx bolts without chewing them to bits. Two came out, one had to be
loosened with a chisel...
Then we jacked up the front of the engine, and managed to figure out exactly how much to turn the box (to within about 1 degree) so that it fitted
down through the space in the chassis.
All the while Dave is underneath, he's got oil running out of the tailshaft onto his leg... and the floor under his arse... But like a good boy
scout, he persevered...
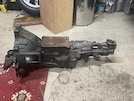 And here we are - one Ford Type 9 gearbox, and it's only taken us an hour... (plus who knows how many hours over the past week just taking bits off
to get it to this stage.)
It looks like the front oil seal is leaking, the inside of the bellhousing has fairly fresh oil running down it. Maybe the rear crankshaft oil seal
is leaking too - needs to be checked. I also notice that the clutch release lever is detached from the thrust bearing AND has come out of the
locating pin at the far end.
Then we have a blether (and a cake!) for about an hour and a half. Then it's lunch time...
After Dave has left, I set out to clean up the gearbox with engine cleaner and a nylon brush. Then I find I can't rinse it because my hose is full
of frozen ice, so I use a wee hand spray of water and a mile of paper towels.
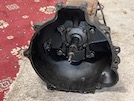 That's a bit better, but it's still manky - I'll need to wait until the hose thaws out, and get the pressure washer on it!
I measure the input shaft and order a new spigot bearing (there's two different diameters, so make sure I get the right one!).
That's enough for today - I have to prepare for some paying work tomorrow!
:: Saturday, 23 November 2024 ::
A few wee jobs to do on the gearbox today, while I'm waiting on a new spigot bearing.
Task 1 - the plastic saddle in the gearlever. I had a go at this in October 2014 but couldn't get the third feckin stupid torx screw out with the box
still in the car. Now the gearlever is out, it should be a piece of piss! I couldn't find the saddle I bought then though, so I bought another one.
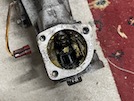 Here it is - it just clips over the top of the selector shaft. I get a hold of the old one with long nose pliers, and pull it off. Then a dab of
grease on the new one, and clip it on.
Then I decide to fit the lever to try it, while the box is out of the car (better to find any problems now, than after you've hefted half a tonne
of gearbox into position, to find you have to take it out again, eh?). I'm not refitting those stupid torx screws again though - I go to have a
dig for some short M8 cap bolts. The cap bolts that I have are all M6, so won't fit... but among them is the 2014 gear lever saddle, for some reason.
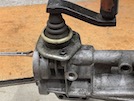 Gear lever refitted, moves nice and firmly to all gear positions, hardly any slack at all now. Task 1 completed!
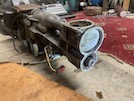 Task 2 - gearbox rear oil seal. This is the same process as the Vixen one last month (but sitting up instead of lying flat) - lever the old one out,
drift the new one in.
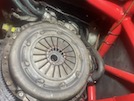 Task 3 - Remove the clutch from the flywheel. It's held on with 6 x M8 bolts around the pressure plate. Break each one loose, working opposite -
i.e. 12 o'clock, 6 o'clock, 2 o'clock, 8 o'clock, 4 o'clock, 10 o'clock, then go round again loosening each one a bit at a time until the pressure
plate is loose, then detach it from the flywheel (with a little leverage to get it off the dowels), noting which way round the clutch plate is fitted.
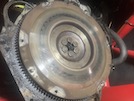 Here's the back of the flywheel before cleaning off the clutch dust - no scores, but maybe a trace of oil contamination?
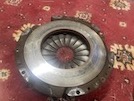 and here's the pressure plate... again maybe just a smear of oil contamination?
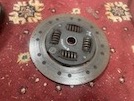 and the friction plate (flywheel side upwards). To be honest, it's not as badly worn as I expected, if this is indeed a 100,000 mile clutch. As I
said before, I haven't changed it, and I've done 50,000 of those miles... Unless it was changed (and not mentioned on the invoice) during the
chassis rebuild in 2020.
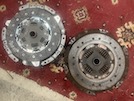 Here's the old and new clutches together - you can see some marking on the flywheel face of the old one, but I don't think that looks too serious.
Task 4 - remove the spigot bearing. I have an internal bearing puller that I bought ages ago for something else (can't remember what) so I fix that
into the spigot, tighten it up and slide hammer it out. Forgt to take a photo though!
Finally for today, I try the new clutch plate on the gearbox splines. Many many years ago, I struggled to refit a gearbox to a Ford Cortina after
a clutch change, and couldn't figure out why it just wouldn't go on - then found out that the new clutch had the wrong spline pattern and the input
shaft wouldn't go through. Again, better to find any problems now, than after you've tried to lift the gearbox into position.
I can't start any reassembly until I fit the new spigot bearing - which is still somewhere in Postman Pat's van.
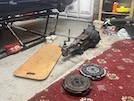 So that's it for today - I can't clean the gearbox until the hose defrosts, which might not be until March, given that it has snowed today. There must
be nearly an inch, I'm stranded in the house, there's been no emergency services or bread / milk / bog roll supplies, no national TV appeals,
nobody cares. The weather forecast says that these conditions are likely to last until at least tomorrow, when a rise in temperatures, combined with
howling wind and bucketing rain, are predicted to clear all the snow by morning. How am I supposed to survive until then?
:: Sunday, 24 November 2024 ::
Well, as forecast, it rained all night so the snow is all gone!
I drag the gearbox out of the garage and give it a pressure wash, being careful to avoid the rear output shaft opening.
While that's drying, I get under the car to inspect the flywheel for contamination. I give it a wee rub over with sandpaper, to take off any surface
marks, and it comes up nice and shiny.
While I'm there, I also check the engine rear cranksfat seal to see where the oil in the bellhousing is coming from. The back of the sump is pretty
dry - a slight oil fim but not bad. The back of the flywheel is bone dry... so it's unlikely to be the crankshaft seal. Must be the front oil seal
in the gearbox - there was oil running down inside the bellhousing when we moved the gearbox out from under the car.
Back to the gearbox - when we were removing it, there were a couple of webs on the tailshaft that were just catching on the mounting bracket on the
chassis.
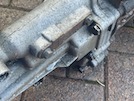 5 minutes with an angle grinder removes this...
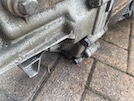 to this, and
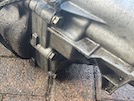 this...
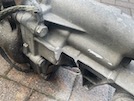 to this. It's not much, but it should make refitting just a little easier eh?
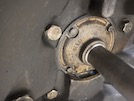 Right, this front oil seal. To get to it, you have to take off this cover, which is held on with 10mm bolts. Yopu can't get a socket on the bottom
two though, because theres a gearbox web that gets in the way... so you have to use a wee open-ended spanner
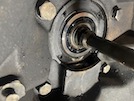 With that housing off, you can see where oil has been leaking down.
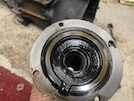 And here...
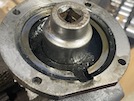 so we get that housing in the vice, with a cloth wrapped several times around the shaft to prevent damage, and lever out the old seal, then drift
in the new one with a socket that's the right size..
I go to refit it to the front of the gearbox, and suddenly I realise - hold on a minute, boy I say boy, hold the cotton-pickin' bus there boy,
didn't there oughta be a gasket in there as well boy? I check my old Granada Haynes manual, which has an exploded gearbox diagram, and yes, there
is. I've got a newer Sierra Manual as well, but it tells you bothing - Haynes have really dumbed-down their manuals to the most elementary tasks.
Anyway, it seems that I now need a gasket...
:: Wednesday, 27 November 2024 ::
Postman Pat finally delivered the gearbox nose seal and the spigot bearing on Monday. Yesterday I had to go to Dundee for work (boo...) so today it's
back to the wee car.
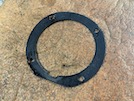 First thing that I notice is that the gearbox nose does have a seal in there - it's a rubber seal that's old and a bit crispy...
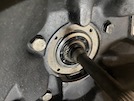 A nice new cork gasket should do the job!
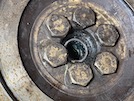 Next task is to knock the new spigot bearing into the end of the crankshat with a wee bit of grease and a socket of the right diameter as a drift.
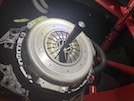 Then I can refit the clutch, using Jock's alignment tool to centralise it, and then tightening up the bolts gradually in a cross-pattern until I get
to 20 lb-ft (yes I used a proper torque wrench and everything - AND I used it correctly - tighten until it clicks once, then go round all the bolts
again, and then a third time, to make sure they're all even).
I remember watching a kwik-fitter tighten wheel nuts with a torque wrench by yanking on it until it clicked, nd then yanking harder another few times
until they were well over-tightened. I attempted to explain this to the manager, but he had no clue how to work a torque wrench either. Silly yanker.
 Anyway - with the clutch fitted to the engine, we're just about ready to refit the gearbox!
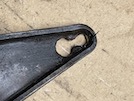 One more thing - the clutch arm. I think I might weld up the "keyhole" shape so that the operating rod can't slip from the wee hole to the big one,
and then punch right through.
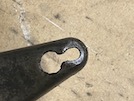 To be fair, though, it doesn't look like it's ready to break through, but the wee hole is quite elongated, and I don't want to leave it - if I need
to fix that later, I would have to take the box out again to get to it with a welder, and well, I'd rather not...
(edit: Later on, I looked at clutch arms for sale online, and even brand new ones have an oval hole, not a round one. They are also bloody
expensive! I don't think there's anything visibly wrong with mine, so I think it's going back as it is, after a clean-up.)
 Dave, Adrian and I were honoured to be invited with our TVRs - the S of course, as that was our first introduction -to join Jim and his family as
he arrived at his funeral, and to say a few words about him, and what he meant to us. It was a beautiful service and a fitting tribute to a man
whose friendship started with silly wee TVRS, but which grew into something far more. Our wee group will never be the same.


