:: Diary - December 2024 ::
:: Monday, 2 December 2024 ::
TVR Car Club meeting day yesterday - our first without Jim. It was a very nice Christmas menu, good chat and all, but there were a few times when I
was all to aware there ws something missing.
All through November, I've been doing a sponsored walk in aid of Prostate Cancer Research. I was able to tell the group yesterday that I've raised
just on £1,500 including Gift Aid, dedicated to Jim. I am truly overwhelmed by the support of friends and family.
I was telling Dave and Eric about my gearbox woes. Eric has his Tasmin's engine in bits because the cylinder head gaskets were leaking in a couple
of places. Dave's Griffith engine is also in bits - lots of bits - but he's hoping to get that back in a week or so... You're never done when you
own a TVR!
Dave's coming back this week to help me lift this gearbox back in, so today I complete another couple of final wee jobs to get it ready.
First I take out the oil filler plug and turn it on its side to drain the last of the gearbox oil out of it.
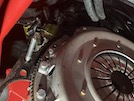 While that's draining, I make up a couple of guide pins to fit into the back of the engine block, to help guide the gearbox into place, and also to
hold the engine back plate while we do that. Pretty simple - find a couple of longer bolts with the correct (M10) thread, cut them down to around 4
inches, round off the ends, and then cut a screwdriver slot just in case they are too tight to hand turn back out again. You can see one in place
here, beside the flywheel and clutch.
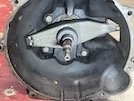 Then I put back the oil filler plug, turn the gearbox upright and refit the clutch arm and new clutch release bearing.
So that's it ready to refit to the car!
:: Friday, 6 December 2024 ::
Welcome to the latest episode of "Car Mechanics for People Who Really Ought to Realise that They Are Too Feckin' Old for this Sort of Shit".
Chapter 2,347 - "Make sure your Chiropractor is set up on Speed-dial on your Phone"
Dave came up yesterday morning to help with re-installing the gearbox. It's an awkwardly-shaped heavy lump, and so is the gearbox.
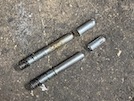 I had made up these guide pins to screw into the two bottom mounting holes in the back of the engine - don't make them too long (as I did initially)
because then there isn't enough space between the bellhousing and the bulkhead to push the box into place - this photo shows them with about 1/2 an
inch cut off.
Then with Dave underneath to lift it, and me up top to hold up the tailshaft with a webbing strap, we (well, he) managed to lift it into position
on to those studs. We got another couple of bolts started in their threads, supported the back of the box on a bit of wood across the chassis rails,
and then replaced the other bolts then the guide studs (thankful for the screwdriver slots in the ends) and tightened up all the bellhousing bolts.
Mission accomplished for the day! It only took us 45 minutes or so, but I had to be cleaned up and off to a work meeting in the afternoon, so that's
enough.
So today, it's time to start refitting all the other bits... and there appears to be lots of them!
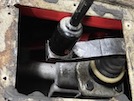 I start with the gear lever - I lower the gearbox slightly and insert the lever, and then insert the bolts and tighten them up. I have to start the
bolts from underneath though, because the hole in the tunnel isn't big enough for a hand holding a bolt...
Next, I lift the gearbox back up into place, and insert the rubber mounting over the brackets and under the box. It's a tight fit but eventually,
after some strategic jiggling and joggling, it goes into place. I bolt it up into the gearbox, and then insert the cross-brace, which was a tight
fit to remove, so needs a bit of percussive persuasion to go back into place so that I can insert the 4 holding bolts and tighten them up, not
forgetting the gearbox earth strap!
 Then I can insert the two long bolts down from the top, through the mounting and the bracket, and lower the jack under the tailshaft, then tighten
up those two nuts as well. Gearbox in and supported! I'll need to paint over the hammer marks in that bracket though...
Next, the propshaft. I've had the front of the diff supported on another webbing strap, so as not to put too much strain on the diff rear mounting.
I remove the strap and lower the diff and rotate its supporting cage downwards... then put the propshaft up from the front, into the gap, and engage
the other end in the splines in the back of the gearbox, and leave the propshaft sitting on the chassis for now...
Then I rotate the diff carrier back down to align with the threaded holes in the diff, and insert one of the front mounting bolts. I can't get the
other one in because the chassis is in the way, so I put the jack under the diff and lift the whole assembly up, until that second bolt is clear of
the chassis... insert bolt, then tighten all 4 mouning bolts up...
I had to take the right-hand diff rubber mounting off to get that other bolt out in the first p[ace, so now I have to lower the diff again to
replace that mounting. Then jack the whole lot up for the final time, and insert the diff carrier mounting bolts upwards through the rubber mounts
and into the chassis.
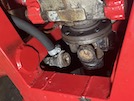 Now I can insert the 4 propshaft bolts, making sure to align the propshaft to the marks I made on the pinion flange.
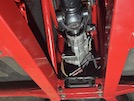 Back to the gearbox and I reconnect the speedo wiring (the red connector dangling here - that will be tie-wrapped up!) and insert the reverse light
switch (the black wire up the right hand side of the gearbox here).
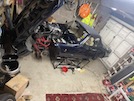 Here's a wee view from high up in the gitcave. The reason that I'm high up in the gitcave is because one of my LED striplights has been a bit
intermitent for the last few days, but stopped working altogether today, and I'm having a look so that I can order a new one that's compatible. I
might be able to fix the broken one, mind, but that's for another day, I've been at this for hours and I'm knackered...
All in all, though, a relatively productive day, between a couple of work distractions (fortunately by phone, not video call, so no need to change)
and going to Halfords for gear oil and brake fluid...
So we're ready for more progress tomorrow! Yes we are. No arguing at the back there!
:: Saturday, 7 December 2024 ::
First things first - I think I've sold the Porsche. Guy came out on Tuesday and had a look over the car, then came back today with his mechanic
pal. So we met along at the farm, they had a good look round the car, and then asked to take it for a drive. I said that I wasn't too keen on them
both going off in my car, but they persuaded me for two reasons:
1. They left me the keys for his Porsche Carrera GTS. I looked that up after the last time he was here, and they are being advertised at 60 grand.
If he doesn't come back, I'll drive it into the barn and he won't be able to recover it later; and
2. His pal says that he used to be a mechanic, but shows me a Police Scotland warrant card for his current role as a Chief Superindendent...
The card might still be fake (although it doesn't look it) but I still have his car! So off they go...
And so a deal is done - not as much as I hoped for, but enough for what I reassonably expected. And as I always say, 90% of something is worth
more than 100% of hee-haw, so we've agreed a deal, and he's coming back tomorrow for a final look at the paperwork, with a deposit.
And so a chapter ends... I had always wanted one, I had one, and I've now sold it for enough that it has cost me nothing for 12 years.
So... back to the TVR and its gearbox...
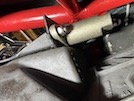 The next step is to replace the clutch slave cylinder. I build it onto is bracket with the two holding bolts, and then clip the bracket into the
bellhousing, and secure it with the bolt through the bellhousing at the front. Then I adjust the pushrod until there's only the tiniest bit of free
play.
I can't fit the clutch hydraulic pipe though, because the one I took off has the wrong thread on the fitting at the slave cylinder (the new cylinder
has a different thread from the cylinder I took off) and there's a sharp bend right behind the old fitting thet means that I can't just cut it back
and put a new fitting on. It's 1/4 inch pipe (not the 3/16ths that the brake lines are) and imperial fittings... I have plenty of the necessary pipe,
but I'm waiting for new fittings to be delivered...
 I've just remembered as I write this that I only adjusted the pushrod finger tight - I forgot to go back and nip up the locknut with a couple of wee
spanners. Back on the list for next time!
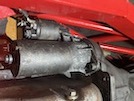 Then I replace the starter motor. Pretty simple - hold it into the bellhousing from underneath, and insert the bottom bolt and get it started...
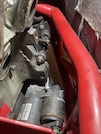 then insert the top bolt from above and tighten them both up. Then connect the two electrical wires.
Next step is the nearside exhaust manifold, which I am replacing with new gaskets. Getting the 6 bolts started is always a fiddly task, but
eventually, just before my fingers go numb with the cold and the awkward angle needed, they are all in, through the gaskets, and tightened, and the
lambda sensor wiring reconnected.
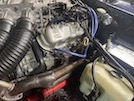 Then the distributor cap, after I have rummaged around trying to remember where I put the rotor arm (not helped by the missing ceiling light in this
corner of the garage), and then the valve cover and oil cap.
Then I go around the engine bay tie-wrapping any wiring that I have loosened, then underneath to tie-wrap the reverse light and speedo sensor wiring
to the chassis and gearbox.
See when I read all that, it doesn't look like very much, but in reality, it took me bleeding hours today - mainly because of a series of texts from
the potential (at that time) Porsche buyer, but also looking for newer bolts to replace old rusty ones that I took off, etc.
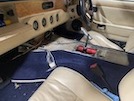 The next tasks will be to refill the gearbox with oil, then put back the centre console and gaiters. I also need to tighten up the clutch actuator
arm.
Then I need to make a new hydraulic pipe when the new end fittings arrive, then bleed the clutch and refit the exhaust - and that should be it!
:: Tuesday, 10 December 2024 ::
Life has been a bit busy for the last couple of days, between dealing with work stuff, christmas decoration stuff (our back garden is like Blackpool
illuminations now) and Porsche sale stuff, so I haven't been back to the car, except for a minute on Sunday. I had a crisis of confidence and
thought that I hadn't put the plug leads back in the right order after replacing the distributor cap. Turned out that they were right, though...
So where are we today? We're still waiting for pipe fittngs for the clutch pipe, that's where we are...
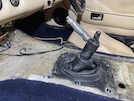 But what we can do, is put back the centre console and gear lever. First replace the rubber boot (ford Transit Mk1 apparently but now unobtainable).
Then there's two electrical plugs up behind the glove box - a 3-pin one, and one that has about 18 pins (I didn't count them...) that connects all
the console switches and dials. With those connected, put the leather gaiter over the lever, then I can push the console back into place under the
dash, making sure to pull the radio wiring and the aerial cable through the gap. The console is fixed in with two screws at the rear.
Then I pack all of the electrical gubbins in the footwell on top of the footwell cover, and shove that up behind the dash into place. There's no
finesse to this, it's a bit like trying to apply first aid surgery to a disembowelled Dalek.
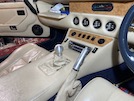 Finally, fit the gearknob and tadaaaa!
Then I get underneath for two jobs. First one is to tighten the locknut on the clutch actuator arm, that I forgot to do the other day...
Then second, fill the gearbox with oil. Instead of farting about with wee vacuum pumps and all that malarkey, I spent £10 and bought a big
fuck-off syringe that holds a pint at a time and would keep Keith Richards buzzing for a fortnight. You fill it with gear oil, skoosh it in (twice)
and then a wee bit more until it reaches the level of the filler plug. Plug back in, and nary a drop spilled!
I connect up the battery temporarily, and check that the switches and dials (and the radio) in the centre console all work.
Only the clutch hydraulics to sort now, where's them fittings?
:: Saturday, 14 December 2024 ::
Well, the brake (clutch) pipe fittings arrived on Thursday, but I haven't been out to the car - it has been feezing cold, but also, I've just been
busy with outh stuff - a bit of work, Christmassy type stuff, and also - I sold the Porsche! It left here on Wednesday night after a transaction
that occupied far too much of the day, including a joint trip to the bank to transfer some of his cash to me...
But the deal was done, and I watched my car go round the corner from my house for the last time - for the second time this year, because I only
sold the Chevy in March! It's a strange feeling selling a car privately - I've owned dozens of cars in my life, but not sold many like this, I've
tended to trade them in, and then the excitement of the new car overcomes any wee remorse that you might have felt. But this time I honestly wonder
if I have doe the right thing... even driving it here from the farm for viewing last week, I was thinking "ths is great, this..."
The big question - will I buy something else? I have no idea. I have no plans, but if something interesting comes along, I might.
Back to the TVR today though, and finish this clutch change. First task is to make up the new pipe from the master cylinder to the slave. I try the
fittings in both cylinders as a final check that they are the right size and thread, and then I cut a bit of pipe to the same length as the old one
(plus a wee bit to allow for flaring), slide the fittings on, and flare the ends.
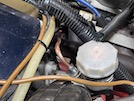 Then it's a matter of bending the master cylinder end to shape using an old box spanner as a former, and bending it a little at a time to the "hook"
shape, then a reverse bend to go down the side of the bulkhead,
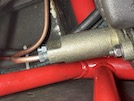 Then it bends over the top of the gearbox, with another formed u-bend to go into the slave cylinder.
That all sounds very easy - but in reality, it took many many cycles of "crawl under car - trial fit - remove - come back out - bend a bit more -
try again" until both ends fitted in place, and it followed a sensible route... No photos of this stage because, well, I was concentrating!
I loosen the bleed nipple and fill the reservoir with fluid, and let it bleed through, and tighten the nipple again. When I try the clutch, the arm
only moves about an inch, so I think I still need to bleed it properly through, just to shift any air bubbles that might be stuck in high points
along the pipe (like the top of that curve out of the master cylinder, which looks like it might be higher than the fluid level in the cylinder
itself))
Then it's time to refit the exhaust - 6 wee nuts and bolts on to the manifolds, 2 bigger nuts and bolts on the sides of the silencer then one bolt
at the back.
Finally, refit the wheels, lower the car and tighten the wheel nuts.
I start the car up, and it does its usual "running like a wet fart till it's warmed up" - but it won't go into gear... hopefully, that's just the
clutch needing bled as I suspect. Don't have time to lift the car again and do that today though.
:: Sunday, 15 December 2024 ::
She goes! Got back underneath this morning and bled the clutch with my vacuum pump. Lower it back to the ground, jump in, start it up and reverse
it out of the garage.
Then it's time to tidy up all the tools, oil, brake fittings, old bits etc that are lying around! This takes ages, partly because I'm pootering about
with stuff I find... like broken christmas lights that need fixing... sorting out stuff to take to the farm...
Oh and that LED strip light that was flickering, but isn't working at all now, right back in the darkest corner of the garage. While the car's out
of the garage, I can get a ladder under and test that it's getting voltage, so it's definitely the light. Time to order a new one - they are so
cheap that it's not worth repairing.
But the gearbox is in, it works, and all is well! Nearly. Again, there's something deeply satisfying about doing a job like this yourself (well,
with Dave's help). It doesn't always feel like it while you're in the process, but when it's all done, it's just great! It's over 40 years since I
last pulled a gearbox out of a car (a Ford of very similar mechanicals), although it seemed a lot easier then - something to do with age maybe?
:: Monday, 16 December 2024 ::
I started today by moving the car outside so that I can get the ladder up to install a new strip light in the garage ceiling. Much better!
Next, I decide to have a look at the misfire. I check all the plug leads and firing order again, but all seems ok. So then I take out all the plugs
and discover that they are all black. I don't have spare plugs, so I heat the ends with a blowlamp and then use a brass brush to clean the plug
electrodes, and put the plugs back.
Now it starts and runs much better!
Then I have another go at bleeding the clutch. It works, but it's very light and very near the floor... there's still air in there.
Reaching the bleed nipple on the TVR clutch is a pain... it's above the clutch pipe connection with limited space between the chassis and gearbox.
Some owners have solved this dilemma by putting the cylinder in the other way, so the bleed nipple is on the bottom. That definitely makes the
operation easier. It also makes the bleed nipple bloody useless though, because you'll never get all the air out.
There are 4 basic methods for bleeding:
No 1 requires an assistant to push the pedal while you loosen and tighten the bleed nipple. That's good on brakes, but awkward when you can't open
and close the nipple easily. This was my first method today, but it ended up worse than when I started.
No 2 uses a vacuum pump - again this normally works well on brakes, but again, it's awkward trying to keep the pump and associated fittings on the
nipple, while running round to check that you haven't emptied the reservoir.
No 3 is the Gunson's Easy Bleeder - basically you fit a pressure cap to the reservoir, and pressurise the system with air from a tyre at around
15psi. I bought one of these donkey's years ago, but I've never managed to get it to work without frothing brake fluid all over the car. I do have
a cap that fits the clutch reservoir though, so I give that a try. Nope, fothy brake fluid everywhere.
Worse than that,., the fluid in the reservoir is now like foam, and full of tiny bubbles. I drain some of that off and fill with fresh fluid.
Method 4 is a variation of no 1 - a pipe on the nipple, but with a wee non-return valve on the other end. Put some brake fluid in a jar, enough to
cover the valve, open the nipple slightly, and pump the pedal yourself. From here, you can see the fluid in the reservoir go down with each stroke,
so you know when to top it up. I pump the reservoir nearly empty twice, and then back underneath to tighten the nipple.
Start the engine and try it - now at last, gear selection is easy. Sorted!
I've also added a "how to chanage the clutch" article to the website, in the menus over to the left there!
:: Thursday, 19 December 2024 ::
Finally got a chance to take the TVR out and try the clutch - the roads are dry, and (at least in the street where I live) unsalted, so I start the
car up and have a wee run down the hill and back up. All gears seem to be engaging properly, and the gearlever action is nice and slick. The clutch
biting point doesn't seem unnaturally low or high, so I think I'll call that a success! I forgot if the speedo was working though - I'm sure it was!
:: Monday, 23 December 2024 ::
Decided to indulge my OCD and give the chassis a bit of a clean with some spray cleaner/degreaser and a cloth. I started at the back, and worked my
way forwards. Then I touched in some tiny chips and scrapes with red hammerite.
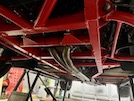 It looks not too bad!
Years ago, not long after I first got the car, I made up little mudflaps to stick onto the bottom of the front inner wings, just to protect the
chassis from stuff thrown u by the front tyres. Today I notice that the rivets had virtually rusted away, so there wasn't much holding them on.
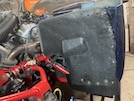 I remove the inner wings, and drill out what's left of the rivets. Then I clean everything up, and insert new rivets and washers.
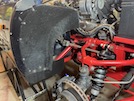 I also have to repair one of the screw holes into the tub with fibreglass resin, then drill a new hole out. But that's them both repaired for
another 20 years!
I also notice that the front tyres are wearing slightly more on the inside than the outside - the difference is less than 1mm but still - this
suggests that there's slightly too much toe-out, so I loosen the locknuts on the steering arms, give them both a wee tweak inwards, and tighten
them again, then make sure that I turn the gaiters so that they're not twisted.
I also notice that the sag in the driver's door is getting worse - I really should do something about that, but last time I tried (in June 2011!)
I couldn't turn the top hinge bolt, so I think it mght be seized - and if that pulls out of the body, it's not an easy repair...
Meanwhile the Vixen rests alone along at the farm. I don't think it's needing any jobs, although the chassis could probably do with a clean and
touch-up.
Eric has been converting his Tasmin from a 4-speed to a 5-speed gearbox, and says that they are both the same length to within half an
inch or so - which is what I concluded when I measured them. So it's not that complicated a swap, provided you get a gearbox with the correct
length of input shaft, with the right number and size of clutch splines, and the right diameter of pinion shaft. Oh and the right bellhousing for
a crossflow with a cable clutch. I'm not sure if it's worth it.
:: Friday, 27 December 2024 ::
Merry Christmas to both our readers!
There's so much I could say about Christmas. It was lovely to meet all of our family, particularly last Wednesday where everyone was here for a
get-together with copious snacks, and an excessive amount of Christmas lights plugged into every available socket in the garage, with extension
leads etc all over the place. Somehow, although you try to make Christmas special for the people around you, you just know that there's big holes
in that circle, that can never be refilled, and that there are people everywhere who are feeling exactly the same thing.
Today, though, it's back to work for a meeting in the Borders for a new job start, and an hour's drive each way to contemplate the next job to
undertake on the TVR. I've spent a week being a glutton for turkey, Cadbury's Heroes, Quality Street and Toblerone, so it's time to go back to being
a glutton for punishment! And what better way, than to try to get the driver's door off to look at these hinges!
My last attempt at this was in June 2011, when I managed to get the bottom hinge out and change the bush, but couldn't move the bolt through the
top hinge, and didn't want to risk pulling the pivot "bobbin" out of the fibreglass. The bottom of the door is chewing into the sill though, so the
time has come!
First steps are to remove the door card - first remove the loudspeaker, then there's a wee bolt on a threaded screw up behind the armrest that you
can reach through the speaker hole - I changed my bolt to a wee wing nut years ago, to make it easier to take off. Then there's a screw at the
back of the door, under the lock, then the door card just unclips from the door, and you can unhook the door handle wire from the door lock. That's
the easy bit done!
Right. Hinges. Inside the door, there's a big M10 bolt (with a 17mm spanner head) that goes downwards into the sill, and another that goes upwards
into the scuttle. They go into threaded "bobbins" that are glassed into the fibreglass. The problem is that, if the bolt into the bobbin is seized
tight, then you'll end up shearing the bobbins out of the bodyshell. This results in an extensive journey up the uncharted waters of Shit Creek.
Before we go any further, let's give both bolts a good spray with penetrating oil. Note: WD40 has many good qualities, but in my experience, it
isn't the best penetrating oil. I've been using PlusGas, but Jock at the farm recommended stuff called INNOTEC De-Block Oil, and I bought a tin,
but haven't tried it in earnest yet. Today's the day! I spray both bolts, between the door and the bodywork, and give it 15 minutes or so to act,
while I go and do something else.
Right - let's start with the bottom bolt. It's fiddly because the bottom of the window channel is also fixed thrugh the hinge, so is in the way.
However, I manage to get a long socket on to the big bolts with a "wobble joint", a short 3/8 drive extension bar and a not-too-long ratchet handle.
You do NOT want to horse on the biggest socket handle you have - if it won't turn with a normal ratchet handle, it's gonna rip the fibreglass before
it comes loose...
It turns! This is the bolt I replaced in 2011 though, so it hasn't got 35 years of rust on it...
Leave it in place while we tackle the top one. Same again, but with a slightly different socket extension bar. It won't turn... Give it another
spray and leave it 5 minutes while I get a jack and a block of wood to hold the back of the door up, and set up a wee table with a big towel over
it to put the door on (in a fit of optimism...). Try the bolt again - it still won't move... The only sound in the garage is the squeaking of my
arse as I give it slightly more turning pressure... and it shifts very slightly! But was that the bolt or the bobbin coming loose? Tense moments -
lock the ratchet and turn it to and fro about 1/16th of a turn (all you can get through the hole in the inner door skin) to work the oil in a bit...
yes it's definitely the bolt that's turning... then one more ratchet click and another 1/16th of a turn... work it again and so on until it's a
little bit more free... then ratchet it out of the bobbin in the scuttle.
Then I wind out the bottom bolt, and lift the door out of the frame, and put it on the table I prepared earlier, like a good Blue Peter badge holder.
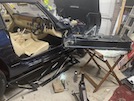 So here's the door, lying on the towel over the table. The wiring for the electric mirror and the window is still connected, and I realise that the
connectors inside the door won't go through the hole in the door or the shell, so I'll have to cut them off, in a place where I can reach to join
them again...
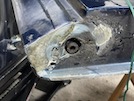 Here's the hinge at the bottom of the door. You can see here that the door has been rubbing on the sill. You can also see that the bottom of the
hinge itself (in the centre of the big hole) is flush with the door.
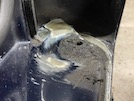 And here's the sill, which also shows where the door has been rubbing.
Now I can see the problem...
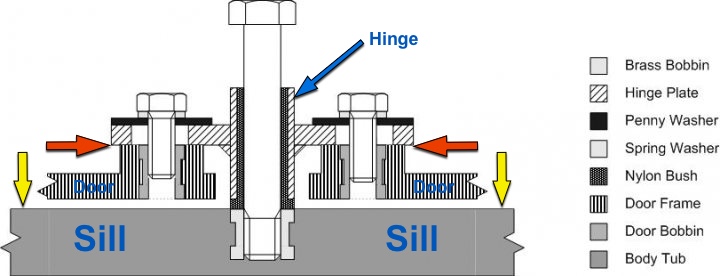
This is a cross-section of the hinge assembly, drawn up by Norman Farmer a few years ago. You can see the bobbin fitted into the sill, and the big
hinge bolt that goes into it. Then there's a plastic bush that the door rotates on, and then the hinge assembly bolted into the door.
The last time I tackled this was in June 2011, and one of the advantages of having this website is that I can look back and see exactly what I did.
And now that I see that diagram and understand how it works, what I did the was fecking stupid... What I did was, put a couple of washers between
the top hinge and the door mount, thinking that would lift the door enough to clear the sill. The top hinge is the same as the diagram above but
upside-down. Putting washers in (where the red arrows point) pulls the dor up on the hinge... but the door then slides down the big bolt to where
it was, so it eventually makes no difference.
Any improvement at that time, was a result of putting in a new bottom bush... but it seems to have been upside-down, so it wasn't holding the door
off the sill...
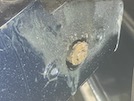 This is the top hinge. You can see that the bush sticks out further than the surface of the door, as per the wee drawing. Contrast that with the
bottom hinge photo earler, where the bottom of the hinge is flush with the door, so there's no clearance so the fibreglass is scraped to buggery.
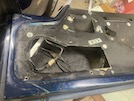 This shows the wiring and connectors inside the door...
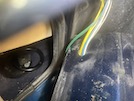 while this shows the hole in the door that the wires go through. The connectors won't fit through that, though, so I snip through the wires inside
the door, and pull them out, so the door is now free from the car.
Now I can get a 13mm socket inside the door, and detach the hinges from the door. One of the bottom hinge bolts also secures the window channel, so
I undo the wee screws holding that in, and slide it up a few inches to get the hinge out.
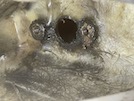 This shows the bobbins glassed into the door to hold the top hinge in place.
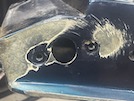
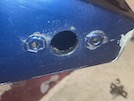 Then I set about cleaning the glassfibre / oil paste off the top and bottom of the door, and off the door sill in the bodyshell.
I think I should try to paint those while they're off, even if the match isn't quite right, it'll still look better than all this bare fibreglass
eh? Ordering paint over the Christmas and New Year holidays might take a while though... I also order new hinge bushes.
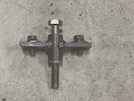 This shows the bottom hinge assembly after it has been cleaned up a bit. It's important that the big bolt has a shank that's at least as long as
the depth of the hinge bracket - it can be slightly longer, but certainly not shorter. The end of the thread has to tighten (not too much!) into
the bobbin in the bodyshell, to hold the door securely.
I dig out a bolt to replace the rusty one that was in the top hinge, and notice that the top bolt is shorter than the bottom one... a wee bit of
measurement shows that there is about 130mm of clearance through the bottom bobbin in the sill (so the bolt can be longer), but only around 15mm
clearance above the top bobbin - if the bolt is longer than that, it will punch through the windscreen scuttle (or tear the bobbin out, whichever
is weakest). I'll need to cut the bolts down so that they go through the bobbins and no further.
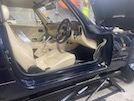 In the meantime, we have the maximum fresh air circulation look!
 While that's draining, I make up a couple of guide pins to fit into the back of the engine block, to help guide the gearbox into place, and also to
hold the engine back plate while we do that. Pretty simple - find a couple of longer bolts with the correct (M10) thread, cut them down to around 4
inches, round off the ends, and then cut a screwdriver slot just in case they are too tight to hand turn back out again. You can see one in place
here, beside the flywheel and clutch.
 Then I put back the oil filler plug, turn the gearbox upright and refit the clutch arm and new clutch release bearing.


