:: Diary - November 2012 ::
:: Friday, November 2, 2012 ::
I'm all excited!
Why?
Well my cordless battery power wrench gave up the ghost last week. I got it at a hugely discounted price, and it's saved me all sorts of hassle in loosening
and removing tight nuts and bolts. It came with two batteries. One of the batteries packed in last year, so I've been charging and using the other battery.
But last week, I found that the charger isn't working.
You can buy batteries. 2 batteries would cost more than I paid for the whole kit. You can't buy chargers though - you need to buy the whole caboodle, and
that's now expensive…
Yes I know, that doesn't sound very exciting.
But by the application of undeniable man logic, I deduced that by spending only a little more, I could get me a decent compressor and some air tools. Now
who's going to turn that chance down, eh?
Yes I know there's another option of "well don't replace it, and just use ordinary spanners and wheel braces like everybody else." That's just silly. Yes
it is. Shut up at the back there.
 And here it is, delivered today! Compressor, hose, snap connectors, tyre inflator, air ratchet, spray gun, blow gun, and an air chisel that's also a
"needle descaler" - according to on-line videos, just what you need for getting paint and rust off bits of chassis, without throwing the debris over half
a square mile like a wire brush does. If that works, I'll be happy!
I connect it all up, just to check it works, you understand. I even read the instructions first, so that I don't blow myself to jam against the garage
wall. Compressor starts, fills tank, set regulator then play at blowing plastic bags all over the garage. Happy!
Power tools. You can't get better.
:: Sunday, November 4, 2012 ::
Every TVR Car Club meeting is a new adventure!
We are joined for the run from Dave's by this bloke called Mike, who I vaguely recall - I'm sure he has a TVR S4. He turns up in a Land Rover Freelander
though - and its very nice! However he scrounges a lift to the Meeting with Jim, while Dave travels with me.
Going through to the meeting isn't particularly adventurous, although Dave points out that the fuel gauge reads "almost empty". I know, I'm trying to
run it low so that I can drop the fuel tank out next, to repair the cradle. Anyway, "empty means "about 2 gallons left" - coming back from Chatsworth
last year I did 40 miles up the M1 with the fuel gauge on "empty". I need to bend the sends to read properly…
I decide to order a lunch. The food is good but the service is the usual chaos.
The chat is also good, as usual - chassis repairs, paints, garages getting broken into, interior door handles, how we bought our cars, etc.
No sign of Adrian though. This means either (a) it's too cold, or (b) he couldn't get his car to start (it's only November).
Eventually we head for home. After about 10 miles (just as we reach the middle of nowhere), my car starts to cough and splutter. It's running out of
petrol… I coast to a halt, we push the car into a wee junction, then Jim and Dave head off to the nearest petrol station (about 5 miles away). They
return with a can of fuel, I empty it into the car, and we're soon on our way again.
After about 18 miles we stop and put another fiver in. That's enough to get me home.
Every cloud has a silver lining though. While I'm a tit for running out of petrol, looking on the up side, I know that the tank is now empty and ready for
removal and tank cradle repair!
Fire up the power tools!
:: Thursday, November 8, 2012 ::
I decide to have a look at the fuel tank cradle, to try to figure out how it goes together (or. more to the point, how it's meant to come apart).
While I'm underneath there, though, I notice that BOTH arms of the cradle have rust holes underneath. It looks like it's only the tank that's
holding the cradle together.
The plan was to take the cradle off and weld a new bit in to the rusty leg. Now I need to weld two bits in - which doesn't leave much of the original
(and increases the risk of warping or twisting so it won't fit anyway).
So I order a new one - just over £100.
Now it's just a case of getting the old one off, without shearing any bolts in the captive nuts in the chassis.
:: Sunday, November 11, 2012 ::
Right, after various distractions, it's time to get in about the task of removing this petrol tank cradle!
First step is to jack the car up to a decent height so that I can drop the exhaust off, and get the petrol tank out from underneath the body.
With the car up nice and high, and after a stability check (which involves pushing and pulling the car in each corner to make sure it won't fall over), I
remove the exhaust. I remove 3 nuts and bolts on each down pipe (air ratchet spins them off no problem!).
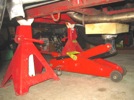 Then I support the front of the exhaust on a jack and block of wood, while I remove the two bolts in the side of the chassis, and the one in the centre
of the fuel tank cradle, between the tailpipes. That lets me drop the whole exhaust off in one piece.
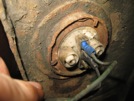 Then I disconnect the fuel sender unit, after taking a photo to remind me where the wires go back later!.
At this point I decide to give the four petrol tank cradle bolts a good soaking with plus gas. The bottom ones are easy: the nuts go right through and
are accessible on the inside of the chassis. The top bolts are captive, on brackets welded to the chassis tubes, and need carefully-aimed plus-gas jets!
I leave those to soak while I start to drain the tank. I have thought of 3 ways to do this:
1. Turn the lock ring in the bottom of the tank's swirl pot, which basically takes the bottom out of the tank. I don't know how much is in there, though,
and it won't be easy to catch, so I'm not keen on that one;
2. Take the hose off the pump, and use the car's pump to transfer the fuel into a container; or
3. Undo the jubilee clip and pull the hose off the swirl pot and let the tank drain into a can, using a funnel.
I opt for No 3. The hose is a braided so is a bugger to get off the stub - I end up slicing it off in layers with a Stanley knife. There's only about
2 litres of fuel in the tank so it doesn't take long to drain. It still makes a mess though!
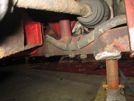 Then I disconnect the feed hose at the pump end, again after taking a photo to remind me how to put it back.
The next step is to remove the trim across the rear of the cradle. This involves removing the two bolts through the boot floor, that hold the back of
the body on. A quick whirry ratchet job, that!
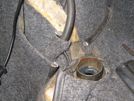
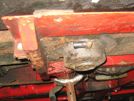 So here's the swirl pot, with the hose disconnected. You can see the supply hose stub, and just to the left, beside the axle stand, you can see the
bottom nut and bolt that holds the tank cradle on. You can also see the state of the bottom of the cradle (the red bit coming towards you) although you
can't see the hole in it. You can also see the state of the tank itself. It's worryingly rusty. It's also got a big dent in the bottom that won't be
doing it any good.
 Now it's on to the filler hose (the fuel cap connection). I peel back the carpet and unscrew the jubilee clips at both ends, and on the little vent
hose, and wiggle (well it's more of a "haul" really) the filler pipe out.
Then I go round and put masking tape over all those hose stubs and vents, to prevent dust or grot from setting into the tank.
Finally, for today, I go around the 4 tank cradle bolts, and crack them all loose with a socket and T-bar - no whirry guns, I want to feel the bolts
out so they don't shear. I can't take them right out yet though - I need to support the tank first, and I also need to remove two of the tank strap
bolts, because they are preventing me getting a socket properly onto the lower bolts.
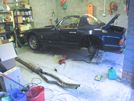 All of that takes me about 2 hours, and it's nearly tea-time, so that's enough for today. I'm happy with progress though, in fact, believe it or not,
I have really enjoyed myself - despite being sprayed with petrol, being up to my elbows in grease, I've had a grand old time!
This might change when I get the tank out, and start taking it to bits for cleaning and painting - it really does look as if the paint is all that's
holding it together. I also need to get a new bit of fuel hose, and some new cradle mounting bolts.
:: Monday, November 12, 2012 ::
Before I get back to the fuel tank, I have another wee job to do. The exhaust on No 1 daughter's Fiesta is burst at the back box. She let me buy a new
box, but then wouldn't tell me when she didn't need the car, so that I could actually fit the bloody thing. Well she left for a week's holiday this
morning so now's my chance.
I'm all out of axle stands though, so I have to put the car up on drive-on ramps, then remove the U-clamp and disconnect the two rubber hangers - at
which point the box falls off and leaves a foot of pipe rust-welded to the back of the rest of the system. I try a hammer and chisel but I can't move it.
It's just above the axle and beside a brake line so a grinder is risky. Hmm… what to do…
Air hammer!
Fit chisel point, fire up compressor, and I manage to get the edge of the chisel into the slot in the clamp joint. Pull trigger, and it peels it back
like the lid on a sardine tin - old bit of exhaust flies off. It's good this!
Then swap the rubber hangers over, dollop some washing up liquid on, then spread some jointing compound on the old pipe, slide the new one on, fit the
hangers onto the chassis, and tighten the new U-clamp. Dawdle.
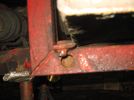 Back to the S and the fuel tank. The tank is held onto the cradle with two metal straps, that are bolted to the cradle in front of and behind the
tank itself. The rear bolts stick down just enough to prevent you getting a socket through the cradle and onto the bottom mounting bolt.
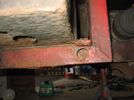 The cradle nuts and bolts are rusted solid - they are not for moving. So I get the grinder out and cut the bloody things off. Very carefully - there's
only a few mm clearance from the edge of the tank!
By the time I've done that, I'm out of time - I need to go to a work meeting and it'll take me an hour of steeping to get the layer of grease and shit off
so that I can give the impression of the consummate professional.
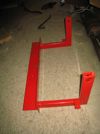 Oh I nearly forgot to mention: This was delivered today - a nice shiny new petrol tank cradle. Notice that the rear body mounting bolts aren't pre-drilled.
:: Thursday, November 15, 2012 ::
Well, after the unwelcome (but necessary) distraction of too much work, it's time to get this fuel tank out. It WILL be parting company with the rest
of the car today!.
First, I turn a plastic bucket (no sparks!) upside down and then use wood blocks (again, no sparks!) on top to support the tank. Then I take out the
two lower cradle mounting bolts - they are not "captive nut" so you can get a socket on each end. The threads are full of paint and rust though, so it's
hard going. I don't want to use the air gun cos I can't get it on straight and I don't want to round the bolt head inside the cradle hole. They do come
off though!
Then it's onto the top bolts, that I loosened and plus-gassed. They come out no problem.
Take out a wood block, and lever the frame down an inch on both sides, then another, etc till it falls clear, supported by the bucket.
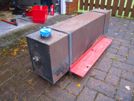 Here's the whole assembly, straight off the car. I painted the tank (the bits I could see) ages ago - that coating is now flaking off, and the bit I
didn't paint looks like it's always been bare metal anyway.
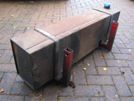 And the other side...
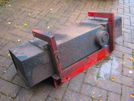 And finally, the underside…
Then it's a matter of removing the four remaining bolts on the straps holding the tank to the cradle, and it comes apart.
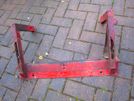 And here's the cradle on its own, after I have had a bit of a poke at it with a screwdriver. It's rotten, both sides. In fact, I am sure that I could
twist it apart in my hands (and I ain't no Charles Atlas), it's so rotten. Not yet though, in case I need to check measurements on the new one. I'll eat
some Weetabix and try it when I've fitted the new one!
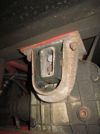 While the tank is out, I decide to check the differential mounting. It's split down one side. Another wee job to do. I also have a look at the diff
filler plug, which I have never been able to remove. It's chewed to buggery. Another wee job…
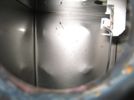 Back to the tank. It's really rusty on the outside, but what's the inside like? A look through the filler stub suggests it's fine.
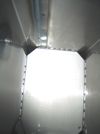 I also remove the sender unit for a look sideways. You can't see far because of the baffles, but it looks perfect in there. I remember to put a wee bend
in the sender arm so that it doesn't read "empty" so early. It then takes me absolutely ages to replace the sender and get the lockring to seal properly.
And I've just realised as I write this that I think I bent the sender arm the wrong way so it'll read "empty" earlier. Bugger…
So it's worth trying to remove the rust and painting the tank, and see how it goes. First step is to scrape off the flaking paint with a wallpaper
scraper, and then a wire brush. No electric tools though - still risk of sparks! I have taped up all the tank openings, so if I smell fuel, I know there's
a leak somewhere!
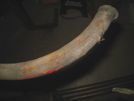 This is the main fuel hose, from the swirl pot to the fuel pump. I was going to buy a new one anyway, but not before time, by the look of those cracks!
:: Sunday, November 18, 2012 ::
I've spent ages looking for a new diff mount, but there are none available online. I was at the national Classic Car Show at the NEC in Birmingham on
Friday, and spent ages scouring the auto jumble for one, but nope. I was also keeping an eye out for front indicator lenses and any other handy bits,
but didn't see any of those either.
What I did see, was a set of "exhaust expanders" at about a quarter of the cost they are usually sold at. Seeing as I am always flattening the exhaust
right at the join under the sump, and it doesn't now seal very well, I bought them for next time it leaks.
I also bought a selection of nuts, washers and bolts to fix the fuel cradle etc back together
Yesterday, I had a look at the "Passionford" forums to see if Sierra owners know where to get diff bushes. The advice on there, and on a couple of the
kit car forums, is to throw away the cheap standard mount anyway, and get a decent quality one with poly mountings, because it makes the back end behave
better by preventing the diff slewing around. I order the alloy / poly one that they seem to recommend. Not cheap but sod it.
So that brings us up to today. I start by spraying some plusgas on the mounting bolts and on the diff level/filler plug. I've only tried to take the diff
plug out once and that didn't go well. With the tank out of the way, it's far more accessible, so I clear out the hexagon, and knock a tight-fitting allen
socket into with a hammer - that makes sure it's right on, AND maybe also shocks the plug loose a wee bit. Then fit a tommy bar and some muscle, and it
comes out! And the magnetic bit is noticeably free of bits (a few wee filings, but nothing to worry about).
Then I remove the tank sender again and bend the arm slightly the other way. It's a bit hit and miss, but once I've got the tank back in and the car all
back together, I'll put 5 litres in from a can and see where that reads on the gauge.
Then I order a metre of braided fuel hose and some end fittings, and a new diff plug. While I am looking for the diff plug, I find a place that sells
standard Sierra diff mounts for £20 (the ones I couldn't find while I was actually searching for them). This alloy one had better be good...
:: Wednesday, November 21, 2012 ::
It's a nice day today - sunny and warm(ish, in Eskimo terms) so it's perfect weather for a bit of petrol tank painting.
I prop the tank on one end and give it a spray with "Marine Clean" and a brush, and then hose it down (I still have all the tank openings taped up so
water can't get inside). I also degrease the holding-down straps.
Then I spray the tank and straps with POR "Metal Ready" which is, like it says on the tin, an etching preparation for bare metal. I leave that for 20
minutes, keeping it wet by respraying from time to time. Then I hose it off again and leave it to dry.
While that's drying, I decide to remove the broken diff mount. First remove the four bolts holding the mount on to the chassis. They are awkward to get
to, even with the tank off, and they are also very tight and very rusty. Using a combination of sockets, spanners, extension bars, ratchets, breaker bars
and windy guns, they do all eventually come off though. I did intend to use those bolts again but they are past it. I only have stainless ones in the
right size, and I don't think they would take the stress, so I'll have to buy some mild steel ones, with new nuts and washers.
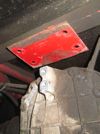 Here's the diff with the mount removed. I need to clean and paint the chassis before I put the new one on. I also need to give the diff a clean, eh?
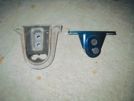 Here's the old and new diff mounts. The new one is far more contact and far stiffer. I try the bolts in the diff housing, and they seem top be too long -
not by much, but I don't think they'll tighten properly, I think I'll cut a couple of mm off each blt.
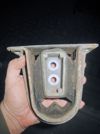 Here's the a better view of the old diff mount - you can just about see the cracks in the rubber down each edge, Putting a screwdriver in the cracks
suggest thats they are almost all the way through, so the mount is just about ready for collapsing.
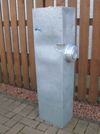 The tank is now dry, so I get out the silver POR15 and a foam pad, and apply two coats. It's not great, but it's only a rust prevention paint - I am
going to spray the tank gloss black over the top of the silver.
So the next steps are spraying the tank black, cleaning the diff, cleaning and painting the back tubes of the chassis, and then replacing the diff mount
and putting in some diff oil. Then we can start putting things back together!
:: Friday, November 23, 2012 ::
After a whole day of pishing rain yesterday (it didn't stop for a single second) it's dry and bright again today. So I get the tank back out of the garage
and start to spray it black. Unfortunately one tin of paint doesn't go far enough, so I din't bother photographing it. I need another can of paint! Or
maybe even two…
Anyway, while that's drying, I get the compressor started up, and fire up the needle descaler, and start to remove the loose paint on the back tubes of
the chassis (the ones you can't reach when the tank is in place). Ooooh it's good this! It blasts off the old waxoyl, and all the loose powder coating.
Quite a lot of the powder coat is still firmly stuck on, though, because in addition to the waxoyl, it's been covered in diff oil for most of the car's
life. I take some of the excess waxoyl off with white spirit.
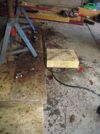 The good thing about the descaler is that most of the stuff it removes, just drops to the floor, rather than being blasted all over the garage by a wire
brush.
Then I spray some Metal Ready on to the bare metal and leave it for 15 minutes, and wash it off with water.
Right, what can I do while that's drying? I bought a fuel filter ages ago, what better time to fit it? It's a bit of a pain in the arse, to be honest,
because the unions are inevitably effing tight, and you can't get a good grip of the filter while you get a spanner on the unions. The two unions are
different sizes as well, just to increase the arse pain. The filter is also full of fuel, so while you're trying to wriggle the filter out of its clamp,
it's pishing petrol all over your hands and into all the wee nicks and cuts you got, trying to get the unions undone.
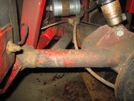 I get it all together, with new copper washers, and then notice that the trailing arm is in a hell of a state - there are cracks in the Hammerite, and
obvious bubbles in a couple of places.
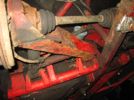 All that freely-pishing petrol has dissolved the waxoyl on the trailing arm underneath it, and it seems that the waxoyl is all that is holding the paint
together - it's falling off in chunks, and barely sticking to the metal at all.
I think I'll take that trailing arm off, and strip and repaint it - with POR15 this time. Not just now though - I'll get the fuel tank back together
first I think! At least I've found a good "how to" guide Here - brilliant web site that. The original, and still the best.
I didn't get on to painting the chassis - it needs a bit longer to dry off.
:: Saturday, November 24, 2012 ::
I'm enjoying this! I know, I'm mental, but I had various other things to do today, and I couldn't wait to get them out of the way, so that I could get
under the car.
I get back under the back of the car and paint the rear sections of the chassis with POR15, making sure to get it up inside the bracket that holds the
fuel cradle on. I put an old bolt into the captive nut on each side, so that I don't get POR15 into the threads.
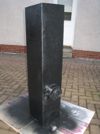 While that's drying, I take the tank back outside and put it on a bit cardboard, so that I don't end up painting black squares all over the drive. It
looks ok - not brilliant, because the tank was far from smooth.
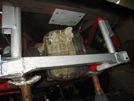 Then it's back under the car to apply a second coat of POR15. Just the red topcoat to do now!
My other task today is rustproofing the inside of the new tank cradle - after seeing how the old one has rotted away from the inside outwards, I want a
good coating of rust protector in there. I have some leftover waxoyl from years ago, but no sprayer (although that's not hard, a wee garden sprayer in
a bucket of hot water would sort that). What I really need is an extension probe, but I'm never confident in the coverage you get from the cheap Waxoyl
one. I need a new approach,
I take my tin of waxoyl and stick it in a bucket of hot water, to get it nice and runny. While that's heating up, I wrap masking tape round all the bolt
holes so that each leg is open only at the top. Then I add a tiny bit of white spirit to the waxoyl, and give it a shake to mix it, then back in the hot
water to finally dissolve all the lumps.
Then with the tank frame sitting right way up, I stick a funnel in the top of one leg, and pour in some waxoyl till it brims, then empty the waxoyl out
again almost immediately into a big biscuit tin. Then I heat that up in the hot water again, and pour it into the other leg, with a top up from the
waxoyl tin, and empty that out.
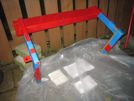 Then I turn the whole frame upside down on a sheet of plastic, so that the excess waxoyl can run out. Here's where I spot the flaw in my plan! None
runs out, whatsoever. The frame was cold, and the waxoyl has solidified almost as soon as it touched it, so there must be about half a pint of waxoyl
in each leg. Good for rust protection, but it's going to run out everywhere when it gets warm, eh?
I resolve this through some focussed Buddhist meditation, clearing my mind so that I can focus on this one point. My meditation comes to the
transcendental conclusion: "fuck it".
:: Sunday, November 25, 2012 ::
Well now I know why Buddhism is so popular! I had a visitation from the Buddha himself in the middle of the night, who showed me the path to Nirvana and
true enlightenment. Or maybe it was my own reflection in the bathroom mirror as I sleep-shambled through for a piss without my glasses on. Whatever, I
had an idea.
How do I get half a tonne of coagulated goop out of the cradle legs? Answer - heat it so it goes runny. How to heat it? Well let's try the trusty 2Kw
fan heater, eh?.
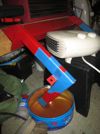 I turn the cradle upside down with the open ends of the legs in a couple of tins. Then I set the heater up on a wee stool, and aim it at the top of the
first leg, with the aim that it'll melt and run down into the open end. Nothing comes out though, it must be sitting on top of a "stopper" of goop.
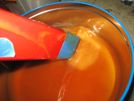 When I have the top bit warm enough, I move the heater to the the open end, and a huge plug of goop drops out followed by half a pint of melted wax. Then
I do the other side, then pour own the melted wax back into the Waxoyl tin.
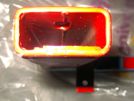 This photo isn't very good, but examination with a light shows that there's a thin even coat of waxoyl all down the inside of each leg. The cradle leg,
that is. The thin even coat down the inside of my legs has dried in since being surprised on the way to the loo, by the Buddha in the night.
I'll leave that to set for a bit. I need to topcoat the chassis then test-fit the cradle without the tank, so that I can mark hand drill holes for the
bolts that hold the body on (the ones in the boot floor).
:: Monday, November 26, 2012 ::
I get a little bit of time today, so I mix up some POR topcoat, and apply a couple of coats to the rear of the chassis, and to the straps that hold the
tank onto the cradle.
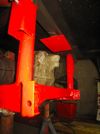 It looks pretty good! You'll see that I haven't painted the top rail there - it's in good nick, mainly because it's covered in waxoyl from when I sprayed
it before, plus a layer of grease from the diff breather, so there's no point cleaning all that off to repaint it - especially as I can't get to the top
of the rail with the body on.
Now I'll leave that to dry, which, at current ambient temperatures, might be sometime in March.
 And here it is, delivered today! Compressor, hose, snap connectors, tyre inflator, air ratchet, spray gun, blow gun, and an air chisel that's also a
"needle descaler" - according to on-line videos, just what you need for getting paint and rust off bits of chassis, without throwing the debris over half
a square mile like a wire brush does. If that works, I'll be happy!


