:: Diary - June 2020 ::
:: Tuesday, June 2, 2020 ::
I've been reading stories about ethanol in petrol. At the moment, unleaded petrol has 5% ethanol, but there's every possibility that this
will be increased to 10% before too long. The UK Government have launched a consultation on making E10 petrol (with 10% ethanol) the
default unleaded grade by 2021. E5 fuel would the be available only as super-unleaded.
So what's the problem? Well, they know around 700,000 older cars in the UK can’t use the fuel, because lots of parts weren't designed to
be compatible with ethanol. This can include flexible fuel hoses, seals, gaskets, plastics and even some metals, so there might be damage
to fuel pumps, carburettors, seals on injectors, pressure regulators and fuel tanks that are not resistant to ethanol. The ethanol can
also dislodge any shit already in the fuel system, leading to blockages.
The main issue seems to be rubber fuel lines, which can be eaten away by the ethanol, leading to splitting or bursting. Now, you obviously
don't want a hose full of petrol, under high pressure, to go spewing petrol all over a hot engine or exhaust - that's guaranteed to bring
you to an ignominious halt, and cause irreparable damage by melting that curly-wurly you were saving for later
So what do you do? Well, one option is to just use super-unleaded, which they say will remain at 5% ethanol - and that might be the easiest
option, but it's so much more expensive. Worse than that, it's ok if you're in densely-populated areas, but there are vast areas of Scotland
where you can't buy the stuff.
The other option is to at least replace the main fuel lines with modern stuff that's resistant to ethanol - that's more of a long-term fix,
but obviously also has a cost!
So on Sunday, after a bit of research, I bought some 8mm (5/16") hose to the right specification - check it's reinforced, and that it can
handle 20bar pressure (around 300 psi), and that it's ethanol-resistant. I think you need R6 or R9 grade hose. I chose not to buy hose with
an overbraid, so that it's easier to check the state of the rubber for cracks or splits.
I also bought the right size of hose clips (not jubilee clips, they don't apply pressure right round the hose, you need proper hose clips)
and also a fuel filter - might as well change that while everything is disconnected, eh?
So with all of that ordered, and due to be delivered later this week, I can get on with other stuff...
so today, I decide to polish the "day car". This involves getting the car into the garage so that I'm not trying to polish in direct sunlight.
This involves shifting the TVR out of the garage first. That involves shifting my daughters Fiat 500, which she has declared SORN but has
nowhere to keep it off the public road, so it's here... So after a three-car shuffle, I can get on with the polishing.
When I'm finished, it's time to reverse the 3-car shuffle. AS I reverse the TVR into the garage, I can spell petrol - not just a whiff but
really strong. There's also a trail of petrol up the drive and a pool under the car. Switch off the pump!
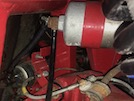 After a suitable period of evaporation, I jack the rear corner of the car up and take the wheel off. Then I can see that the wee hose that goes
from the pump to the fuel filter has split at the filter end, as it joins the banjo joint. It would appear that my precautionary ordering of
new fuel hose was not a moment too soon (and possibly several moments too late).
 I undo the clip and pull the hose off the union, but it's still dripping as the filter empties. I push another bit of hose on temporarily,
and clamp it shut.
So now I need to wait until all the stuff arrives, and jack the car up higher so that I can get under it to replace the main feed and return
hoses front to rear (which run along the top chassis tubes so are a right bastard to get to while the body is on the car).
When I get back indoors, I have an email from the fuel hose supplier - they're out of stock so can't deliver in the foreseeable future.
Bugger... I spend ages finding some elsewhere, and ordering that. That's set me back a few days!
:: Saturday, June 6, 2020 ::
The new fuel hose was finally delivered this morning, so while I nip out to the garage to bring in something for the house, I decide to
try one of the new clips on the end of the hose, just to make sure it fits. Then I decide to try the end of the hose on the banjo joint
on the end of the fuel filter, just to make sure it fits there too.
Well, I might as well try the other end on the fuel pump, eh? I disconnect the old hose by undoing the clip, pull it off, cut the new hose
to length, and fit it on, just to make sure it fits there too.
Well, while I'm here, I might as well fit the new fuel filter, just to make sure it fits. I get a couple of spanners the right size, and
undo the banjo joints. Just to be awkward, the banjos are a different size on each end of the filter - the inlet is 19mm, the outlet is
17mm. The hex sections on the filter itself (to stop it turning) are also different sizes. the clamp bolt is 13mm, so a different size
again. I'll just get the right spanners ready...
10 minutes later and the old filter is off. This is where I realise that the new filter wasn't supplied with new copper washers for the
banjos, so I have to find the box of copper washers I bought ages ago. Because I spent 3 weeks tidying the garage during lockdown, I
find them in 10 seconds.
Might as well check that it all goes back together... just to minimise any fuel spillage, you understand...
 It does!
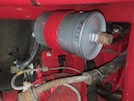 I reconnect the battery and prime the pump to check for leaks. After a wee tweak to the filter outlet banjo, it's fine!.
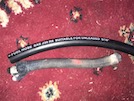 Here's the hose I took off, beside a bit of the new hose.
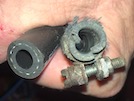 You can see here, the difference in thickness of the hose wall, and also how perished the old hose is - yes those hoses are both supposed
to be the same internal diameter!
OK, now that I've checked all that, I'm ready to fix that fuel hose. Oh wait...
Next, I need to check the hoses from the filter to the engine, and the return hose to the tank, fixed to the top chassis tube alongside the
transmission. The car's in a wee bit of an awkward position to get it high enough though, so I'll leave that until I can manoeuvre it
over a bit. That involves shifting 2 other cars from in front of the garage (one of which is SORN and not even mine) so that I can
take the TVR out and reverse it back in at the right angle, so I'll leave that for another day, seeing as it's pishing rain.
What was it that I came out to get from the garage again? I forget...
:: Sunday, June 7, 2020 ::
The weather is better today, so I shuffle a couple of cars out of the way and then take the TVR out and reverse it back in again, a wee
bit further from the wall.
That lets me get a jack under the front to lift it onto a pair of axle stands. Then I use two trolley jacks, one under each rear outrigger
arm, to lift the rear of the car on to another air of axle stands at the back of the chassis (where the petrol tank cradle bolts on). Then
it's off with the nearside rear wheel to check again for any fuel leak. None. I get a better screwdriver onto those hose clips (one with a
small socket on the end) and tighten them up just to be sure.
Now I can get my carcass underneath to check the fuel lines, but I can't see much because the exhaust silencer is in the way. Right - off
with the exhaust then! I've done that a few times over the last 17 years, so that's no problem - put a box under the rear of the exhaust
and undo the centre bolt under the number plate.
Then I go to the front and support it with a bit of wood on a trolley jack before I undo the six 13mm nuts holding the exhaust on to the
downpipes (mine is an S3C so it has cat replacement pipes - other models have a different exhaust arrangement here). Then it's a simple
matter of undoing the two bolts in the middle holding the silencer up, lowering the jack a bit, removing the box at the rear and slide
the whole lot out from underneath the car.
When I had the chassis re-done, he fitted standard exhaust clamps instead of the Mikalor ones I had before. This reduces the ground clearance
by a fraction, so I'll order new Mikalor clamps before I put it back on.
Right - get the fat carcass back under the car with a light...
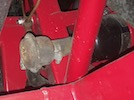 Here's the inlet end of the pump - the rusty thing is a fuel "damper" thing - dunno what it's meant to do except turn the hose though 90
degrees.
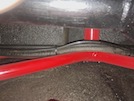 Moving forward, and looking upwards past the prop shaft, you can see 3 hoses here, fixed to the top rail of the chassis. The thin shiny
one is plastic, not rubber, and is the main feed from the filter to the fuel rail on the engine. The hose nearest to us (with the yellow
print on it) is the fuel return hose from the pressure regulator back to the tank. The other hose is part of the fuel tank ventilation
system - it brings fuel forward to a solenoid where it gets sucked into the inlet manifold and burnt off.
All of these hoses seem to be in pretty good nick - no signs of deterioration at all.
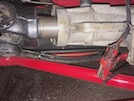 Further forward again, here's a view up the side of the gearbox...
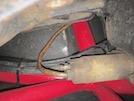 And at the front, beside the bell housing and the clutch slave cylinder. Although they look a bit grubby, there doesn't seem to be
anything wrong with them.
I also check the short bit of hose that connects the plastic pipe to the fuel rail. That seems to be ok too.
I've been in touch with the man who rebuilt the chassis - he says that the plastic pipe should be ok as it shouldn't suffer from
the same ethanol problem as rubber, and also he checked the other hoses as he was putting them back on, and they seemed to be ok
then. I would be a bit more confident of the pump to filter hose hadn't burst off, but it all seems to be fine for now.
In other words. it ain't broke so I ain't fixing it.
[Note from later - this advice is a load of crap. After a bit more reading, I did decide to change these hoses, ethanol is nasty
stuff and it does things to old hoses that you can't see until it's too late - see 9 June below for reasons to change them!]
With that decided, I turn to look at the handbrake - it seems to be working better on the nearside wheel than the offside one. Also,
it's not quite "clicking" onto three clicks, and it doesn't hold the car on 2 clicks. I loosen it off slightly and it seems to be
better on 3 clicks, but I won't know until the car's back on the ground - and I want to fit the new exhaust clips before I put the
exhaust back on.
:: Monday, June 8, 2020 ::
You know when you start something and then you just get carried away and before you know it you've got no car but a garage full of bits?
No? Then you're not doing this TVR game right!
I've been thinking about the handbrake - it seems to be binding on the nearside but the offside wheel is free. I decide to put the nearside
wheel on to give a better comparison of turning effort.
Now I know that the nearside is definitely harder to turn than the offside. When I pull the handbrake on 2 clicks, the nearside wheel is
locked but the offside still turns. 3 clicks and they're both locked.
Does this mean that the nearside handbrake is sticking on, or the offside is sticking off? The fault seems to be the nearside - the brake
is definitely dragging.
So I take the nearside wheel off and dismantle the brake drum and brake shoes. For full details of how to do that, check the "how-to" section
in the menu on the left.
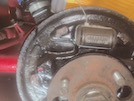 I put a cable tie around the wheel cylinder to stop the brake pistons popping out under any residual pressure in the system.
Then I remove the end of the handbrake cable from the backplate, and remove the 13mm nut that supports the cable on to the trailing arm. Then
I can pull the cable out and up backwards (towards the diff) and hold it in place with an old adblue bottle so that the end of the cable is
the highest point.
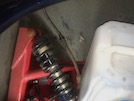 Then I dribble some oil onto the exposed end of the cable, and work the handbrake lever up and down a few times to spread the oil along the
inside of the cable. Repeat many many times.
It does feel pretty free, but a bit of lubrication can't go wrong. I continue with this for ages, although it doesn't appear to be any looser,
I can see that the wee return spring is pulling the inner back out from the outer cable so it seems to be free enough.
By this point I have to stop because I have real work to do. Back to this later - or tomorrow. Maybe.
I'll see what it's like when I put it back together. If the cable is still sticking, I'll get a new one - available for 40-odd quid in the
right size. What I think is wrong, though, is that the handbrake cable hooks on to a lever fixed the the trailing brake show, and the lever
arm seems to be pretty stiff on its rivet - I'll be sure to lubricate that as well, before I put it all together again.
:: Tuesday, June 9, 2030 ::
/
Well… I’ve been thinking again (that’s three times in a week, I really must watch out). This time I’ve been thinking about ethanol in petrol,
and its effects, so I thought I might do a bit more research.
We all know now, don’t we, that currently, petrol has 5% ethanol in it. The plan is to increase that to 10% next year (2021).
Why is the government doing that? Well, it seems that the aim is to reduce transport emissions, and ethanol burns much cleaner than petrol,
so creates less emissions. The UK Government has a target to ensure that 9.75% of all transport fuels must come from renewable sources by
the end of 2020 under their “Renewable Transport Fuel Obligation”. The government apparently believes that a move to standardising E10 fuel
will be equivalent to taking 350,000 cars off the road each year. The Department of Transport estimates that this may cut CO2 emissions for
transport by 750,000 tonnes per year.
Note the use of “believes” and “may”. No explanation of that “belief” or how close “may” is to “probable” or, indeed “probably not”.
Anyway, we’re stuck with it.
The Federation of Historic Vehicle Clubs asked the government earlier this year about arrangements for classic vehicles, and the answer was
decidedly woolly (what else do you expect?) and included this statement: “Currently, around 95% of petrol cars used in the UK can use E10,
but around 700,000 are not warranted by their manufacturers to use E10.” That’s us folks!
So in other words, there’s not that many old cars left, and they’ll wear out soon enough. For the real classics, as I said the other day,
the plan (for the meantime, at least) is to keep super-unleaded fuel at 5% ethanol, so we can use that. Until they stop providing it (or
for those of us in the middle of nowhere, until we get fed up driving miles to find a petrol station where we can fill up, and a higher
cost per litre).
The big problem that’s been widely discussed, is the compatibility of fuel lines. Ethanol doesn’t like rubber, and causes it to degrade.
It also can increase corrosion in the fuel system because ethanol can attack some of the rubbers and plastics used in fuel pump diagrams,
injector seals etc - but it can also attack some of the alloys used in fuel pumps and carburettors etc.
I kinda already knew that, but I also read that there’s not a lot you can do about other seals etc without a total rebuild. The main risk,
I read, is perishing and bursting of fuel hoses, and the subsequent huge fire that you might survive, but your car almost certainly won’t.
Well, I’ve not convinced myself that the fuel lines on the TVR really ARE ok, so after all of that preamble, today I thought I would find
out a bit more about this degrading of fuel lines.
I’ve almost shat myself.
One of the big differences between ethanol and petrol, is that ethanol is hygroscopic - that means that it absorbs water, like brake fluid
does. That there water in the fuel, even if it’s only 0.5%, also leads to corrosion of metal components in the fuel system, so isn’t good.
If the fuel is left sitting still for a length of time, any absorbed moisture could be enough to initiate rust inside a near-empty fuel tank,
building up over time to the point where bits of rust might eventually block a tank outlet, fuel filter or carburettor jet.
The thing is, I discovered, that the SAE rating of fuel hoses isn’t just to do with its pressure rating, and/or whether or not it dissolves
in ethanol, but also its porosity. Yes, porosity - water can soak through brake hoses, slowly and imperceptibly, but surely, into the fuel
inside.
A hose rated to SAE30 / R6 was the first hose for which maximum permeability (in simple terms vapour loss through the tubing) was specified.
It’s not the inner lining, or the reinforcement etc that makes the difference, it’s that “permeability” that is the key reason why older
hoses are incompatible with fuel containing ethanol.
The higher the permeability, the more vapour finds a way through the hose wall, and as it does so, any ethanol component gradually “dries out”
the synthetic materials that keep the hose supple. Cracks then develop, and eventually the fuel finds a way through – though the time taken
has proven to be quite unpredictable. What is known, though, is that higher ethanol content speeds up the whole process.
Newer and tighter specifications mean that current R9 hose has permeability under 3% of the R6 series figure. In other words, an R6 hose is
30-odd times more likely to let water near the ethanol.
So, J30/R9 fuel hose is now recommended as an all round general replacement. It’s described as a “synthetic rubber hose, with 15 g/m²/day
permittivity, and 100psi pressure capability. The inner will be resistant to chemical attack, swelling, and permeation by gasoline, oxidized
gasoline, ethanol extended gasoline, diesel fuel, and oil or lubricants and vapours. The outer tube will be oil, ozone and heat resistant.”
The hose that I bought was R6, Bugger. Worse than that, I stumbled across a website that says that exact hose, from that exact suppler, has
been known to fail in only a few months. It’s going in the bin.
I have no idea what spec of hose is on the car supply and return pipes - but it has never been changed to my knowledge (and I’ve had the car
since 2003) so my guess is that it’s the original 1990 TVR stuff. When I checked it the other day, it looked ok, but I’ve now realised that’s
not the point - the point is that next year, when there’s twice as much ethanol in petrol as there is now, those hoses are a big risk.
So after all that, I order proper Gates Barricade SAE30/R9 hose, which is apparently the stuff to get. I’ll leave the car up on the axle
stands - it’s not moving until I change those hoses.
So on that note, it’s time to get back to the back brakes. I reassemble the shoes and handbrake lever (again as per the “how-to in the menu
on the left there) and replace the drum. I do notice that the shoes look pretty worn - not quite at the minimum but worn. I yank on the
handbrake many times, and also stomp on the foot brake a few times. With the brake drum off again, I can see that the self-adjuster is moving
to take up the play.
A few more handbrake / foot brake applications to self-adjust it a bit more, and I’ve now got 5 clicks on the handbrake. I dive back underneath
to adjust the cable up a bit. Now it’s at 4 clicks before it locks up both wheels, and I can’t adjust it any further because I’ve run out of
turns on the adjuster beside the diff - it’s screwed right up.
What I do notice while I’m under there, is a tiny trail of brake fluid from the connector on one of the rear flexi brake pipes. I get a couple
of spanners and tighten up the connector.
As for the handbrake adjustment, it could be that I need new brake shoes, or it could be that the handbrake cable has stretched - it’s 30
years old so no shame to it! I order both, you don’t take chances with brakes!
:: Friday, June 12, 2020 ::
The replacement fuel hose arrived yesterday so today is hose replacement day!
I start by getting under the car and snipping off all the cable ties holding the hoses to the chassis. That means reaching up between the
propshaft and gearbox to the top chassis rail. There are also a couple of ties you can only reach down the back of the engine.
I'm going to change them one at a time, so that I can be sure to connect them up properly to the engine. I start with the fuel feed hose.
At the filter end, it's plastic shrink-on with no hose clip, so I have to slice through it with a knife. No going back now! Then under
the bonnet I disconnect it from the fuel rail, and pull it through past the engine.
 Just above the bell housing, there's a connector between the plastic hose and the rubber hose connected to the fuel rail. For a minute I
wonder if it's also a non-return valve, but I'm sure that the fuel pressure regulator does that. A wee check shows that it is just a
connector, so I replace it one one single length of hose, fed down from the front and then routed alongside the return hose to the fuel
filter. I fix it on at both ends with a couple of hose clips.
Then I do the same with the fuel return hose - it takes fuel from the pressure regulator back to the tank. That means there's a constant
flow of fuel so you don't get vapour locks (and also so that it stays cool and therefore denser and burns better in the engine). Disconnect
both ends, pull the old one out, feed the new one in, again being careful to follow the same route, and clip both ends.
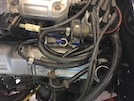 So here's the two new hoses duly connected.
Then the tricky bit - I dive back under the car with a pile of large cable ties, and fix the new hoses to the top chassis rail. Fiddling
the ties over the top, between the chassis rail and the body, isn't easy but it's possible. Just!
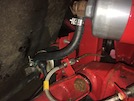 Finally, I replace the short bit of hose between the pump and the filter (the bit that I replaced the other day, but with stuff that I later
found isn't suitable)..
So that's it! Tomorrow (or when I decide to get around to it) we'll be on to back brake shoes and new handbrake cable, both of which were
delivered by courier today.
And now, a word from your sponsors. Don't buy car parts from Carparts4less.co.uk. Their prices are tempting but trust me, it's not worth it.
You see, the Mercedes has wobbly brakes, probably because it has been standing around during lockdown and the disks got rusty. A wee look
confirmed a sizeable lip around the edge of the disk. They've done 25,000 miles so that's probably about the life of them.
So I ordered new disks and pads from carpart4less.co.uk. They were a lot cheaper than I could see them elsewhere, and I thought it would be
easier than a "non-essential" trip to the local motor factors. How wrong I was.
Delivery was quoted as 3-4 days right up until just after you pay the money, when it's revised to 10 days. Not exactly happy but what can
you do...
A box arrives on day 10. A heavy box. Except it's only half the weight it should be because it only has one brake disk in it.
I try to phone. The queue is estimated at 2 hours but they close in 20 minutes - no point tonight. I send them an email. Never got a reply.
Day 11 - I try to phone, hang on for 2 hours but get cut off when I'm 3rd in the queue. Try the online chat - 54th in the queue. After half
an hour I'm down to 46th in the queue. Life is too short for this shit.
Day 12 - I get on the online chat the second it opens but I'm still 32nd in the queue. I'm working on the computer anyway so I let it run...
2 1/2 hours later I'm on! They tell me to send back the single brake disk and they'll send me 2. "Why can't you just send me another one?"
"We only send them out in pairs" they say. Well, evidently, you don't! But no, them's the rules. They give me a return number for it to be
collected on Monday.
Day 14 - they collect the single disk. Then, nothing...
Day 25 - I wait online for another 3 hours to be told that they'll send them out next week. Cobblers.
I spend some of the waiting time reading online reviews of carparts4less.co.uk - they're not good, there are many tales of woe about poor
customer service. I should have read them first - saving a few quid has a price! Just don't do it.
They are a subsidiary of Euro Car Parts - I've never had a problem with them, mainly because you go to the shop to collect stuff, or take
stuff back, and the people there seem to know what they are doing. The online version is clearly staffed by retarded sloths.
:: Monday, June 15, 2020 ::
Right, it's time to get on with these brakes, now that the new shoes and handbrake cable are here.
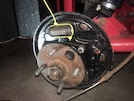 First I remove both brake drums and then disassemble the rear brake shoes from the backplate (again as per the “how-to in the menu on the
left there). The yellow cable tie is to prevent the pistons pooping out of the wheel cylinders while I'm doing the rest.
Then I undo the nuts holding the handbrake cable on to the trailing arms, then back under the car to remove the split pin and clevis pin from
the cable connection to the handbrake lever. That lets me disconnect the cable from its two chassis mounting points - one is the adjuster above
the diff, the other is a fixed mounting in the offside wheel arch.
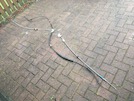 So here's the old and the new!
The next step is to route the new handbrake cable above the propshaft, following the same route above the diff on one side, and through the
wheel arch on the other side, and locate them in their chassis slots. Then I route the cable through each trailing arm into the backplate,
and fix on the two P-clips to the trailing arms.
Right, time to reassemble the rear brake shoes.
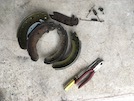 Here's the new shoes beside the old ones. It's many years, and several thousand miles, since I changed those. They aren't that badly worn,
although the one on the handbrake side (the left-hand one in this photo) is worn more than the other. You can also see the selection of
springs and cams that have be reassembled in the right places and in the right order - make sure you note carefully where these go, before
you take it all apart!
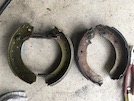 And here it is, all assembled and ready to go back on the car.
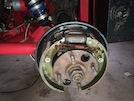 So - following my own "how to" advice, I connect the nipple on the end of the cable to the handbrake arm on the rear brake shoe, then locate
the assembled shoes onto the backplate, and pushing through the spring-loaded locating clips. Knock them roughly into the right position and
put the brake drums on.
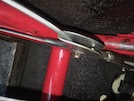 Then I make sure that the outer cable ends are still properly located on the chassis, and reconnect the cable at the lever end - locate the
quadrant, then insert clevis pin and split pin. There's a wee sleeve on the cable to prevent it rubbing on the chassis - I fix that to the
chassis with a cable tie.
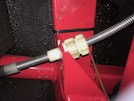 I put the back wheels on, then wind up the handbrake adjuster until the cable starts to tighten, but the wheels are still turning, then I
pull on the handbrake to see how close it is to final adjustment - I get 5 clicks.
Now I adjust it up some more until the handbrake is fully on at 4 clicks. The rear wheels are locked, but turn freely when I put the handbrake
off. That seems to be fine for now, I'll see how it adjusts itself.
Right - final step is to refit the exhaust. I've done this so often now that it's a dawdle - lift the back end onto a box about 6 inches
lower than its final position, then jack the front up on a bit of wood until the downpipes are located. bolt up the downpipes connectors
loosely at this stage.
Now lift the back slightly until you can get the bushes and washers onto the middle silencer mountings, and bolt them up loosely too.
Then, lift the back into position and insert the centre bolt and bushes, then tighten it up. Then tighten the centre mounting and finally the
downpipe connector bolts. Finally fit and tighten the clamps holding the downpipes to the main system, in front of the silencer.
I start the car and check the exhaust for leaks, then jack the car down off the axle stands. I'm just about to set off for a trial run, when
I remember to check the fuel system for leaks. The two connectors under the bonnet are fine, I jack up the rear of the car so that I can see
the pump and filter past the wheel, with the engine running. Those are ok too!
A short test drive confirms that the brakes are fine, the handbrake works well and the brakes don't seem to be binding. I think I'll call
that a success!
 After a suitable period of evaporation, I jack the rear corner of the car up and take the wheel off. Then I can see that the wee hose that goes
from the pump to the fuel filter has split at the filter end, as it joins the banjo joint. It would appear that my precautionary ordering of
new fuel hose was not a moment too soon (and possibly several moments too late).
 I undo the clip and pull the hose off the union, but it's still dripping as the filter empties. I push another bit of hose on temporarily,
and clamp it shut.


