:: Diary - September 2010 ::
:: Ken Appleton ::
I was shocked and saddened to hear of the death of Ken Appleton on Monday. Ken owned two TVR S Series, one of which he was converting to V8 power.
I met Ken at a couple of TVR events in England, but knew him mainly as a font of technical knowledge on the TVR advice forums.
He was the one who gave me a stainless steel cover for the tank cradle (the strip that goes along under the back of the body above the exhausts) three years
ago - no charge, he just wanted someone to have the use of it.
He announced last week that as a result of some news he had received, he was selling both of his TVRs. Little did anyone realise that the news was so bad,
that within a week, he would no longer be with us.
Unbelievably tragic for Ken and for his family. None of us ever know what fate has in store for us.
:: Thursday, September 2, 2010 ::
Started off by making a couple of metal spacer plates for the rear body mounts. In usual TVR fashion, each side is a different size and has to be
measured and cut separately. Great!
Then Dave arrives and we start to fit the offside chassis repair. I didn't take any photos so it's hard to explain - but by the time we've finished, we've
cut the chassis to the shape I showed in the photos on Tuesday, and we're well on the way to cutting the new tube to the same shape. Unfortunately time
catches up with us and we pack up before 9pm, so that the barn owner doesn't have to come and chase us
I have to admit that I'm quite disappointed by how thin most of the chassis tubing has become. We've cut out all the wafer thin stuff, but the worrying
thing is how much thinner it is, than it was the day it was assembled 20 years ago. And that deterioration is invisible until you start cutting through the
tubes.
I'm disappointed. Disappointed that the damage to the chassis was invisible until the body was lifted. Disappointed that, even then, the worst damage is
still hidden till you strip all the paint and rust off. And disappointed that even then, the tubing that looks ok, is still rusting, and you can't tell
until you cut through it. It makes you wonder how bad the rest of it is.
I've been pissed off with the car before, but once I get it fixed. it's been fine. This time, I fear I'm going to be left with this nagging doubt that it's
still rusting through... There again, I've always carried a nagging worry that the outriggers are rusting away under the body, and that's fixed now!
Well almost.
:: Sunday, September 5, 2010 ::
The plan was to get along to the farm and get the metalwork finished this weekend. Thanks to Dave, it's gone really well so far, but I have to finish it off.
Unfortunately I didn't get time on Friday, and yesterday I procrastinated until it was too late to do anything about it. I did go out and buy some rubber pads
at a ship's chandlers, to cut to shape to fit behind the rear seat belt brackets, but that was about the limit of my motivation. At least it have me a
chance to cut the grass, tidy the garden, and get on with a few other jobs around the house!
The weather this morning was really nice. A perfect day to get on with fixing the chassis! So I set off in the Cerbera for a run that took me over 100 miles
and just under 3 hours (I did stop along the way!) It was great! I needed a reminder that all this hassle is worth it - I was thinking while I was out that
it would have been better in the S today. In one town, they even laid on a pipe band to escort me through the town (I think that may have already been
organised, possibly, and I just happened to be the first car to arrive after the road closure, but it was very nice.)
When I get back I decide that I still have time to nip along to the garage and get the chassis and the repair tubes cut to shape so that they fit. So it's
load up the car time, with everything I think I might need. I left the welder and various other tools along there, there's no point carting them backwards
and forwards when I don't need them at the house, eh?
 I'll be happy if I can just get all the tubing cut to shape so that it fits together. After a few trial fits and a bit of angle grinder action, nicking
tiny bits off the chassis progressively, I have it fitting not too bad at all.
 And here it is looking from behind. This is when I think to myself that I would be better welding the body mounting plate to the tubes BEFORE I fit them to
the chassis. I will have to weld the plate along both its top and bottom edges, so that's about 2 foot of welding, with the top welds almost inaccessible
behind the tubes, and the bottom welds upside down. That little bit of horizontal weld at the back of the front brace isn't going to be easy if the plate is
in place, but it's about 3 inches long and a lot easier to faff about with than the alternative which involves 2 feet of awkward welding.
So again I check the old corner I've just cut off - the plate is mounted lower than the plate on the inner side, well below the tube centre line. I turn it
over and find that I can pack 5 layers of thin ply pieces (which I brought to pack the body off the chassis) between the floor and the plate. So - put down
the new corner (upside down), put down 5 layers of ply in the corner, lay the plate on top, and check it lines up with the marks I made last time. A couple
of wee tack welds than try it in place again - perfect!
Then I weld it, about an inch at a time, along both bottom edges. Turn it over, and weld into the top edges of the plate (even although the weld on the
bottom is almost right through the plate).
 Another trial fit - and it's perfect! Well almost - now that the front tube is fully in place, the side tube is a mm or two too short - that's fixable
though, no problem.
So here's how it goes together:
 First, there's a bit of smaller diameter tubing inside the front outrigger. The front outrigger gets drilled and that gets plug welded in place.
 Then the new section slides on, and that also gets plug welded in place, and a seam weld right around the join.
Another bit of smaller tubing fits inside the sill, and that also gets plug welded and seam welded. That bit of tube will have to be manouvered through the
join after it's in place, either using a screwdriver or a sacrificial gerbil.
Unfortunately, I have forgotten to bring my electric drill, (well I didn't forget it, I thought I had left it at the garage last time but obviously I didn't)
so I can't set up the plug welds etc (and I also want to drill the plate for the body mounting bolt before I put it on) so that's me stuck again for today.
Never mind though - I've got on fine with that today - all of that only took me an hour! I expected to spend 3 times that long just getting that join to fit
properly.
In fact, I've spent longer downloading and editing the photos, and writing this entry, than I spent doing the job in the first place... and now that I look
at the photos, the rear upper corner could do with a wee bit filed off it, to let the repair piece sit fractionally higher and line up better with the old
tubing.
I'll also have to strip more paint off that cross tube, and wire brush round the cut edge, before I try to weld it.
:: Thursday, September 9, 2010 ::
Been a bit busy with other stuff, but finally got back along to the car today. Forgot the camera though so I'll add the photos next time.
I start by filing a little bit off the corner of the front tube, so that it fits together better. Then I put the inside tube in, and mark how far it goes, then
transfer that measurement tot he outside of the chassis tube, and also the outside of the new bit. That tells me where I need to drill the holes for plug welds.
Then I do the same on the sill tube - mark the length of the inside tube on the outside. Then I drill holes for the plug welds in the chassis and in the new bit
I've made up. Make sure the holes are on the bottom or the sides where you can reach them with the welder when they are on the car!
Then I drill a hole in the body mounting plate, for the bolt to go through.
Right - this is a tricky bit. I can put the connecting tube inside the front rail, and push the new bit over - but I can't then get the connecting tube into the
sill, at the same time. Vice versa, if I put the tube into the sill first, I can't get the front section over the inner connecting tube. I need a way to slide the
sill tube into the joint, after I've put the front tube on.
Surprisingly, given my usual thickness, I come up with a solution after a minute or two. I cut off a couple of feet of welding wire, and put it in one of the
"plug weld" holes in the chassis, and out the other side. Then I push the inside tube into the sill tube, so that it takes that welding wire with it. Then I pull
the welding wire, and it pulls the inside tube back out. Trial fit works, so far so good!
I need to work out how I can tell when that inside tube is in the right position, as I pull it ouyt of the old sill and into the new one. I put it half-way into
the sill tube, and make a wee mark through the furthest-away plug weld hole, with the permanent marker. Then I take it back out, and make a slight mark right round
the tube with a hacksaw.
Final check that everything fits, all plug weld holes drilled, because once I take the next step, I won't be able to get this back off again without cutting it
apart. I check particularly that the sill tube is straight and will fit when the body is dropped back over it. Yup, everything fits.
So. Welding wire in place, push connecting tube into sill tube, grooved end first. Then insert the other tube into the the front tube, and slide the repair piece
over, make sure it's properly fitted. Then hold the new sill tube into position, and pull on the welding wire, and watch the connecting tube slide into the joint,
until that groove appears in the rearmost plug weld hole. Perfect!
Then it's simply (hah!) a case of welding up all the joints, and then the plug weld holes. Although access isn't easy, especially to the top of the side tube and
the back of the front tube, I get what seem to be good strong welds all round.
I start to grind down the welds (to make sure the body will fit over) but realise that it's getting near tea time (I've been at this 3 hours although it feels like
less than half that).
A final check of the welds shows that there's a tiny bit missed on one of the joints - I'll fix that next time.
Overall, though, I'm happy with progress today. What does that leave? Grind, clean, prepare, rustproof and paint!
Oh, and then put the car back together again!
:: Saturday, September 11, 2010 ::
I'm starting to wish I'd never started this. On Thursday, I spent the morning scarifying my grass, which wasn't good for my poor old back, so I was sore before
I started on the car. By the time I'd spent another 3 hours lying underneath it, covering myself in molten metal, I was a lot sorer! When I woke up yesterday
morning, I thought somebody had nailed my pyjamas to a board - I couldn't move. Still had to go to work though like a brave wee soldier.
Now that the pain has subsided a bit, I get along to the car reasonably early, and start by grinding down some of the welds. Then I fix the two wee bits of welding
that I missed.
 It seems to have all gone to plan. You can see here the welded joint along the lines I explained before, and the shiny bits where the top plug welds are.
 Here's the same bit from underneath.
 And the join in the sill tube, again with a section of smaller tube inside, and plug welded.
So that's the welding and metalwork finished! I'm going to put the car in an envelope and send it off to see if I get the Standard Grade metalwork I never got at
school.
The next step is getting it all ready for painting. The new bit is easy, but I need to get more of the paint and waxoyl off some of the old bits that are left. So
it's time to put the wire brush back in the angle grinder, and set about it! There is a huge difference in the adhesion of the Hammerite, with the paint almost
falling off the fronts of tubes (where they get hit by stones etc) yet sticking like glue to the more protected areas. Hammerite is good stuff, but clearly very
brittle under impact. The problem is, when it chips off, it takes the waxoyl with it, so you're left with nothing.
Once I have most of the paint off, I scrape off the remaining waxoyl (on my "overpaint" areas at the edges of the repairs) with a scraper. Then I wash the whole
repaired area down with "Marine Clean", which also dissolves the remaining waxoyl.
Then on the rear outriggers I spend ages picking the paint and any rust out of the suspension mounting brackets, to get them as best I can, back to bare metal (or
at least, bare rust). I check for thinness or holes with a screwdriver but it seems to be ok.
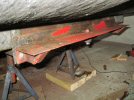 Finally I remember the bracket along the rear of the petrol tank (the one that's hidden by the alloy strip under the rear of the body). While I have the body
raised, I'll repaint that as well. It's in a hell of a state, and by the time I've finished scraping and wire brushing it, the garage floor is covered in crap
again. But that's ready for painting as well now!
The instructions say that before you apply the POR15, you should prepare the surface with Metal Ready - it kills rust in the old metal, and also etches any new
metal for the paint to take. I don't have time to do that today, so that's me finished!
I'm definitely happy to see progress, I just hope it all fits back together!
:: Sunday, September 12, 2010 ::
Day off from fixing the car today - I'm taking the Cerbera to a Sporting Bears lunch, where we'll be presenting the cheque from the TVR Car Club summer BBQ on
4 July, to the Clowndoctors.
First I check the car over - it needs about half a pint of oil, and a cup of water - that's in 1,500 miles near enough, so I can't complain about that.
The drive down is great - it's relatively early, the roads are quiet, so we can tick along. Coming back in the afternoon, though, is completely different. The
roads are full of the "40mph everywhere" brigade. Members have to pass an entrance exam that involves driving along at 40 mph on single carriageway roads where
the national speed limit applies, but being sure to nervously touch the brakes before teetering round the slightest bend at between 30 and 35. Speed cameras also
require the same braking caution. They also have to demonstrate a complete disregard for 30 mph speed limits in built up areas, passing through at their top speed
of 40, oblivious to pedestrians, parked cars, or anything.
As a result, they potter along in front of you, then disappear up the road when you reach a town, only for you to catch them up again after half a mile or so,
and repeat till next town.
Now they are bad enough, but they are inevitably combined with the anti-overtaking club, who will follow for miles, rather than risk an overtake on any straight
bit shorter than the Bonneville salt flats. Unfortunately, they also specialise in following at close quarters, so you can't even "hop" past them one at a time.
All of this means that half of the journey home is completed at 40 mph, while everybody follows the slowest car on the road that day.
This is even further exacerbated by a 15-minute queue at the only set of traffic signals, which appears to be caused solely by the inability of half of the
drivers in the queue, to co-ordinate pressing the accelerator down with letting the clutch up, less than 10 minutes after the car in front of them has moved away.
There are days, you know, when you start to wonder. Days when driving is no longer a pleasure, just a bleeding chore. This is one of those days.
This blog today has been sponsored by the new wonder anti-depressant drug "Fukitol". When life's a bitch, when the milkman brings the wife back for a refund, when
you're out of beer and money and there's still loads of month left till pay day, when the car won't start, and when it eventually does, you remember where you
were going and wish it hadn't, when you realise that you only go to work to get a rest - you need "Fukitol". Two tablets, twice a day, and you too, won't give a toss.
:: Tuesday, September 14, 2010 ::
Back to the S - this time, to start preparation for painting. I am using "Metal Ready" which is supposed to treat rust, and also etch new steel so that the paint
takes better.
It's supposed to be simple - you spray it on, leave it for 30 minutes, keep wetting it, and then wash it off.
Of course, it's not that simple. The spraying it on and keeping it wet is simple enough - it's the washing it off that's a pain, because it leaves white stains
on garage floors. So I have to put down a tarpaulin and a big catch tray that I have to keep moving about.
Obviously, you also have to dry everything after you've washed it, otherwise the paint won't take - so that takes ages, getting into all the nooks and suspension
mountings on the rear outrigger. I end up using a blowlamp on low heat to dry the last bits out.
And that's it ready for painting! The instructions for POR15 say to recoat when it's tacky dry - after 3 to 5 hours. You can't recoat it quicker, because it
dissolves the first coat I suppose. You can't recoat it after that time because the second coat won't stick. I don't have time to do both coats today so that'll
have to wait for another day.
Forgot to take the camera again, so no photos...
This blog today has been sponsored by the new wonder memory drug - erm what was it called again? They gave me some to advertise, but I forget where I put it.
Never mind, I'm sure it'll turn up. Ah yes! I put it beside my camera! Yay!
:: Wednesday, September 14, 2010 ::
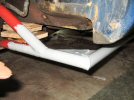
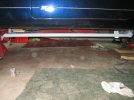
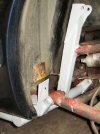
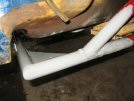
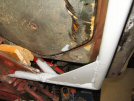
Yes I've been colouring in. This is two coats of POR15 rust prevention paint, over all the bits where the old paint fell off.
It's odd stuff - they advise you in the instructions to take out the paint you need and reseal the tin, because it will dry out while you're painting if you
leave the lid off. Also, they say "don't get paint in the groove in the top of the tin, it's seal permanently shut" - so you're supposed to use clingfilm between
the lid and the tin, if you want to ever get the lid off again.
It's very thin stuff, goes on like water, but it doesn't half stick to rusty steel. Rather than a brush, I use a foam pad to apply it - I bought them in a
ship's chandlers, they are meant for painting boats or something. That means you can use the edges of the pad as well as the end, to coat the tops of tubes etc.
After a couple of hours I apply a second coat, which sticks far better to the earlier coat, and goes on a bit thicker. Not too much though because it's still
dead runny.
I did manage to phone my office while I was waiting, and amused myself by telling them that I was only phoning them because it was a slightly better alternative
to watching paint dry. Well you've got to keep them on their toes, eh?
I remembered to paint the plate under the rear of the fuel tank, but I forgot to photograph it.
So - leave all that to dry for a bit, and then apply the red topcoat when I can get back to the car - that'll probably be at the weekend now.
I also set up the new shock absorbers by setting all the lower spring cups 10 turns up - just enough to nip the spring in place. I'll need to measure the ride
height when they are on the car, and adjust accordingly.
I also set all the damper adjustments to mid-way - 14 clicks from "hard" on each corner.
So they're now ready for fitting after I've finished painting.
:: Saturday, September 18, 2010 ::
Tie me kangaroo down sport, tie me kangaroo down, altogether now... Bom-te-tom, tiddley-bom... can you see what it is yet?
Yep I've been painting again!
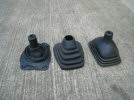 First, though, I have a trip to the local previously-enjoyed spare parts emporium - the scrappy, to see if I can get a replacement gear lever rubber gaiter. He
doesn't have any 1960s Transits in stock (there's a surprise) but he lets me have a wander about to see if there's anything else that might fit. The transit one
(that I took off) is on the left. The middle one is off a pile of metal which I think was once a Suzuki Vitara, and the right hand one is from a Renault Master
van. I'm not sure if they'll fit, but seeing as they only cost a quid each, it's worth a try.
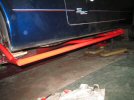
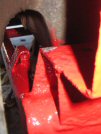
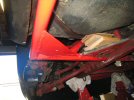
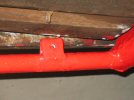
Then it's onto the painting! The grey POR15 is effectively the rust preventer and metal protection - it resists chipping, scraping, burning, bending, freezing,
global nuclear holocaust, everything. Unfortunately, like Superman, it has one weakness - sunlight! Yep it deteriorates in ultra violet light, so you have to cover
it so that it's kept dark. Seeing as I don't want my car to turn into a pile of smouldering dust at dawn, like Count Dracula, I'm going to paint over it!
The topcoat of choice is also made by 'POR15, and is a two-pack - you mix the paint and hardener, then paint it on before it sets. I use an old kitchen scoop to
put 4 scoops of paint and 1 of hardener into a separate paint receptacle (made by cutting down an old coke can) and mix them together. It's a bit like the POR15 -
it's quite runny to apply. But it covers well, and after a couple of coats (which needs 2 paint mix batches in total), the finish is pretty good!
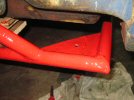
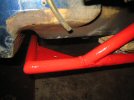
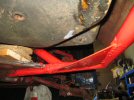
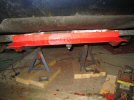
Once it dries, I'm going to lift the front of the body slightly, and move those wood blocks across so that I can clean and paint the two inner body mounts - the
paint is starting to peel off them as well.
Then it's time to start putting the car back together!
I also give the Cerbera a wash and spruce up - we're off to a show at Selkirk tomorrow for the Sporting Bears.
:: Sunday, September 19, 2010 ::
Day off from car fixing today - we're off to a show! I happen to wake up early so I decide to leave and have a nice run down to Selkirk why the roads are quiet.
After driving home through motor-zombie hell last Sunday, I could do with going at my own pace for a change! It's bucketing rain when I leave though, so the
pace won't be that high...
Half-way round the bypass I catch up to a nice Jaguar XJ6, who I follow for a bit before I stop for fuel, where the man behind the counter tells me he likes the
colour.
So then it's off again, roads still pretty quiet, so I reach the show almost an hour before I need to. We make a start to putting up the tents, displays etc, then
it's bacon roll time!
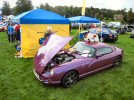
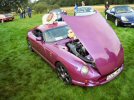 I'm amazed at how much attention the car attracts. Loads of people stop to look at it, and I let some of the kids sit inside. I also start it up so they can hear,
and that attracts an even bigger crowd!
I've said this before, but it's easy to forget, when you're in the car club and you see them all the time, just how special TVRs are - people like them because
they are rare, they are beautiful and they are British! I'm a lucky, lucky bastard.
I also speak to one guy who owns a Cerbera, and one who owns an S2, who is interested, in that odd masochistic way, in the chassis work I am doing to mine.
I show him some of the photos on the camera. I hope his is ok!
I also speak to the bloke in the XJ6 I saw on the way down.
Then it's a nice steady drive home (that's my new calm perspective on the dawdling bastards who won't get out of the way) before I tuck the car away in the garage.
Another good day!
:: Saturday, September 25, 2010 ::
I've had a busy work week, so I haven't been able to get along to the car during the day time. Also, the nights are drawing in so that means I don't have a lot of
time at night before it gets dark (I usually try to be off the farm by dark - they don't like people still there after then). It's all taking a bit longer than I
meant it to take - but there again, I'm not in that much of a rush anyway.
So today, I faff around in the house for 3 hours before I set off to get on with the car.
First job is to jack each footwell up very slightly at the front, and move the wooden support blocks from the inside body mount, to the newly-rebuilt outer mounts.
That lets me get a scraper and brush in, to remove all the old paint and the original powder coat. Then I wash that area down with Marine Clean, and dry it all off.
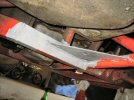 Then I take another little batch of POR15, and paint the inner mounting plate, and the bit of the chassis and outrigger they mount to. I also remember (just!) to
paint those little spreader plater that I intend to put behind the seat belt mounts under the rear wheel arch. By the time I've finished the first coat, it's time
to start the second, and I get both coats out of the one paint batch.
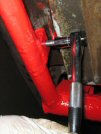 I need to make sure I can get the seat belts back on when I lower the body, and my main concern is that paint has got into the threads in the little mounting brackets
on the sills. I take one of my new mounting bolts, and thread it into each mounting bracket with a little spray grease.
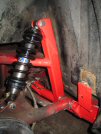 While I'm waiting for the paint to dry, I decide to fit the rear shock absorbers. I notice that they are about an inch shorter than the old ones at full stretch,
so I'll probably have to adjust the ride height once (if!) I get the car back on its wheels. I've bought new bolts, nuts and washers for this as well, seeing as
the old ones are well past it. I spray the mounting bushes, the inset "top hat" washers, and the bolts with grease before I assemble everything, to make sure it'll
come apart again next time.
First the bottom mounting, then I jack the wheel hub up slightly to push the top bush into place. Line up the top bush, put the bolt through, then tighten
everything up. I noticed that my old bolts were the same length, top and bottom mounting. The book advises that the top bolt should be 1/4 inch shorter, so that
it doesn't push against the body - I've ordered a shorter top bolt so that's ok.
I need to paint over the last bits of chassis with topcoat, but I'll have to let the rustproofer dry first. I'll do that tomorrow, and change the front shock
absorbers between coats.
The next step after that starts with "lower body back into place!" - at long last!
:: Sunday, September 26, 2010 ::
Nearly there!
First I mix up a wee batch of red POR15 topcoat to finish off those inner body mounting plates. The lid has stuck firmly onto the topcoat hardener, so I end up
having to punch 2 holes in the lid (like you used to have to do with cans of condensed milk...) and pour the hardener into another empty jar, leaving just enough
to add to my paint batch.
After I've painted the first coat on, I change the two front shock absorbers - again the new ones are about an inch shorter than the old ones, so I'll probably have
to adjust the height of those as well. I remember to add copper grease to the bolts and bushes - I've learned my lesson, and now know how long it takes to cut
through all the mounting bolts if the bushes are siezed!
Then it's back to give the topcoat a second coat, to even it out a bit. I also remember to paint the little spacer plates.
So that's it ready to put back together after all the paint has dried!
I go through my list of mounting bolt sizes, because I remember that there was one size they didn't have, so I bought longer ones with the intention of cutting
them down. I can't remember which bolts it was though. A quick check of the list confirms that the two bolts that go down through the body into the top of the
transmission tunnel should be 25mm, and I don't have any: I have 2 extra 40 mm ones. I run a thread die up the bolt, clamp it in a vice, and then cut through
them, before rounding off the cut end with a hand file, and removing the die to recut the thread. I try the cut bolt in another normal nut and it works perfectly.
I also went out and bought some thick plastic floor tiles, that I can cut up to make additional spacers between the body and the brackets, if I need any to level
things up. Another £2.98 spent - this is getting expensive!
Won't get back along to the car now until Wednesday or maybe Thursday, but at last, I'm looking forward to starting to put it back together. I think it might
take me another month to clean all the dust off it!
:: Thursday, September 30, 2010 ::
Right - time to start putting the car back together!
When I lifted the body, I lifted it back-front-back-front in 2 stages - so I'll put it back down in the opposite order, so it should end up where it started eh?
So - using two jack, I lift the front slightly, and take out half the bits of wood. Then the back... then the front again, making sure the rubber packing pads are
in place, using a drift through the hole to line the holes up. Then at the back, make sure the rubber pads are all in place (2 under the seat belt mounts, 2 on top
of the chassis at the top of the wheelarch, and two on the bracket across under the rear valance, and drop the body into place.
Then I put the 4 footwell bolts in, and put the washers and nuts on, but don't tighten them yet. The bolt on the outside offside bracket (the one I cut off and
replaced) doesn't line up properly, so I have to raise the body a fraction, wiggle the rubber pad out, and drill a hole that lines up. Reassemble everything, drop
it dowm, and it's fine.
Then I put in the bolts at the rear: 2 bigger ones downwards under the seat belt reels, which fit into captive nuts, and two that go through brackets against the
main chassis. I also wiggle in the 2 bolts in the boot. Then I tighten all those main body bolts up.
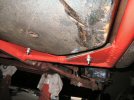
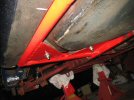 Then it's on to the seat belts - 4 bolts each side for the belt reel, 2 mounting points plus the stalk. They are fiddly but they do eventually go in!
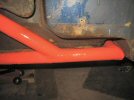
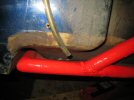
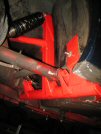
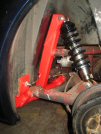 So far so good - it's all fitted together ok, the body fits properly over the chassis, everything lines up.
So it's on to the other stuff - first I reconnect the fuel tank sender, and the earth pint under the wheelarch above the sender.
I get some cable ties and re-fix the fuel pipes to the top chassis rail, the fuel pump wires to the crossmember, and the cabling under the nearside front wheelarch.
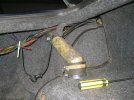 Then I refit the fuel filler neck - which turns out to be a right bugger, but with the aid of brute force and vaseline, it eventually goes on! I tighten up all the
hose clips, but I'll need to put some sealer around the short rubber hose that connects through the boot floor into the top of the tank - it needs to be sealed into
the boot floor.
Then I reconnect the top steering UJ and repace the gaiter I stretched over it.
And that's it for today, boys and girls. I started at about 10:00am, and got to this point by 4:00, without any lunch stops or anything.
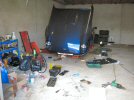 As you can see, I'm not the tidiest of workers, I tend to leave tools and things where I last used them, and then tidy everything up at the end. This time, it
takes bloody ages!
Happy with today though - next I have to replace the handbrake, install the two bolts on top of the transmission tunnell, fit the gear gaiter, then replace the
centre console, gear knob etc. Then I have to replace the exhaust and the wheels, reconnect the battery, and start it up! Nearly there!
 I'll be happy if I can just get all the tubing cut to shape so that it fits together. After a few trial fits and a bit of angle grinder action, nicking
tiny bits off the chassis progressively, I have it fitting not too bad at all.
 And here it is looking from behind. This is when I think to myself that I would be better welding the body mounting plate to the tubes BEFORE I fit them to
the chassis. I will have to weld the plate along both its top and bottom edges, so that's about 2 foot of welding, with the top welds almost inaccessible
behind the tubes, and the bottom welds upside down. That little bit of horizontal weld at the back of the front brace isn't going to be easy if the plate is
in place, but it's about 3 inches long and a lot easier to faff about with than the alternative which involves 2 feet of awkward welding.
 Another trial fit - and it's perfect! Well almost - now that the front tube is fully in place, the side tube is a mm or two too short - that's fixable
though, no problem.
 First, there's a bit of smaller diameter tubing inside the front outrigger. The front outrigger gets drilled and that gets plug welded in place.
 Then the new section slides on, and that also gets plug welded in place, and a seam weld right around the join.


