(Disclaimer - the following explains how I carried this out on my car. This is purely advisory, and is given in good faith. This method may work for you, and it may not. If it goes wrong, then don't blame me!)
I discovered as I was driving along that my headlights were stuck on main beam. I could get them to go to “dip” if I held the indicator stalk back slightly. They also went to dip if I indicated “right” but not “left”. A wee search on-line showed that this is a common problem caused by the switch housing getting hot because the switch carries full headlight current. There is a relay kit available in the USA, to bypass the switch so that it only carries a small “activating current”, but I can’t find that here in the UK. I’ve ordered some relays and bits to make my own, and I might explain that later, but in the meantime, I need to get the car lights repaired. So I need to replace the switch.
Step 1. Disconnect the battery! I didn’t, right enough, but this leads to several comedy gold moments as you keep earthing the horn connection and giving yourself a fright. There might also be a risk of death (either to you or the car) as you swap connections over.
Step 2. Remove the steering wheel. First centre the wheel so that the centre pad is horizontal. Then pull off the horn pad - it’s held on with 3 springy clips, two at the bottom and one at the top. Laugh as you toot-te-toot while you do this. Then remove the wire on the back of the pad. Laugh again as the wire earths on the steering wheel and more tooting ensues.
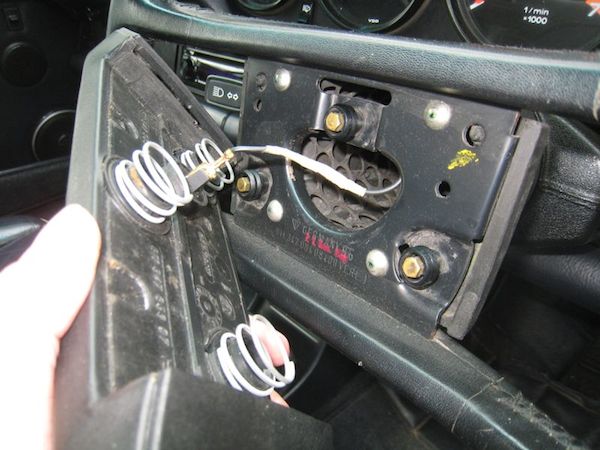
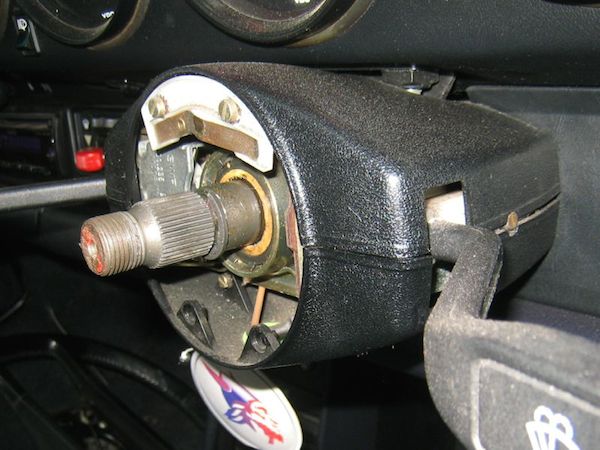
Step 3. That leaves you with this: Now you need a 27mm socket to fit the nut on the end of the steering column. If you’re lucky, like me, you’ll find that your 27mm (or 1 and 1/8th AF) socket doesn’t quite fit through the available gap. I filed slightly along the edge of the wee bracket for the horn pad holder (coloured in yellow) - it only needed a slight shaving.
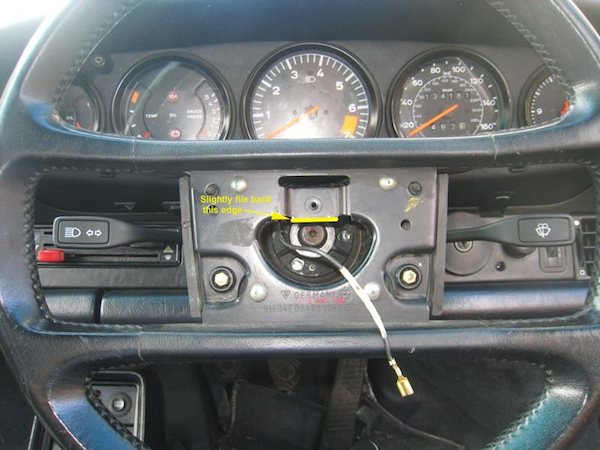
Step back to avoid a broken nose. Now, loosen the centre nut by a few turns, but don’t remove it. Then, sitting in the drivers seat, check that the wheel is still central, then give the wheel a good hard yank with both hands (ooh er missus!). This is where the nut you left on, stops the wheel from embedding itself in your face as it comes free. Now take the nut off and remove the wheel.
That gets you to here:
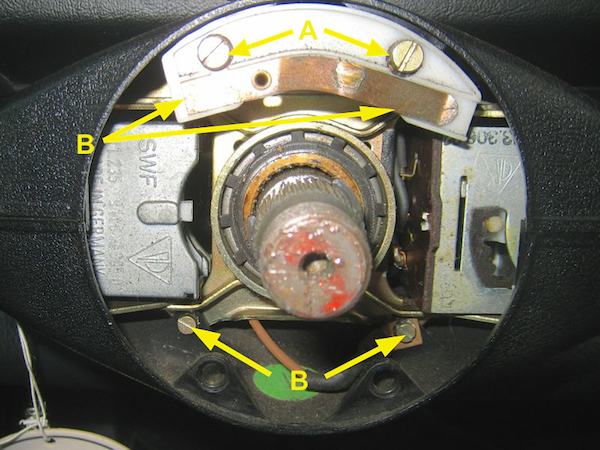
Step 4. Remove the two big screws arrowed A in the picture, and remove the horn contact plate. Hoot with laughter is it falls forward and touches the column. Toot-toot! Then remove the wire from the back. This photo is a bit blurred to give you an idea what this will look like if your eyes are still watering after smashing your face in with the steering wheel earlier.
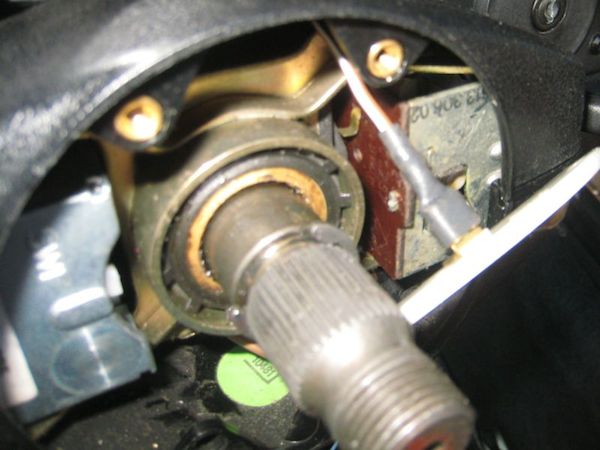
Step I can count to purple. Remove the 4 fiddly little screws marked B in the photo. Use a magnetic screwdriver unless you have fingers like an anteater - they are really hard to reach. Note that the bottom left one has an earth wire under the screw. Don’t drop the screws inside!
Step 27. Now remove the two screws in the sides of the switch housing - one each side. Don’t get all these screws mixed up, by the way, they are all different threads. What’s that? You already have? Oops. Now fiddle the top and lower housing off. Remember which is which!
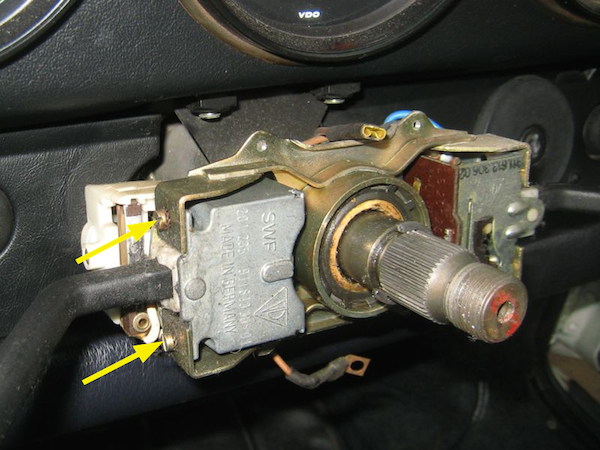
Step up to the plate. First note the route of the brown wire that loops around the column and connected to the horn contact plate. Now remove the two screws holding the switch onto the column, and push the whole switch in, towards the dash, so that it slips out under the bracket.
Step Inside Love. Now it starts getting tricky. Remove the knob from the headlight switch. On my car, a 1989 Carrera, you prise out the plastic symbol from the rubber knob, and then remove the 10mm lock nut in the centre - then the knob just unscrews. Other models may vary.
Steps “Don’t stop Moving”. Now remove the switch. I used circlip pliers to turn the locking ring, because I don’t have the proper tool. However I have been informed that I am a proper tool, so the ying-yang balance is maintained.
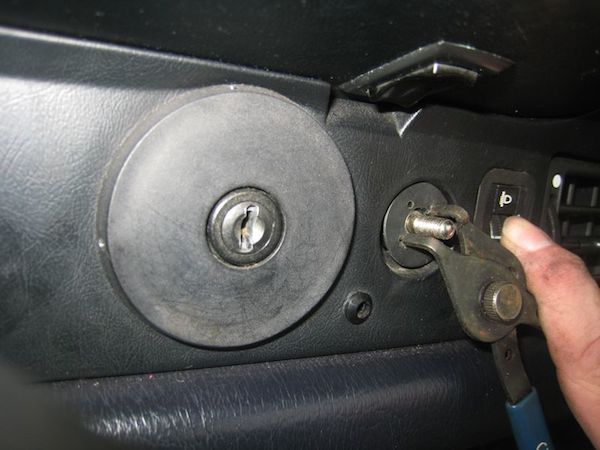
Step 89. This is easier said than done. Now push the switch back out of the dash. There are a lot of wires in the way, and also, on mine, the vacuum tubes for the headlight adjusters - just be careful that you don’t dislodge any wires from the switch or from anything else. By a combination of twisting it, turning it and cutting your fingers to shreds on it, you’ll eventually get it hanging below the dash. Don’t disconnect anything!
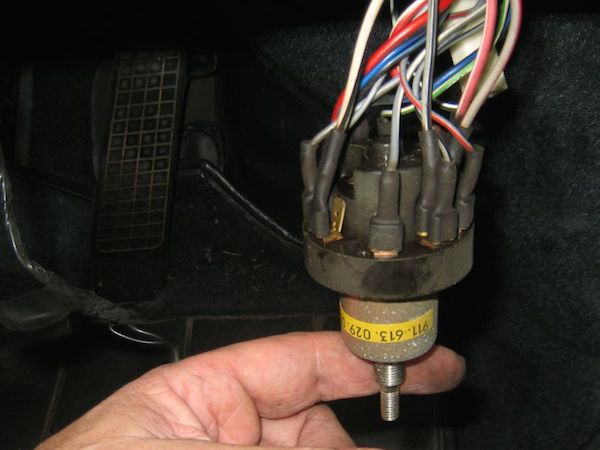
Step away from the car and relieve those aching back muscles. While you’re wandering around, go and get the new switch. You’ll see that it has two main cables - one of them ends in a 5-pin multi-plug, the other in various separate spade connectors. There are various other bits of wire and connectors as well. Looks scary, huh? Well don’t you worry your purty lil head - we’ve got somebody brainy to explain it all as we go.
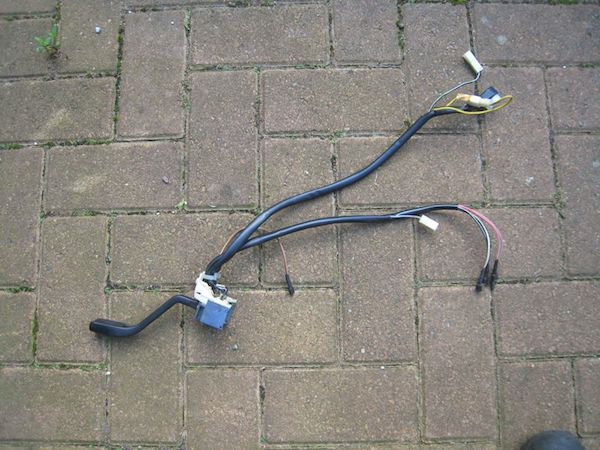
Step-hen Hawking. Before you disconnect the old switch, thread the wires for the new switch between the dash and the column, along the route of the old cables. It can be very fiddly getting the cables through the gap between the column and the dash, but it does go. Follow the cable routes exactly so that the new wires are hanging down beside the headlight switch.
One Step Beyond. Feel along the cable until you find where the multi plug goes. On mine, it was slightly behind the footwell trim, so I took out the two screws into the door pillar so that I could get my hand behind it.
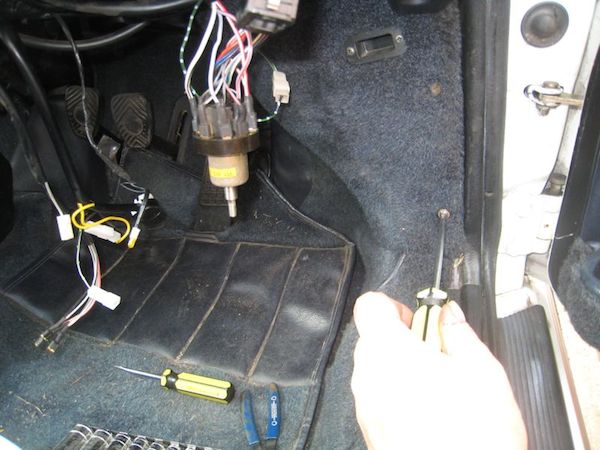
Step 101. Then unplug the old multi plug, and plug the new one in. Then unplug the separate green / black wire and plug the new one in.
Step-hen King. Now for the scary bit - the headlight cables. You need to be veeeery careful. Go one wire at a time. On the new cable, identify the red/white wire. Then find the red/white wire from the old cable to the switch. Disconnect the old wire, and replace the new one. Do that, one at a time, for each of the 4 wires to the switch - disconnect the old cable and connect the new one. Be careful that some of them are “double connections” on the switch - don’t disconnect the wire that goes to the rest of the loom, only the one from the old switch cable. Then there is another separate connector half—way along the cable - replace that.
Military two-step. So now your new switch should be fully connected up, and the old one fully disconnected. So now you gently untangle the old cables from the rest of the loom, and withdraw them between the dash and the column, being careful not to dislodge any other wiring as you go. Again, it can be fiddly getting them through the gap, but it does go!
Assembly, as they say, is the reverse of removal. Push the new switch forward under the bracket and then screw it in place. Replace the headlight switch, and then maybe test that everything works before you put all the trim etc back together.
Step boldly down the road to the pub. Well done!