:: Diary - October 2007 ::
:: Saturday, October 6, 2007 ::
Before I set off for the TVR car club meeting, I align the headlamps while the car is in the garage, and therefore in the
dark, see? No flies on me...
I looked up the MOT website to make sure that I was doing it right. This diagram here shows the regulations:

So dip beam has to point downwards by between 0.5% and 2%. I usually aim for the 0.5% because I like my headlights as far
up the road as I can aim them. 0.5% is equivalent to half an inch downwards, if the car is 10 ft from a wall (which is as
far from the wall as I can get it, inside the garage with the doors shut (to make it dark)
(If the headlights are higher they have to point downwards at a steeper angle but since it's a TVR we're talking about,
let's leave that bit!)
First mark the headlamp centres onto the wall, making sure you have the horizontal AND vertical centres right.
Then move back and park say 10 feet from the wall, but still at the same level, and put on dip beam. The dip pattern is
like a half circle of light with a horizontal cutoff and with a "peak" to the left to light up the verge. The peak joins
the horizontal line at a distinct angle. That point where the angle joins is the centre of the beam. That should line up
with the centre marks you made, but half an inch (or maybe slightly more) below.
It's very important that the car is at right angles to the wall and still in line with the original marks.
Replace the chrome trims then back to the house for a quick wash (the car not me) and set off for the meeting in roasting
(well ok, mildly warm) sunshine, but by the time I get halfway there, it's freezing.
Tell me this. How is it that I drive hunners of miles a week in the Lexus, up and down the country, and while you meet
the occasional impatient nutter, for the most part nobody bothers you. They follow at a reasonable distance, pass you if
they want to and that's it.
Drive a car with a TVR badge on its backside, though, and you're guaranteed, within a few miles, to attract at least one
"have a go hero" who just HAS TO drive right up your arse to show that he can go faster than you, and then pass on the
shortest straight that their wheezing heaps can work up a few extra miles an hour, before invariably relying on you to let
them in again before they hurtle into the 44-tonner that's just hove into view around the next corner.
That's if they see it. Most of them are usually looking over to revel in the look of fury on your face as they put you in
your place and prove once again that putting a "turbo" badge off a top of the range dyson vacuum cleaner onto a Corsa 1.2
endows it with supercar qualities that render it unbeatable by anything that doesn't have a Saturn booster rocket bungeed
to the roof. Their gloating is usually somewhat diffused by my latest practice, which is to wait until that crucial
"glancing over" moment before picking up and studying a Jelly Baby and then eating it - perhaps with a smile and a wink to
show them just how tasty jelly babies are.
While this no doubt emphasises to them that just because you drive a TVR, you're not trying like a bastard everywhere you
go, it probably doesn't prevent them gloating down at Maccy D's about how they blew away one of those TVR things man,
wikkid etc. There's a driver of a Skoda diesel taxi around here who must be convinced by now that his car is supercharged.
This now happens to me nearly every time I go out in the car - at least once per journey and sometimes more. Sod it,
they're too stupid to know and I'm too old to care.
I arrive at the meeting a wee bit late. There are another couple of new faces, and a couple of people looking to buy their
first TVR and looking for advice. I also meet the chap in Perth who bought the S with a recent MOT but a chassis made of
fibreglass and cardboard, and currently being rebuilt by a specialist down south. He shows me photos of his chassis, that
are woeful to behold.
There is a total of 16 cars there, not bad considering that we're well past the summer. 4 S's, 4 Griffs, 4 Chimaeras,
3 wedges and Willie's TVRolet - a marriage of a Tuscan racer with a 6.3 litre smallblock Chevrolet engine. It looks and
sounds great, and the finish is excellent (especially considering that most of it has been hand-built by Willie himself).
This is the first time I've seen it (the first time, I think, it's been to a club meeting) and it's a bleeding brute.
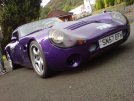
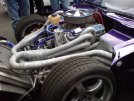
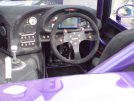
Stewart has brought along the Griffith he's just bought, which is also very nice. I could be tempted into one of them...
Following the boily-boily episode at Selkirk last month, Dave noticed that the overflow pipe on the radiator bottle was
broken. Now I don't think that makes any difference to the coolant temperature or pressure but I was going to look for a
replacement over the winter. Dave has brought his old one (he's had a new one made in alloy, natch) which he kindly
donates to me. It needs a bit of a clean up but that shouldn't be too difficult.
Then the drive home, again a wee bit short of time. This time the have a go heroes are in a Renault of some description (a
Megane or something, I dunno) which follows me past a lorry and a caravan on a dual carriageway while sitting about 2
inches off the bootlid. He does well, to be fair, until we come to a roundabout and he has to accelerate back up to speed
again, which costs him a mile or two. Nevertheless, with a terminal speed unrestrained by any imagination of his own
mortality or mechanical sympathy for the screaming cacophany of pistons bouncing through his bonnet, he is soon up my
chuff again. And me with no jelly babies, what's a poor TVR driver to do?
He's most displeased about half a mile later when, as he finally passes, I stick my indicator on and turn left towards the
garage.
:: Sunday, October 7, 2007 ::
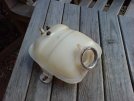 Decided to clean up the radiator bottle, with hot water and detergent and one of those curvy little bottle brushes that
looks like a loo brush for people who want their post-ablution hygiene to be the most thorough. After I have cleaned all
of the sludge out of the inside and the muck off the outside, I sand down the rust off the bottle neck to ensure a good
seal with the pressure cap.
Next step is to fit it. I think I'll do that while I change the steering column bush - I'll have better access with the
bottle out of the way.
:: Sunday, October 14, 2007 ::
Not a lot today. I have made up a list of winter jobs to fix various niggles that could be better. This includes the
steering column bush that has featured on my "to do" list since I bought the car, plus dropping the exhaust, cleaning up
the transmission, fixing the front brakes which have been vibrating on the last 2 or 3 runs the car has been out, tidying
up the radiator swirl pot which looks shabby, replace the radiator expansion tank, fix the speedo and instrument lighting
(broken bulbs I think), scrape and paint the petrol tank cradle, fit rew adjustable-height rear shock absorbers, fix the
fuel gauge, rehang the drivers door, polish up the wheels (yet again), polish the bodywork (which I notice is covered in
swirl marks when under the garage lights) - the list goes on!
First step is to sweep the floor. At some point during the six weeks that the car was at the house, the farmer decided to
install new electrical cables to a workshop further up the yard and ran the cable through the walls of my shed, dropping
concrete dust everywhere. At least this prompts me to tidy up some of the accumulated rubbish!
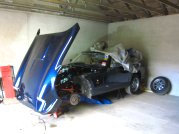 Next step is to get the car up on stands. I have two sets of axle stands - the big ones are the same height when down, as
the wee ones are fully extended. After much jacking and supporting on bits of wood, I get the car up to carcass-clearing
height. This photo shows the car with the cover pulled back, on the stands.
By then I am so knackered that I decide to go home.
:: Monday, October 15, 2007 ::
Another long-put-off job - sinve I fixed the swing-arm in April, and put new springs on, the car has been sitting too high
at the back. It's also not quite as steady-handling as it was (possibly because of the ride height but the shocks could be
done) and needs new (adjustable height) shock absorbers.
I order a pair of AVO 718's, which the website says are for the rear.
:: Tuesday, October 16, 2007 ::
A more productive day - not as good as I had hoped, but a reasonable start considering that I only had 2 hours to play
with.
I remove the front wheels and drain the coolant by removing the bottom radiator hose. I am going to put new antifreeze in
anyway so this stuff gets chucked. It's manky anyway.
There are 5 hoses of various sizes fixed to the swirl pot. The 2 top ones are almost the same, but one goes to the
expansion tank and the other goes to the engine so to avoid getting them mixed up, I mark the top one by wrapping a bit of
tape around it, before removing the jubilee clips and removing the hoses.
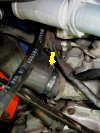 The wee hoses come off without a lot of bother, but the big main hose is a right bugger. I decide to remove the other end
as well and it's then that I notice that it's split at the clip and just about to burst open. Tragedy averted! (This one,
at least!) I finally get that hose off plus one of the wee hoses which is also perished at one end, so I'll find a couple
of replacements. Don't quite know where, yet.
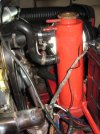 The swirl pot is held on to the chassis by 4 bolts through the base plate. Three of those come off without any bother, but
there's always one... I end up grinding the 4th bolt off with an angle grinder, because I just can't be arsed today with
nifty bolt grips and thread splitters etc. I'll find a couple of replacements. Don't quite know where, yet.
Just as I finish this, the shock absorber supplier phones to say that their catalogue number is wrong, and that I have
ordered "fronts". He changes the order to "419"s which are "rears".
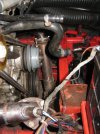
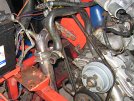 The chassis plate is fine but needs repainting before I reinstall the swirl pot.
The swirl pot itself is in worse condition than I thought. There is a lot of rust and scale inside, and it looks as if the
paint is holding it together. I'll wire brush the paint and rust off and see what it looks like, before I decide whether
or not I need to order a replacement. Don't quite know where, yet.
That's taken me 2 hours so it's time to go home, taking with me the bolts (so I can get new ones), 2 of the hoses (ditto)
and the swirl pot (for wire brushing and hopefully not ditto).
:: Friday, October 19, 2007 ::
Decided to take a day off work, to do something more relaxing - so I decide to take the car to bits.
The shock absorbers are delivered today - part no "418 front". Wrong bits.
First I go to the local motor factors and ask for a rummage through their box of radiator hoses. After much digging and
comparing, I find a bit of hose that's almost the same shape as the nearly-burst top hose I took off on Tuesday. £8 it
costs me - hope it fits!
Then it's along to the garage. Where to start today? I think I'll start easy and take off the radiator bottle - should
only take around 10 minutes. Aye right.
It's held on with two bolts through the bulkhead. One of those bolts is under the brake fluid reservoir, tight against a
clip that holds on one of the two wee fluid hoses that go to the master cylinder. The other bolt is behind the two hoses.
The first bolt (behind the hoses) comes off easy. The second one is a bugger - I end up having to loosen the hose clip on
the master cylinder to turn it to get a socket onto the bottle mounting bolt - and the damn thing comes off. So that's air
in the brake system then. Great.
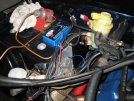 After an hour, I have the radiator bottle off. It's started well, I see...
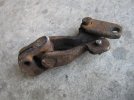 Right - now the steering column bearing. First step is to remove the upper universal joint on the column. It's held on
with a clamp bolt, which are notorious for rusting up and then shearing when you try to take them off. I put a socket on
it. It shears, as expected. Great. It's off though.
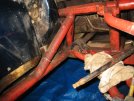 After another bleeding age of hammering and battering, I manage to get the other end off the column linkage so that I can
try to get the broken bolt out later (or buy another UJ).
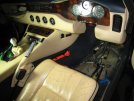
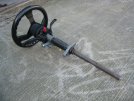 Remove the steering column shrouds, unplug the electrical connectors to the ignition, lighting, wiper and indicator
switches, then remove the two big bolts holding the upper end of the column behind the dash. The column pulls back out of
the bulkhead bearing - the only easy bit of the job so far!
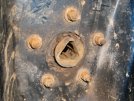 Now that the steering column isn't holding it in place, it's pretty obvious that the bulkhead bearing is completely shot.
It's held in with 5 wee bolts from the footwell, with nuts under the bonnet. Unless you have 16-foot=long india rubber
arms, you can't get a spanner on both ends at the same time. In fact it's bloody hard to get a spanner on the inside bolts
at any time - they are tight up against the bearing housing.
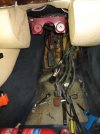 With a lot of fiddling, I get one of the bolts loose, but it takes ages, and it would be a lot quicker if I had a spanner-
monkey to take the nuts off while I hold the bolts, so I give this up for the meantime.
I then have a 15-minute lie-down on the garage floor while I straigheten my back out again, after contorting myself into
the footwell for ages.
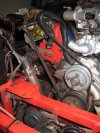 Let's finish off with some recreational painting instead. First I wore brush and paint the platform for the swirl tank to
go back on.
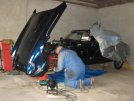 A rare shot of the git in action. Now you'll understand why the car has to be jacked up so high...
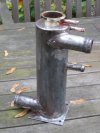
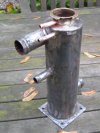 When I get home, I attack the swirl pot with my wire brush, mainly to check if there are any rust holes under the paint.
It doesn't look like there are... I am in two minds about repainting the tank though - will I paint it red to match the
chassis, or a silver-aluminium colour, or maybe satin black (which would be best at conducting heat). That's three minds,
mind.
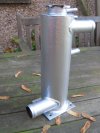
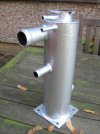 In the end, I decide on silver (mainly because I have some in the shed).
I also have a go at getting the broken bolt out of the steering UJ - but it won't move. I wonder how much Sierra or Fiesta
steering UJs are? A quick check on-line shows that the UJs aren't standard Ford - one end is, but the other isn't. They
are only available from TVR specialists, which is normally code for "they'll cost a mint". And they do - £50 each! Renewed
efforts on bolt-removal required!
I'm knackered!
:: Saturday, October 20, 2007 ::
First half of the day is spent kicking my heels in a Lexus garage for 2 hours and a bit, while they change a bit of
windscreen trim, which has come loose. It's a 10-minute job but takes ages. Sometimes I'm glad I can fix cars - relying on
garages would drive me mental. I can't fix the Lexus because I'm not qualified to work on company vehicles. The yoof
experience shaved chimp I see through the garage door, obviously is.
Anyway, when I get home I decide that I don't like the swirl pot in silver - it looks too much like it's trying to pretend
to be alloy, but failing.
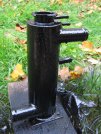 So I give it a rub down and paint it black. Unfortunately, the paint reacts with the silver underneath and goes all
pimply, so I'll need to start again. At least it confirms that black looks better than silver.
Now then - the steering joint. At £50 for a new one, it's worth another attempt at getting the broken bolt out.
Unfortunately, after half an hour playing with various sizes of mole grip and vices (no not bad habits, vices you clamp
things in) and other extraction techniques, total progress is zero. Time for some more serious engineering. First the
angle grinder to remove the end and grind the broken bit flush (how did I ever get by without an angle grinder until
earlier this year?). Then a centre punch marking dead centre of the bolt, and carefully drill down the centre, using
drills of progressively bigger sizes until I reckon I am just about through to the inside edge of the thread. A bang on
the other end with a hammer, then a mole grip on the bit sticking out, and I remove the threads of the bolt, more or less
intact. I put an old bolt (with the same thread) through a thick bush and tighten it up to make sure it's not stripped.
It's fine. Joint restored for use!
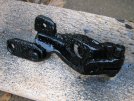 I give it a spray and it looks as good as new. Obviously, I'd checked it for excessive play before I started all this
palaver! My lifetime record of not paying over the odds to buy stuff from a TVR specialist, remains intact!
Then I discover that I can't find the radiator bottle that I cleaned up last weekend. I've put it somewhere safe - the
boot of the TVR probably - but I can't go along to the garage to check. It must be there - I can't find it anywhere here
at the house.
:: Sunday, October 21, 2007 ::
I'm out first thing today with a tin of nitromors, stripping the swirl tank back to bare metal. The black has gone all
pimply so isn't sticking to anything very much, so comes off easy. The silver is sticking like stuff on a blanket so it
takes a lot of nitromors and concentrated steel-wooling to get the paint off. I get it off though. Then I wash the tank
down to get all the nitromors off, and leave it to dry.
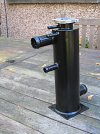 Then I spray it with Hammerite satin black (when in doubt, go back to the old Hammerite!) and leave it to dry while I go
to the garage to remove more bits. I does look good though - much better than black gloss.
First job at the garage is to look for the missing radiator bottle - except I can't see it. Must be in the boot then. One
problem - the boot only opens when the ignition is on - and the ignition switch is on the steering column in the opposite
corner of the garage. 5 minutes with a couple of split pins soon sorts that - pushed into the right bits of the wiring
loom and the boot pops open.
The radiator bottle isn't in there either... hmmm... it must be at home - but where?
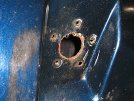 Anyway on to the first job for today - removing the steering bush. I have brought a glamorous assistant to help (seeing as
I can't reach both sides of the footwell at the same time). It's a right bugger because the shape of the housing prevents
you getting a spanner on the bolts, but after 30 minutes of faffing about, it's off!
The existing bush is mounted in a plastic housing, and it looks as though it will break when I try to take the bearing
out. I think I'll just order a new (metal) one.
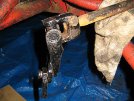 On to the steering joint. I refit it to the end of the rack linkage, and tighten up the clamp bolt, ready to refit to the
steering column.
Next job - remove the rear shock absorbers. Compared to the fiddly pish I've dealt with over the past couple of days,
this bit is easy!
Back home, I decide to give the swirl tank a second coat of paint, this time hanging it upside-down so that I can paint
the bottom. First I need one of my hanging-things-up-for-painting wires, which are hanging from the roof of the shed.
Hanging on one of them, above the workbench, is the radiator bottle that I've been looking for for 2 days. I KNEW I'd put
it somewhere safe!
By the time I've sprayed the tank and let it dry a bit, it's too dark to photograph. It looks good though!
I need to order some stainless steel bolts to put this lot all back together again.
Later on at night, I order a bush housing, a TVR badge (to replace the one on the boot, which is crap), a fuel tank sender
unit and a couple of seals. Don't have time to order bolts because I have work to do if I want another day off.
:: Monday, October 22, 2007 ::
Work today, so no car-fettling.
I order a selection of stainless steel bolts for the swirl pot, the radiator bottle and the steering bush, supposed to be for "next
day delivery".
:: Tuesday, October 23, 2007 ::
Hospital appointment this morning, so I decide to take the whole day off and get some more car bits spread over the garage floor.
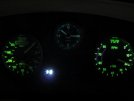 While my clothes and hands are clean, I decide to fix the speedo light bulb - it has two, but the right hand one doesn't work (it
never has!) so at night I don't know what speed I'm doing till I get up to 60. Not ideal. I tried to get to it before but the
steering column was in the way - so I'll do it now while the column is out! I dive head first into the footwell and can just get
my fingers on to the bulb holder. The bulb is blown (and silvered) and is one of those wee capless things - ie fiddly as hell.
I hivny goat ony spares so I'll have to buy one.
Next job is to remove the exhaust so that I can clean it up, take off the alloy strip across the back and repaint the fuel tank
cradle.
The downpipes come off really easy - stainless steel bolts are a blessing!
The rest of the exhaust is held on with two bolts in the middle (at the so-caled silencer) and a single bolt right at the back. At
this point I discover that TVR obviously build cars with the engine and exhaust etc mounted to the chassis before they put the body
on. This means that getting a spanner onto the two middle bolts is really hard because the body is just above them. I manage to
compress the rubber bush enough to get a thin ring spanner on, then a socket on the nut to remove. The bolts have to stay in
place - they are too long to get out of the chassis without hitting the floor.
Right, only the single back bolt to go. With the front of the exhaust supported on a jack and a bit of wood, I get a 17mm socket on
and it turns about 1 degree and sticks. Although it's a fairly thick bolt, I'm wary about snapping it in its captive nut through
the chassis, so easy does it eh? It's as rusty as hell and tight and partially-siezed the whole way out, so it takes ages to make
sure I don't snap the bloody thing. With plenty penetrating oil, and easing the bolt back and forth a quarter turn at a time, I
ease it out. And out. And out. It's bloody massive! At one point I think I might have to dig a hole in the garage floor, or jack
the car up by another couple of feet, just to get it all out, but it does eventually come free.
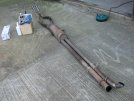 As you can probably see, it's manky. It's covered in mud, it's got what looks like a melted binliner sticking to bits of it, and
it's rusty (not too bad, it's stainless steel, but there is some surface corrosion).
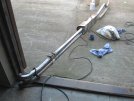 After an hour and a bit, it looks a lot better! First I wire brushed all the crud off, then polished it with metal poish applied
with steel wool. It's not perfect but it's not too bad at all!
You would think that would be enough for one day, but no - I decide to remove that alloy strip so that I can paint and rustproof
the fuel tank cradle. It's held on with two bolts that also hold the body on to the cradle, through the boot floor. I manage to
wedge a spanner into the boot floor and get one bolt off. The other is siezed solid, and won't budge - the nut is badly rusted and
rounds off in a nanosecond. Great. I contemplate various subtle means of removing the nut, using bolt grips, nut splitters, etc.
Then I say "bugger it" and promptly angle grind the bastard off, stopping only to check that the ensuing showers of sparks haven't
set fire to anything, especially me.
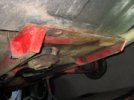 The original plastic coating comes off as one huge single paint flake - you can just see it in this photo, between the red cradle
and the car body. I need to wire brush the rest, and hammerite it. Not today though - it's getting too close to tea time.
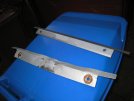 I have a new alloy strip, courtesy of "clarence boddinger" who gave it to me after S Club in July. No that's not his real name, but
my cheque book doesn't say "Mr tvrgit" either (although sometimes it feels like it should!).
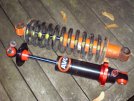 The replacement rear shock absorbers were delivered next door while I was out. I check their length (noting that they are
considerably stiffer than the ones that are on, and that's on the softest setting). The distance between the spring cups, at their
lowest setting, is exactly the same as my old ones - in other words, I won't be able to set a lower ride height. I need shorter
springs. Great.
I need to order some more stainless steel bolts to put this lot all back together again, too. I also need a replacement rubber
mounting for that rearmost bolt, too.
:: Wednesday, October 24, 2007 ::
My new steering column bearing mounting arrived today. I press the bearing into place using a couple of sockets in a bench vice,
then press the triangular plastic bush into place using the same technique.
The new fuel tank sender has 3 electrical terminals, whereas mine has only one. I spend a few minutes trying to research how the
wiring should go, but can't find anything. I'll figure it out.
:: Saturday, October 27, 2007 ::
Before I go along to the garage, I swap the springs from my old rear shocks, onto the new ones. This takes me twice as long as I
thought it would (everything does, it's my age you know). My excuse this time is that I expected the sequence of events to be:
attach spring compressors - compress spring - remove spring - fit spring to new one - fit spring retainer - remove compressors.
Em... naw. The new shock absorbers (being adjustable height) have a thicker body so the springs don't fit on with the compressors
in place, so the sequence becomes:
attach spring compressors - compress spring - remove spring remove compressors - fit spring to new one - attach spring
compressors - compress spring - fit spring retainer - remove spring remove compressors.
Anyway, that done, I collect an assortment of bits and tools and head off to the garage.
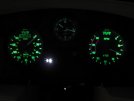 Again, while my clothes and hands are clean, I fit a new speedo light bulb - now I will be able to see how fast I'm not going.
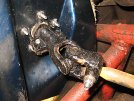 Then I fit the new steering column bearing, without the aid of an assistant this time.
Full details of how to do this are available at
Pies' site
so I'm not going to repeat them here. I bought 5 new stainless steel cap screws (the correct name for what I call allen bolts)
because that will save me the grief of trying to get a spanner to fit when they are tight against the bearing housing. After fixing
the bearing in place (using the bottom section of the column through the bearing to prevent the spanner turning on the other side)
I refit the column and all the electrical connections to the column lighting and wiper switches etc, then fit the steering linkage
and tighten the clamp bolts.
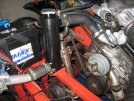 Then I refit the swirl pot, again with new stainless steel mounting bolts, then reattach all the hoses. I bought a new top hose
from the local motor factor's spares box, just to get the right "kink" to clear the fanbelt. It's not the original, and gawd only
knows what it was originally meant to fit, because it has an extra right-angle bend at the swirl pot end. After I have cut the hose
to length with a Stanley knife, it fits on no problems, and after making sure that it clears the fan belt (which it runs VERY close
to!) I tighten up the clamps.
I forgot to bring the expansion bottle so I can't refill the cooling system just yet.
That little lot took me a couple of hours, and I am running short of time so that's it for today.
Later, I pop in to see Mike who bought an S4C two weekends ago. He has an enviable garage set up, painted floor and workbench and
everything. Dave's is good as well. Theirs are like F1 McLaren pit garages compared to mine, which I can't fit out like that
because it's rented from a farmer and I never know how long I might be there for. Still, at least it's better than fixing cars
outside, which is what I've always had to do up until now.
Mike's car is very nice - a dark metallic green, tan interior and in pretty good nick (probably similar to mine when I bought it).
He's got his plan on how to work through the various jobs, as you do, and seems to have made a fair bit of progress already. He
plans to repaint the chassis so I can take some comfort from the fact that taking the old paint off should at least clart up his
nice clean garage a bit.
After gittering for ages, and at least 20 minutes after his first attempt at chucking me off the premises (sorry Mike!) I head off.
So that's four of us within a radius of a handful of miles - red, white, blue and now green. Magic!
I forgot to buy a replacement rear exhaust mount.
:: Sunday, October 28, 2007 ::
Not really TVR-related but a wee motoring story nonetheless.
I didn't have time to do any TVR work today because I was working - a new set of traffic signals needed calibrating so I spent hours
out there in pishing rain, soaked to the skin, trying to save people a few seconds' delay.
And still they think there's a conspiracy to make traffic signals work as bad as possible - I suppose that people become cynical and
think they're getting fitted up in every aspect of life, but in this case, no - we still aim to keep queues as short as possible by
twiddling settings.
Anyway, having done that, I was on the way home on the motorway, through the centre of Glasgow, through the usual big queues and
miles of comgestion. Just as we cleared the slow bit, traffic suddenly came to a stop again, so I stopped, as you do when everybody
else in 4 lanes of motorway. No fuss, no drama, just check the mirror, one car a fair distance behind (ie not tailgating), so slow
down and stop.
This obviously escapes the lad behind who promptly romps into my luggage, not just after I'd stopped but a couple of seconds later.
I wave him over to the hard shoulder, even I can smell antifreeze so he's done his car some terminal damage so won't be going far.
I spot that he is just a young(ish) lad with 2 mates in the car - an Audi 3.0 Quattro - that won't be cheap to insure (especially
after today). Partly because I wonder about his insurance credentials for a car like that, partly to prevent getting banjoed by the
three of them, but mainly because there is no hard shoulder and I happen to have stopped right beside a motorway telephone, I call
the cops, who attend in 4 minutes.
The three of them sit in the car, which is also pishing out oil, so I'm happy that they are not about to leg it. I think they are
also a bit worried that I am still wearing my high-vis coat, and are trying to figure out just who or what they have smacked into. I
decide not to speak to them - I just stand on the verge and watch them while I note the car make and reg etc, and take some photos.
When the traffic police arrive, I give them my details and then, while they go and interbiew the other driver in the back of the
patrol car, I try to work out how to get my boot to stay shut - the bumper has been bent and the rear body panel has been pushed in
a couple of inches so the boot lock doesn't line up any more. I finally fix it shut with a boot lace.
I sign for a producer (no problem with this at all), get the other drivers' details without engaging in any conversation whatsoever,
and then disappear, while they wait for a breakdown truck.
When I get home, I loosen the lock mounting bolts and wedge a couple of bits of clothes peg under the rear edge, so that the boot
lock lines up and works (the problem with the bootlace option is that the "boot open" warning light stays on, and also, because the
car thinks the boot is open, it won't let you lock the doors, which isn't a lot of good).
So tomorrow it's accident report form time, then collect insurance form and down to the cop shop.
:: Wednesday, October 31, 2007 ::
A wee update on the Lexus front.
Filled in an accident claim form on Monday and sent it off to the insurance company. They wanted to recommend a repairer. I told
them I was taking it to the dealer's bodyshop. End of chat.
Also took my documents into the cop shop, which is always an education. While the lovely wee police cadet took my docs through the
back to process, a couple arrived to see their darling wee boy who had apparently been lifted for some inexplicable reason -
apparently the police are just picking on him. No, explained the nice policeman, they hadn't found any cannabis on him this time,
but the big sheath knife was a wee bit of a problem. It was probably not a good idea, the policeman went on to explain, to cart that
about with him when he knew there was a warrant out for his arrest following his failure to turn up at court on Friday, to answer
his assault charge after picking a fight with a couple of nightclub bouncers who tried to eject him because he was barred
after a previous ding-dong while he was pissed out of his wee head. No, said the policeman, you can't see him, no he's not a
juvenile any more so there is no obligation for him to be accompanied by an adult, yes things do get a lot more complicated when you
reach 16. I realise that I've led a sheltered life, me.
Fortunately I get my documents back before mammy shrek gets into full volume mode, so I disappear.
Then I took the car in for an estimate on Tuesday, to the dealer bodyshop (the same place that repainted the front of the TVR a
couple of years ago). The estimator pointed out the variation in the rear door shuts, the slight kink above the nearside rear
wheelarch, kinks in the seams of the bootlid and slight paint cracking. The whole back of the car is twisted slightly to the left.
He says they will have to replace the whole bodywork from the rear doors back - boot floor, both wings and boot lid. This will take
about 6 weeks labour. It doesn't sound good!


