:: Diary - May 2024 ::
:: Wednesday, 1 May 2024 ::
The ups and down of TVR ownership, all in one day!
The first "up" is that all of the brake parts arrived yesterday and today - new wheel cylinders, brake shoes and fitting clips.
So today, let's get busy! I'm not going to go through this step-by-step, suffice to say that I got the wheel cyclinder fitted after ages fighting
with the 3 spring clips that hold it to the backplate, then remember to fit the wee rubber gaiter before connecting the handbraake cable and the
brake hose. Fit the brake shoes and drum and adjust it up till just before it's tight.
Then I remove the drum and fit new shoes on the other side - there's nothing wrong with the shoes on that side, but I don't want to only do half
the job, eh?
Then the disapointment... I discover that one of the wheel studs on that side is spinning in the hub. Not too difficult, eh? Knock the old one out,
get a new one, push that in from the back and pull it through by tightening a wheel nut onto it... Except no - these are Triumph TR4 hubs, and for
some reason, they had studs that screw in from the front and then are peened over like a big rivet from the back. They don't come out without
grinding off either the front or the back... The studs on the front hubs are standard splined wheel studs.
I don't know if it's the thread on the stud that's stripped, or the thread in the hub flange. The first one can be fixed by cutting off the old one
and putting a bolt in from the back. If it's the hub threads, that's slightly more awkward - I would need to get a front stud (7/16ths UNC, none of
your modern foreign metric stuff here) and maybe drill the hole out slightly, to just the right size to grip the splines.
What I don't want to do, is put the wheel back on and then find that I can't get that wheel nut off because the stud won't grip... and then end up
with a damaged wheel as a result...
Hopefully, whatever the answer is, it won't involve taking the hub flange off - they are pressed on using a huge press, and as far as I can see
from reading various forums, getting them off, after 50 years of rust and shit, without distoring the flange, is almost impossible.
A new hub flange is £130. You can also buy a whole assemn]bled hub, that swaps straight in after undoing 6 bolts and a universal joint, for around
£400. All for one feckin' wheel stud...
:: Thursday, 2 May 2024 ::
I've discovered that there's another option for fixing the wheel stud - you can buy wheel studs with a bigger thread on the hub end but standard
thread on the wheel end... you cut the old one off, and then tap out the hole to take the bigger thread. Reviews suggest that it works, so I'll go
for that. If it doesn't work, then the hole is still tight enough to grip a splined stud pulled in from behind.
In the meantime, I cut a screwdrive slot in the end of the loose stud, so that if I use an open-ended wheel nut, I can hold the stud in place while
I spin the nut off.
Next task is to bleed the brakes. I try using the vacuum pump method, but there's so much air that it's just not pulling fluid through... so back
to the old (and best) way. I engage the services of my glamorous assistant (who is well accustomed to putting the brakes on things) to stomp the
pedal while I open and close the bleed valves. I go round all the wheels twice, and the pedal feels nice and firm...
It needs a road test, but hopefully, that'll do for its debut at the local TVR car club meeting on Sunday.
:: Friday, 3 May 2024 ::
Wheels all back on and car lowered to the ground - time to test these brakes!
One of my memories of 1960s Ford engines is - they can be bastards to start from cold! Oh how we victims of the British car industry used to enjoy
trying to start our Ford Continas and Rovers, while we watched our neighbours jump into their Datsun Cherry or Honda Civic and drive off while we
were still cursing... No wonder the UK car industry was screwed... Anyway, I haven't yet found the right combination of pre-start pedal pumps and choke
position, although this is largely irrelevant when the starter barely turns the engine over... I connect up jump leads to the day car, and it turns
over better, but now it's flooded.
Plug leads off, plugs out and cleaned with a wee brass brush - stick them back in, reconnect jump leads and we're off!
I have a drive of around 20 miles, the brakes feel crap after the Range Rover, but they do stop the car well, and in a straight line, if you press
a wee bit harder.
Back home to tidy up a week's worth of random tools and other shit from the garage floor.
I have bought a pair of mirrors identical to the ne on the car, but with convex lenses. I swap the existing flat lens for one of th conves ones,
and it seems to give a better field of view (so far as you can tell inside a garage).
:: Sunday, 5 May 2024 ::
It's TVR Car Club day, and the Vixen appearance as a debutante!
Once again, it takes a few attempts to get started - but she does, and I set off to meet at Dave's. I have plugged in the sat-nav so that I can
compare the speedo with GPS speed - is pretty much bang-on. As I turn in at Dave's, I see a Tuscan turning in the drive, and realise that Eric has
bought the car he was looking at in Elvaston. Two debutantes!
 Here's a new family photo - Jim's brought his wedge so Dave is the only S-club member with an S today. After a bit of a chat about all these newcomers,
and also Dave's wedge which he has just finished successfully rewiring after its submarine impression a year ago, we're on our way, with me in the
lead so that I can set the pace (seeing as I haven't driven the car above 60 mph since I got the wheels re-balanced).
When we get on to the motorway, I find that the car is perfectly smooth (but noisy!) up to around 60 mph, then get a bit shaky (and noisier) at about
65, but smooths out a bit (but even noisier) by the time you get to 70. I have brought ear plugs, and with those in, it's a lot more bearable, so I
tick along at just on 70. The convex mirror is a lot better - it's actually useful now!

 We get parked up at the hotel alongside some of the oher TVRs that are there
There are 12 of us sitting down for lunch. The meals take ages to arrive, as if they can only cook one menu item at a time on a primus stove. If
you're lucky, yours will be first. If you're unlucky, like Dave, then the chicken fillets will be cooked last, and you won't get yours until
everybody else is finished. If you're really unlucky, like Eric, you won't get your soup at all.
 Then it's back outside for more chat and looking at cars. Eric's Tuscan is lovely - he's only had it for a couple of days. It has a nice interior
too, with the wavy dash, which I like.
 But the old girl still holds her own in this company (when we're all standing still - different story on the road)!
Time passes quickly and soon it's time to head home, with me at the back of our little group this time. A guy in a BMW Z1 passes us near the Kelpies,
and gives me a wee toot and thumbs-up, which is nice. Dave and Eric turn off, I follow Jim for a bit until he turns off, and then head for home -
with another toot and wave from someone else!
When I get home, I park in the drive to open the garage, and the interior door handle comes off in my hand... the wee pin has fallen out. I get a
roll pin the same length and drift it in, then park the car away.
What a brilliant, brilliant wee car! I think I'll have another check over the front suspension to see if there's any looseness in any joints etc,
and maybe also get the wheel balance checked again - or maybe get the back wheels balanced and swap them to the front, just to see. I had a VW
Passat 30-odd years ago that had alloy wheels that were awfully susceptible to wheel balance, and your major tyre chains just couldn't do it - they
might be Kwik but they were also Kwite shit. Until I found a garage that actually knew what they were doing, I got better results with one of those
Gunsons wheel balancers on top of a milk bottle. I still have that, come to think of it...
I think I'll also have a look at this starting problem - first by checking the engine and starter earths, to make sure that there's no voltage drop
when it's cranking (I think there might be - the interior light dims significantly!). I'll also check the ignition timing etc, because that can make
old Ford engines into non-starting cranky-cranky buggers.
:: Monday, 6 May 2024 ::
After yesterday's brilliant day out, I decide to look at the wee issues that I mentioned at the end of the diary.
First, front suspension. I know that the car has just had an MOT, but let's check anyway. I lift the car and pull each front wheel top and bottom,
then side-to side to check for wear in balljoints. Then a lever under each front wheel to check the bottom joint. Waggle the steering rack - all
seems ok - no knocks or noises.
 Then I check that the front wheels aren't buckled using my very expensive run-out gauge that happens to be lying at the garage door after painting
the shed. Shining a light up from underneath accentuates the size of the gap as you spin the wheel. That seems to be ok as well. Looks like I'll
have to try re-balancing the wheels.
Next - ignition timing. Once I get the car started (after several turns of the key) I let it warm up and then check the timing with a strobe light,
and it seems to be ok - but if I advance the distributor, the idle speed goes up and is more even. I get it to peak revs and then retard it a bit,
then adjust the idle speed at the carburettor. The strobe suggests that it's slightly too far advanced, but that might be right with the Kent cam
and all.
While I'm doing that, I notice oil dripping down from the bottom of the oil filter, just under the disributor. I noticed oil there before, but
thought that it was maybe just left over from a filter change - but now I see a tiny pinhole in the plastic capillary pipe for the oil pressure
gauge, just near its joint into the engine connector. I take it off, clean it up and then melt it slightly with a soldering iron to close the pinhole.
A wee test drive confirms that it's going well, with no signs of pinking.
Back to the garage and this starting problem. First step is to check the earth connections - very important in a fibreglass car.
The chassis connection for the batter is fine - I remove the nut, and find that the terminal has been recently cleaned. Bolt that back together.
Then I turn to the main chassis connection above the gearbox bellhousing - it has 6 separate wires bolted to the chassis by a nut. The cables aren't
tight, they all move when you touch them. I go to loosen the nut and find that it just turns... it's held on by about 1/2 a thread and the rest of
the bolt is stripped.
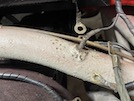 I think this could be the problem! But what to do? Without any electrical terminals, the nut just catches on the last of those threads. With even
one terminal (never mind 6) it doesn't grip at all...
I can't run a die down it because the car body is in the way so the die handle can't turn. There's not even enough thread to bolt on a wee plate,
that the terminals can then connect to like a wee buzz bar. Looks like the solution is to cut that bolt off and weld on a new one. Not tonight
though because I only came out for a wee while after dinner time for a 10-minute job...
Coincidentally this image appeared in the TVR S Series group chat on Facebook today. So true...
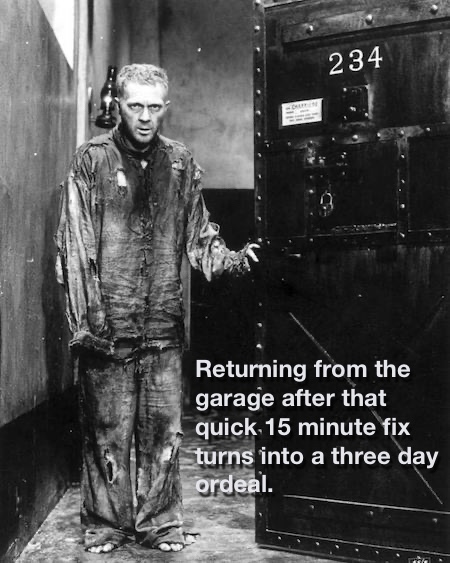
We've all been there!
:: Tuesday, 7 May 2024 ::
Not much time for the car today - I actually had work to do! However, I do get a wee go at it after dinner time.
The longer-term plan is to make a bus-bar or similar, so that I can connect these 6 earth separately. At the moment though, the priority is to get
them connected at all!
Despite overnight meditation, I still think that the simplest solution is to cut the old bolt off and weld on a new one. So I remove the battery for
better access, then it's out with the angle grinder, cut off the bolt and grind that bit flat.
Then I get a bolt and clamp it in the vice, and grind off any galvanising. Zinc and steel welding don't mix!
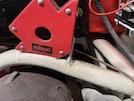 I hold it in place with a magnet, and tack on the nearest edge, then weld around the bolt head.
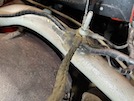 Then I run a nut down the threads as far as it goes, then a thick washer and the 6 earth terminals, another two flat washers and a spring washer,
and another nut. That's a lot tighter than the oold one.
I reconnect the battery, and start the car. It starts first time, from cold. It hasn't done that before so it's looking promising!
By now it's 9.15 pm, so I switch off the car, switch off the garage light and leave every work surface and half the floor covered in tools, drills,
angle grinder, tap and die box, welder, lead light, tins of bolts and screws, plus the floor jacks. Anybody comes in here in the dark, they're gonna
do themselves a serious injury. That's most likely to be me, to be fair.
:: Saturday, 11 May 2024 ::
Success to arseholeism all in one day...
 First, the success... I fitted a matching mirror to the passenger door. It's not in a matching place though - it's slightly further forward, and
slightly higher up the door, than the one on the driver's side - so that you can see it over the door edge, and clear of the vertical quarterlight frame.
I figured out the position by taping the door to prevent scratches and make it easier to mark. Then I held he mirror in place with more tape including
supporting bits stuck to the windscreen, and then draw aroud the base with a marker - I forgot to photograph that stage.
 Then I used the gasket to straighten up the base...
 and mark the holes to drill.
The next stage is to remove the inside door handle and keep-fit window winder handle, then remove the iside door trim so that I can check that the
mounting holes will be clear of any brackets, window mechanisms etc - at least theres no wiring to worry about!
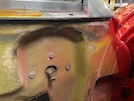 There aren't any access holes in this part of the door - there's nothing to access. I can get my hand in from the opening window cavity though -
there's nothing else behind that, above that door handle.
So the next stage is to drill two 7mmm holes (the mounting bolts are M6) starting with a 3mm then a 5mm so that nothing gets cracked. My 7mm drill
is pretty long, so I extend it through those holes to punch through the inside of the door.
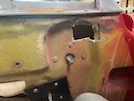 Then using those two holes as guides, I cut out a wee hole with one of those oscillating cutter things, holding the cut-out bit with long nose pliers
so it doesn't fall down inside the door. I make the hole just big enough to get my fingers through and get the bolts through the gasket and into
the mirror mount, beibg very careful not to drop those bolts or washers into the bottom of the door, where they would rattle about for all eternity
because I couldn't reach to get them out. Tighten those up with a 10mm socket on an extension bar - job done!
I have a wee celebratory drive around, although the car is tricky to start - the battery seems to have lost a bit of charge since Wednesday, despite
the isolator switch preventing any current draw.
I buy a new battery in Halfords and with that fitted, it turns over a lot better!
Another wee drive just to fully charge the new battery, but on the way back, about 2 miles from the house, it lurches to a stop - it's out of petrol.
Bugger. The next job on the list was to fit the new fuel gauge that I bought, but I've only done 175 miles since I filled it up, and it's supposed
to be a 15-gallon tank. It has spent a disproportionate amount of time just sitting idling while I have moved it in and out of the garage or faffed
around with various things. But whatever, there's no petrol in the glass filter between the pump and the carb.
A couple of guys from the Vauxhall dealership come out and push the car into their forecourt. At this stage I call once again for my glamorous
assistant, describe where the petrol can is (in the garage) and she goes to the petrol station on her way to where I am. The guys in the garage are
really helpful (after they give up trying to sell me a Vauxhall). When she arrives, I slosh the fuel in, try again, give it time to pull fuel through
from the tank - still nothing... Maybe it still has fuel and it's the pump that's failed? Bugger.
She drives me home, where I dig out a 4-gallon jerry can, and go and fill that, take it along to the Vixen, slosh the whole lot in, and try again.
It starts! I drive back home before it changes its mind.
Then I have to persuade the glamorous assistant to take me back to get the Range Rover, with the enpty jerry can in it. On the way, she suggests
that we buy ice cream lollies for the guys in the garage - it's roasting today. So we stop at a Scotmid store and she goes in, then comes out and
says she forgt her purse so can't pay - so I go in. When I take my wallet out of my pocket, I realise that I have forgotten my Range Rover keys...
So it's a mile back to the house and then 2 miles back to the car and then 2 miles back to the house. The guys are awfully grateful fo the ice
creams though!
So - get that fuel gauge fixed!
:: Monday, 13 May 2024 ::
Well, after Saturday's shenanigans, I decide that the next priority is to get a working fuel gauge... so I take the matching gauge that I bought out
of its box, and notice a wee sticker on the side that says "24 Volts"... a bit of rsearch shows that these gauges were fitted to a lot of military
vehicles at the time, and they are all 24 volts. The Vixen isn't... I try wiring it up but - not a peep. I test it at the battery and still not a
flicker.
I need a new gauge. I trawl the internet looking for something that looks right, but that matches to the tank sender. I read that the tank sender
has a resistance range of 0 to 90 ohms, so I need a gauge that works with that. SOme gauges read from 90 ohms (empty) to 0 ohms (full), and others
expect 0 ohms when empty and 90 ohms full. I don't know which I need.
So I lift the boot carpet and connect up my test meter to the sender, and find that the resistance is 65 ohms. I put more fuel in, and see that the
resistance rises - so it seems I need a 0-90 gauge and not a 90-0. I order one that won't look too out of place, but at least will let me see how
much petrol I have left.
While I am contorting around in the boot space, over and under the roll bar, I emember that Jim and Dave said that the brake lights were really dim.
My neighbour said the same when he followed me home when I first picked the car up. I bought a high level brake light, but I can see that one brake
light is much dimmer than the other, so I also want to get the car lights working as well as they can. Let's investigate!
I remove the boot trim and the boot floor (not strictly necessary to reach the lights, but I aso want to be able to trace earth wires). Then I pull
the bulb holders out of the rearr of the lights for isolation and testing.
I switch on the lights. Both sides come on. I press the brake - one brake light comes on, the rear lamp on the other side goes off... Try again with
the lights switched off - drivers side brake light comes on, the passenger side illuminates only the rear lamp filament. Remove the bulb and test
- yep both filaments work.
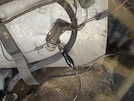 I earth the bulb holder with a wee jumper wire, and it all works perfectly! Looks like another dodgy earth! I unplug the bulb holder from the car,
and notice that the other 3 all have earth wires soldered on, but this one doesn't, so I solder on a length of wire that I can take to an earth point.
All working!
I put the bulb holders back in the lights (not easy - I can only just reach the rear quarters of the car by crushing myself between the roll bars,
and not breathing too hard. Check operation again - now I have decent rear lights both sides, but no brake light on the passenger side that I just
fixed. After checking the repair and connections again, I remove the bulb and test it - the bulb has gone! New spare bulb that has lived in my "box
of electrical shit" for years - and it's all working!
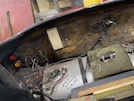 The car's wiring is an absolute feckin' mess though - it looks like it has been wired by a retarded chimp trying to finish early because he's on a
promise if he gets home on time. It also looks pretty original in most places, so that probably accounts for TVR's early reputation for electrical
unreliability. Even 60's Italian motorbikes had better wiring than this - and they were shite.
Anyhow - while this is still in bits, I decide to start to wire in the high level brake light, It has about 3 feet of wire attached - not quite
enough to reach the brake light wiring, so I make up a small bit of loom, about 18 inches, to splice into the existing wiring WITHOUT the use of
the feckin' horrible Scotchlock connectors supplied in the box. I prefer bulleted take-offs separating existing bullet connectors on the supply and
earth side. It works!
I don't have time to fix it to the rollbar though because it's nearly dinner time and we have visitors coming. Pity that none of them have kids that
fancy a spot of child labour wriggling under that roll bar - the kind of cruelty that was abolished when they stopped sending wee boys up chimneys.
I miss the good old days...
:: Tuesday, 14 May 2024 ::
Only limited time after dinner time tonight to try to finish the Vixen's rear light wiring. I've been busy with work, we also had to go out today,
and I'm also in the process of taking a former client to court for non-payment of fees, and separately, to assert copyright so that he can't use my
work. That's taking up a fair amount of time (and money!) at the moment but, well, sometimes you just have to, eh?
Anyway, back to the Vixen. The last bit of wiring work is to test the rear light / reversing light unit, and the wiring leading to it, after which
it works perfectly (I don't know exactly what I did, but it works!).
Then I fit the high LED brake light to the back of the roll bar, above the back window, and plug that in, and fix the wiring to the roll bar with
cable ties. Another check - everything still works.
Then I refit the back of the boot floor. Suddenly the reversing light doesn't work... who needs a reversing light anyway? I think it's just a wonky
supply connection, so I'll have a look at that tomorrow before I refit the boot trim and carpet.
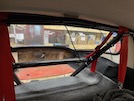 Here's the space that everything (including me) has to fit through, between the roll bar and the car roof. I've still to snip off thends of those
cable ties! The rear of the car, and the lights etc, are only just reachable once you're wedged in there head-first down to your chest. Maybe that's
why they employed a chimp to do the wiring?
:: Wednesday, 15 May 2024 ::
I was right about the wonky live connection, but it took me ages to track down where the wonkiness was, with a tester just going through in sequence
- supply to lamp ok, supply to bulb holder ok if the voltmeter is pressed hard enough against it...
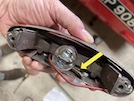 Eventually I track it down to this - here's the reverse light / number plate light. The red wire in the photo is for the number late lights. There's
a separate green wire for the reversing light - the big bulb in the middle. The yellow arrow points at the connector between the green wire and the
bulb holder. The connection is loose - if you press the bulb right down it touches the connector and gives you current - with the bulb in normal
position, there's no current...
I pull that connector apart, and bend the female connection in with a screwdriver to tighten it. Replace the wire and all ok!
Reassemble the light back into the car, and it all works - at last! That has taken far too long to track down and fix that one internal loose
connection - even a chimp could probably have done that quicker!
Refit the boot trim and carpet, trim off all the cable ties and that's a job done!
Next task will be to replace that stripped wheel stud...
:: Sunday, 19 May 2024 ::
Had a lovely wee drive yesterday in the Vixen - brilliant! It's going really well!
Today I decided to fix that stripped wheel stud.
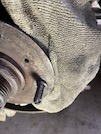 Here's the offending article! It's a good job that I took the precaution of cutting a scredriver slot in the end of it, or I wouldn't have got the
nut off otherwise! It's spinning freely in the hub.
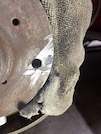 I stuff cloths in between the hub and the wheel cylinder and brake shoes, to catch any metal swarf, and cut the stud off carefully with an angle
grinder. Then I push the remaining bit out tha back.
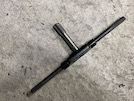 The new stud has a 12mm 1.25 threads per inch on one end, and a 7/16 inch UNF thread on the other. The hole that's left is just under 10mm (meeasured
with a drill) and needs to be just over 10mm, so I drill it out. Then I tap a 12mm x 1.25 thead into the hole.
Then I lock 2 nuts onto the outer thread, and apply a bit of Loctite, and tighten the stud into those threads. Then loosen the nuts and take them
off.
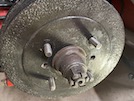 Brake drum back on, then put a nut back on, towards the hub. The new studs are made slightly too long, so I slice off about 10mm and then use a
hand file to chamfer off the ends of the threads. Then I remove the second nut to clean the thread end.
Wheel on, tightens nicely!
:: Monday, 20 May 2024 ::
The fuel gauge arrived today, that I ordered last Monday. Now that I see it in the flesh, it's not that good a match for the others - but at least
if it tells me how much fuel I have, it's worth a shot eh?
I pull out the old gauge and wire up the new one.
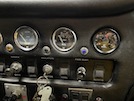 It works! Although I know that the tank is full (I brimmed it only yesterday) the gauge reads less than 3/4. The important point, though, is where
it reads when it's empty. There are two ways to find out - either drain the tank, or drive it (with a spare can in the boot!) until it runs out,
and see where the gauge is then.
Strangely I worked out when I brimmed it yesterday that I've put around 10 gallons in since it ran dry - 2 x 20-litre jerrycans, 1 x 5 litre can
(which wasn't even full) and about 2 litres to the brim yesterday. That's 47 litres, or just over 10 gallons. It's supposed to be a 15-gallon tank.
I'll see how long the second tankful lasts!
:: Wednesday, 22 May 2024 ::
You might think that I have nothing else to do except play with TVR Vixens - and you might be right! Yesterday, though, I had a bit of work to do,
including a meeting about 4 miles away - and it was a nice day so I went in the TVR (by a longer route than usual...).
That meant no work on the car yesterday, although when I got back I decided to check the brake hoses that I had disconnected, and nip them up a bit.
While I was doing that, I noticed that the dripping brake fluid had blistered the paint on the lower suspension arm.
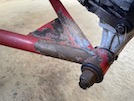 So today, the first task is to whip off that wheel and wire brush the blistered paint off, then give the arm a spray with brake cleaner to remove
any remaining brake fluid. Then I give it a couple of coats of red Hammerite.
While that's drying and the car's in the air, I dig out my old trusty grease gun. It's a long time since I used it, although it came in handy a
couple of times on the old Chevy. The Vixen has quite a few - one in each front trunnion, two in propshaft UJs, four in driveshaft UJs, two in
the rear suspension uprights, one in the top of the steering rack, and even two in the handbrake cables! I give them all a couple of pumps,
although I have to remove and clear a couple that seem to be blocked.
Car maintenance is a far better way to pass the time than working! I'm still doing some work in my spare time though!
:: Thursday, 23 May 2024 ::
Facebook reminded me this morning that it's 10 years since my son and I arrived in Monaco for our Grand Prix weekend. What a weekend that was! You
don't realise at the time how important some of these things will become in the future. I thought I was making memories for him...
Anyway, today's another day, and I have spent the whole afternoon on electrics. I have a silly wee maplight that doesn't work, a radio that doesn't
work, and a fag lighter that works, except when it doesn't. I decide to get behind there and test these out.
The first task is to remove the centre console. There's one domed nut towards the back, and two aat the front, into the dash. First I pull off the
radio knobs and then unscrew the bolts holding the controls on, and then the faceplate. Then I can remove the gearknob and loosen the gear and
handbrake gaiters. That lets me pull the console back a wee bit, leaving the radio in the dash. With the console out of the way, I can pull the
radio forward to disconnect the wires - except that there is't a single wire connected to it! No feed, no earth, no speaker connections. There is
a feed wire with an inline fuse holder but no fuse, and a couple of speaker wires but no sign of any speakers... I think we've figured out what's
wrong here...
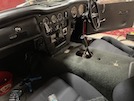 I test the radio off the car with a supply and earth, and an old speaker, and it does work - but it's an old MW/LW thing with a cassette player so
quite frankly, it's shite. I'm sure that I had a more modern radio in the car I passed my test in, in 1976. I'll keep it for now, to fill the hole
in the dash though.
The next task is the map light. Before I start, I test the wiring - it has a supply when the ignition is on, through an unlabelled switch in the
dash. It also has an earth. When I connect a direct supply and earth jumper, there's nothing. So it's the light itself that's faulty...
Removing the light from the dash is an interesting challenge. The light mounts through a hole in the dash with an earth connector, a big washer, a
spring washer and a nut on the back, and the supply wire through the centre of all that. The nut on the back doesn't fit over the connector to the
car wiring - so once I've fiddled my hand up the back of the dash to remove the nut, I have to pull the light out and then snip the wire.
Testing the light on the bench shows that it works if you hold the bulb down, but goes off when you let it go. The bulb is held down by a spring
that fits under the clear len. I can't see how the bulb comes out, but eventually I manage to persuade it out with an old cable tie. There's also a
spring around the base of the bulb, but no proper bulb holder. I wind the bottom spring up a wee bit, and then put the top spring in the right way
round (I thik it was upside down before and therefore not holding the bulb down properly) and test it again - it works!
I don't have any tiny connectors that will fit through the mounting nut, so I fit the wire up through the earthing washer and out from the back of
the dash, and then solder it back together with a wee bit of heat shrink over it. Fiddle about for ages getting all the washers etc lined up with
one hand, get the nut on and tighten everything up.
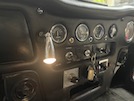 It works! That silly wee job has taken me most of the afternoon...
Fortunately the fag lighter is just a loose connection so that only takes 2 minutes!
Then it's just a matter of refitting the dead radio, and replacing the console.
See when I said yesterday that car maintenance is a far better way to pass the time than working? I lied.
:: Friday, 31 May 2024 ::
I've been a bit busy with various things over the past week, and haven't had time to write about the odds and ends Ive done with the Vixen. In any
case, I think I've been writing far too much and too much detail, so I decided to knock it on the head for a while.
What I have been doing though is:
1. Checking and cleaning all the earths near the battery for any sign of voltage drop;
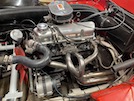 2. Cleaning up the engine bay, including the engine itself, exhausts etc;
3. Polishing up the metalwork like the bumpers, door plates and fuel cap etc;
4. Cleaning and polishing the paintwork.
It's looking not too bad!
Yesterday I decided to make sure that the fuel tank was topped up before its debut classic car show this Sunday. I have 5 litres of fuel in a green
emergency can, but it has been lying around for ages, so I decide to mix it in to the tank, and refill the can with fresh fuel.
Then I have another 20-litre jerrycan, so I'll use that to top up the tank to full, and then refill the wee emergency can with what's left. I get
about 10 litres in, before the tank is full to brimming out of the cap. But within a minute, the filler has emptied into the tank - I can see down
the filler tube that the fuel barely covers the bottom of the filler. Chuck in another 5 litres - again it brims but soon settles down to around the
same level. Another 5 litres - now the tank is full to the top of the filler, the jerrycan is empty and I'll have to get more for the emergency can.
That's 25 litres, or 5 gallons, of fuel into a tank that I thought was almost full... no wonder the range on that first tankful was somewhat curtailed!
Lesson for today - the last 1/3rd of the tank is a slow bastard to fill!
Before all that, though, I had a wee trip into Edinburgh for something, and decided to get the bus. Edinburgh buses never fail to be entertaining,
ranging from varous nutters who want to talk to you or just stare at you, to the "singing wifey" who belts out operatic numbers at full tilt as you
travel along. I've only encountered her a couple of times, but she's pretty good, to be honest, like a sort of Susan Boyle on wheels, and seems to
know all the drivers. No such luck today though - the bus into Edinburgh is pretty quiet.
On the bus home, I was sitting upstairs quiety minding my own business, when I hear a phone ring a couple of seats in front of me. The phone belongs
to a guy who has a new haircut and is wearing a suit jacket over his best football top, so is obviously out for a special occasion. He answers it,
and launches into an explanation of how he got on. Turns out he has been at court for the umpteenth time, and was told by the Sheriff (in Scotland,
a judge in the lower courts, not a John Wayne type who goes around shooting outlaws who step out of line, more's the pity) that at the age of 40,
it's time he mended his ways, because if he appears in that court again, he'll be going "doon the stairs" not "oot the door". He's moaning to he
pal on the phone about how he's going to have to give up his lifestyle of being an obnoxious wee fanny, when he suddenly he leaps up onto the seat
and opens one of those wee flap-style windows you get on buses, and shouts out "Hey Jamesie, where are ye goin'?" In the ensuing conversation between
our man on the bus, and Jamesie running up the pavement, he explains that he's "been to see the beak again", although there's no real sign of regret
or remorse for whatever crime has been committed this time.
He gets off a couple of stops before me, and swaggers off up the street as if he owned it. You have to admire it...
 Here's a new family photo - Jim's brought his wedge so Dave is the only S-club member with an S today. After a bit of a chat about all these newcomers,
and also Dave's wedge which he has just finished successfully rewiring after its submarine impression a year ago, we're on our way, with me in the
lead so that I can set the pace (seeing as I haven't driven the car above 60 mph since I got the wheels re-balanced).

 We get parked up at the hotel alongside some of the oher TVRs that are there
 Then it's back outside for more chat and looking at cars. Eric's Tuscan is lovely - he's only had it for a couple of days. It has a nice interior
too, with the wavy dash, which I like.
 But the old girl still holds her own in this company (when we're all standing still - different story on the road)!


