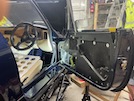
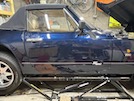
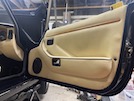
Since I bought the car, it has had a sag in the driver's door which is now getting worse. I tried to sort it in June 2011, and managed to get the bottom hinge out and change the bush, but couldn't move the bolt through the top hinge, and didn't want to risk pulling the pivot "bobbin" out of the fibreglass, which is not an easy repair...
First steps are to remove the door card - first remove the loudspeaker, then there's a wee bolt on a threaded screw up behind the armrest that you can reach through the speaker hole - I changed my bolt to a wee wing nut years ago, to make it easier to take off. Then there's a screw at the back of the door, under the lock, then the door card just unclips from the door, and you can unhook the door handle wire from the door lock. That's the easy bit done!
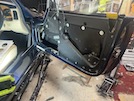
Inside the door, there's a big M10 bolt (with a 17mm spanner head) that goes downwards into the sill, and another that goes upwards into the scuttle. They go into threaded "bobbins" that are glassed into the fibreglass. The problem is that, if the bolt into the bobbin is seized tight, then you'll end up shearing the bobbins out of the bodyshell. This results in an extensive journey up the uncharted waters of Shit Creek.
So before we go any further, I give both bolts a good spray with penetrating oil. Note: WD40 has many good qualities, but in my experience, it isn't the best penetrating oil. I've been using PlusGas, but I was recently recommended stuff called INNOTEC De-Block Oil, and I bought a tin, and today's the day to try it in earnest! I spray both bolts, between the door and the bodywork, and give it 15 minutes or so to act, while I go and do something else.
Right - let's start with the bottom bolt. It's fiddly because the bottom of the window channel is also fixed thrugh the hinge, so is in the way. However, I manage to get a long socket on to the big bolts with a "wobble joint", a short 3/8 drive extension bar and a not-too-long ratchet handle. You do NOT want to horse on the biggest socket handle you have - if it won't turn with a normal ratchet handle, it's gonna rip the fibreglass before it comes loose...
It turns! This is the bolt I replaced in 2011 though, so it hasn't got 35 years of rust on it...
Leave it in place while we tackle the top one. Same again, but with a slightly different socket extension bar. It won't turn... Give it another spray and leave it 5 minutes while I get a jack and a block of wood to hold the back of the door up, and set up a wee table with a big towel over it to put the door on (in a fit of optimism...). Try the bolt again - it still won't move... The only sound in the garage is the squeaking of my arse as I give it slightly more turning pressure... and it shifts very slightly! But was that the bolt or the bobbin coming loose? Tense moments - lock the ratchet and turn it to and fro about 1/16th of a turn (all you can get through the hole in the inner door skin) to work the oil in a bit... yes it's definitely the bolt that's turning... then one more ratchet click and another 1/16th of a turn... work it again and so on until it's a little bit more free... then ratchet it out of the bobbin in the scuttle.
Then I wind out the bottom bolt, and lift the door out of the frame, and put it on the table I prepared earlier, like a good Blue Peter badge holder.
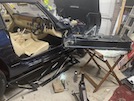 So here's the door, lying on the towel over the table. The wiring for the electric mirror and the window is still connected, and I realise that the
connectors inside the door won't go through the hole in the door or the shell, so I'll have to cut them off, in a place where I can reach to join
them again...
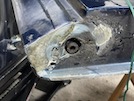 Here's the hinge at the bottom of the door. You can see here that the door has been rubbing on the sill. You can also see that the bottom of the
hinge itself (in the centre of the big hole) is flush with the door.
Note that the hinge bolt is offset from the centre of the hinge bracket, so take careful note of which way round the bracket is bolted in.
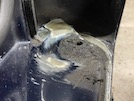 And here's the sill, which also shows where the door has been rubbing.
Now I can see the problem...
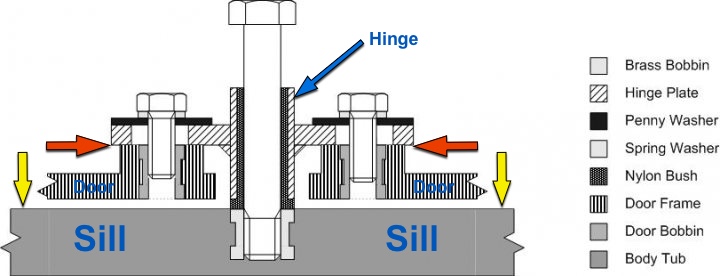
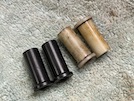
This is a cross-section of the hinge assembly, drawn up by Norman Farmer a few years ago. You can see the bobbin fitted into the sill, and the big hinge bolt that goes into it. Then there's a plastic bush that the door rotates on, and then the hinge assembly bolted into the door.
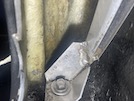
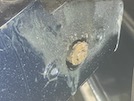 This is the top hinge. You can see that the bush sticks out further than the surface of the door, as per the wee drawing. Contrast that with the
bottom hinge photo earler, where the bottom of the hinge is flush with the door, so there's no clearance so the fibreglass is scraped.
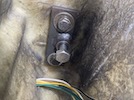
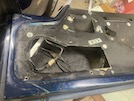 This shows the wiring and connectors inside the door...
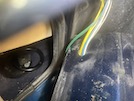 while this shows the hole in the door that the wires go through. The connectors won't fit through that, though, so I snip through the wires inside
the door, and pull them out, so the door is now free from the car.
Now I can get a 13mm socket inside the door, and detach the hinges from the door. One of the bottom hinge bolts also secures the window channel, so I undo the wee screws holding that in, and slide it up a few inches to get the hinge out.
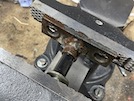
 This shows the bobbins glassed into the door to hold the top hinge in place.
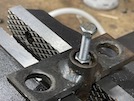
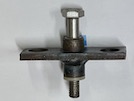
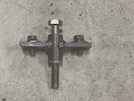 This shows the bottom hinge assembly after it has been cleaned up a bit. It's important that the big bolt has a shank that's at least as long as
the depth of the hinge bracket - it can be slightly longer, but certainly not shorter. The end of the thread has to tighten (not too much!) into
the bobbin in the bodyshell, to hold the door securely.
I notice that the top bolt is shorter than the bottom one... so I measure the avaiabe depth thrugh the bobbins, which shows that there is about 130mm of clearance through the bottom bobbin in the sill (so the bolt can be longer), but only around 15mm clearance above the top bobbin - if the bolt is longer than that, it will punch through the windscreen scuttle (or tear the bobbin out, whichever is weakest). I intend to put in new bolts, so I'll need to cut them down so that they go through the bobbins and no further.
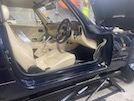 In the meantime, we have the maximum fresh air circulation look!
