:: Diary - December 2019 ::
:: Sunday, December 1, 2019 ::
It's TVR Car Club day!
Dave isn't going, because he's busy playing with his toy cars. It's the Scottish championships or something, so he'll be up against
competitors whose reactions are slightly faster than a fossilised sloth, and who can see as far as the other end of the track. No
disadvantage there then!
Anyway, I meet up with Jim and head through to the normal venue in the trust Mercedes (so the journey is pretty uneventful).
When we get there, Hugh has already arrived. After checking that we've not forgotten to put the clock forward, we order our lunch
and sit down for the usual chat, on the usual wide range of different subjects. And no toy cars. Or trophies.
All very pleasant as expected!
:: Tuesday, December 3, 2019 ::
Back to the TVR in its garage.
First, I push the car outside, and spray the engine with degreaser, before brushing it in and then hosing it off. That makes a fair
difference!
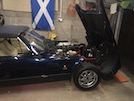 I push the car back into the garage, and jack it up onto axle stands so that I can get the bonnet to open right up,
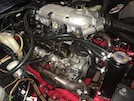 and here's the engine as it stands. Note the paint flaking off the cylinder head, and the general tatty state of hoses etc.
Next, I number all the plug leads, and take them off, and take a scraper and a brush to the cylinder heads to take off any loose
paint, before I take the spark plugs out.
Then I remove the 8 wee bolts on each side, and remove the rocker covers, complete with gaskets.
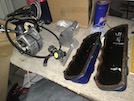 Here's the bits I've taken off so far...
:: Friday, December 6, 2019 ::
I've bought some light grey high-temperature paint (because the silver that I painted them before, was just too... well. silver!).
So I open the tin, get a couple of wee brushes, and paint the cylinder heads, as smoothly as I can. Some bits might need another
coat, but I'll see what it looks like when it has dried. Which might take months when it's winter!
Then I clean up the rocker covers ready for painting - except I don't have any paint, I've been too busy trying to decide on the
colour. They are presently dark blue, and they have been like that for ages. I fancy to a change to red. Or black. Or silver. Or
orange?. So I go down to the shops and carefully select a colour on the principle of "eeny-meeny-miny-mo" and come away with a tin
of Hammerite silver.
:: Friday, December 13, 2019 ::
Inspection of the cylinder heads shows that they are mostly fine, although there are one or two bits that could do with touching up.
While I'm at it, I notice that the timing case and water pump now look tatty, so I give them a coat of paint as well.
Then the rocker covers - they are ready for painting, so I give them a couple of coats of Hammerite. It's bloody freezing though, so
the finish might not be as great as I hoped. I also paint the alternator bracket while I'm at it.
:: Saturday, December 14, 2019 ::
I start today by putting the rocker covers back on, first manoeuvring them under all the pipes and hoses so that they don't get
scratched, and then fiddle the eight wee bolts in each side, and nip them up.
Then I replace the spark plugs and put the leads back on.
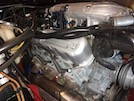 It's looking nice and clean!
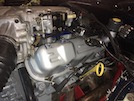 The other side.
Next, I decide to polish the alternator. That occupies an hour with metal polish, scrubber pads and a variety of polishing cloths.
I can't put the alternator back on though, because I haven't painted it properly, so I have to give it another spray and leave it to
dry.
So after passing a while polishing up the plenum chamber while the paint dries, I mount up the alternator bracket. I noticed there's
a new earth under one of the bolts on the front of the engine block, so I put that back too. Then I mount the alternator into the
bracket, and fit the fanbelt. Then I can reconnect the alternator and fire it up!
It starts first time!
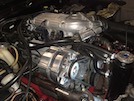 Gratuitous photo of a shiny engine!
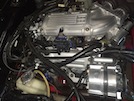 Bugger it, let's have 2!.
So that's it for today. Next job will be to clean up the rest of the engine bay.
:: Sunday, December 15, 2019 ::
Today I hope to finish off the engine bay. I start by cleaning up other metalwork, starting with the plenum chamber - first a good rub
with metal polish, making sure to get into all the embossed markings, then a buff up, then a final buff with a clean cloth.
Then I polish up the visible brake pipes, both radiator caps and the brake balance “thingy” on the bulkhead.
Next, I get on to cleaning all of the coolant hoses that are visible. A wee spray of vinyl and rubber care onto a cloth, wipe it on, job
done! Except that there seem to be hundreds of water hoses and air hoses and ignition leads etc so it takes ages, but eventually it all
comes up nice!
Next, I use detailing spray to clean up all the areas of body shell visible under the bonnet - the inner wings, bulkhead and windscreen
scuttle, which are now covered in metal polish residue (I planned this sequence, believe it or not!) They also come up well (for
30-year-old paint).
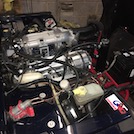 Last for today, I replace the gas strut on the bonnet and leave it up while everything dries off.
:: Tuesday, December 17, 2019 ::
So now, it’s on to the interior. I lower the car off the axle stands and drive it outside so that I can see what I’m doing.
Then I take the roof off and give both panels and the rear section a good scrub with fabric roof cleaner, before hosing the cleaner off,
and patting them down with a microfibre cloth to help them dry. Then I set them aside to dry out more.
Right, on with the interior! The seats are manky. I start by cleaning them with leather cleaner and a sponge, but that’s not shifting
the muck. Well it does, but they still look grubby. Then I remember the “magic eraser” stuff I bought ages ago, and surprisingly, I can
still find it in the garage! Using that with the leather cleaner really dies shift the muck - they look amazing!
The rest of the interior gets the same treatment, with leather or vinyl cleaner and the magic eraser. I clean the console, dash, door
cards, roof hoop - everything I can reach! Transformed...
:: Wednesday, December 18, 2019 ::
Not much time today, been busy with work. That and a three-hour lunch...
All I do is put leather conditioner on the seats, to keep the leather protected and in decent condition. It’s already cracked in places
but I don’t want it getting worse. It has been 9 years since I refurbished them, and they’re not looking so pristine any more,
One problem is that the colouring is coming off the beading. They were originally cream with blue beading, but I refinished them all in
cream. The colour is wearing off the beading though, and I bought blue gliptone years ago to colour them, but never got round to it.
Well today, I do! I start with the drivers seat and a wee brush, and carefully paint around the edges of the drivers seat and seat back.
This is going to need more than one coat though! A lot more...
I have to stop after an hour (one coat on one seat) because, well, I’m losing the will to live... maybe tomorrow eh?
:: Sunday, December 22, 2019 ::
This task of painting the seat piping is like painting the Forth Bridge - I’ve had a go at it every day since Wednesday,
but it’s just so fiddly, partly because I can’t really see what I’m doing in the garage, so I’m holding a hand lamp in one
hand while trying to paint tiny strokes with the other. The drivers seat has had 3 coats, and looks ok, but I haven’t even
started the passenger seat yet.
I’ve also taken off the headrests and have given them one coat so far.
The passenger seat is more awkward because of the angle my hand is at unless I paint left-handed. So today I decide to take
the passenger seat out so that I can paint it outside in the daylight.
Last time I had the seats out (10 years ago) I used stainless steel bolts etc to put them back in. Today I’m glad - ratchet
socket, 5 minutes and the seat is out! I put it outside on a bit carpet, and recline it a bit so that the beading is all
accessible.
Then I set about painting - I give all the piping one coat, and then give the headrests their second coat.
That was a lot easier (and a lot more visible) than painting them in the car. So much so that I decide to take the drivers
seat out and check it in the daylight - it’s not bad, but there are a couple of bits that need touching up, so I use the
last of the paint that I have poured out, to do that.
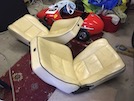 Then I lift them both back into the garage to dry out, and here they are, so far... the nearest one is the driver seat, which
I don’t think needs more painting. The passenger seat will need another 2 or 3 goes...
Then they will both be sprayed with sealer and then the satin finish I used before.
I half wish I hadn’t started this - it has turned into a marathon! I hope this will all be worth it!
 I push the car back into the garage, and jack it up onto axle stands so that I can get the bonnet to open right up,
 and here's the engine as it stands. Note the paint flaking off the cylinder head, and the general tatty state of hoses etc.
 Here's the bits I've taken off so far...


