:: Diary - December 2013 ::
:: Monday, December 2, 2013 ::
Missed the TVR Meeting yesterday, because I went to lunch with the Sporting Bears. Proper meeting about what we’re doing next year, and all.
Anyway - today I ask my boss nicely for a day off, and the daft sentimental old bastard falls for it. So I get out to the garage at the crack of 11am,
and start more cleaning up of bits.
First, the fuel rail. The bead blaster wouldn’t move the paint, so today I go at it with a small sanding disk in a dremel. It works, but it’s laborious
- this paint only exists in two extreme states - it’s either flaking off in chunks in some places, or sticking like shit to a blanket in others. I try
Nitromors. Doesn’t even look at it. It’s like spray-on armour plating. Eventually though, I get most of it off, and set the thing aside.
Now it’s on to the plenum. I remove the two bolts holding the idle speed valve on, and put it aside, well away from glass beads. Then I remove the 6
bolts holding the throttle body on to the plenum, and separate the gasket. First the plenum, then the throttle body, go in the blaster, for a clean up.
Then I blow them out with compressed air, then carb cleaner, then more compressed air.
Then I give the throttles and plenum a polish, but they don’t come up as shiny as I expected. I think I need a few more layers of polishing to get a
better finish. Not today though. I put the throttles back on with a new gasket.
I know this seems a bit random, but it’s my garage and I’ll play how I like. Next I want to play with paints, so I spray a few bits including the
alternator fan and pulley, and the adjuster bracket. I haven’t stripped the paint off the alternator bracket yet though, so that will have to wait.
I still have a bit to do - mainly painting bits - before I can put everything together. I suppose I could make a start by putting the manifold and
distributor back, but I would prefer to build the injectors and fuel rail back together “on the bench” where it’s a bit easier.
:: Tuesday, December 3, 2013 ::
Not a lot of time to get out to the car today, but I manage to spray paint (well primer at this stage) the fuel rail and both replacement rocker covers.
I also re-assemble the alternator fan and pulley back onto the shaft, not forgetting the little woodruff key.
I haven’t got my scabby work clothes on though, so no wire-brushing paint off the alternator bracket, or any sand-blasting today!
I did take photos of all of this, but they’re pants.
So - todo list before I start to put it all back together:
1. wire brush alternator bracket;
2. paint alternator bracket, rocker covers and fuel rail in finished colour;
3. get pissed off and leave it lying in bits in the garage until 2 days before the first TVR event of the season, in April.
No wait, scratch that last one, my name isn’t Adrian (although I might be tempting fate here… I have other winter tasks to complete and this isn’t
getting me any closer to doing those!)
:: Monday, December 9, 2013 ::
Despite my lack of daily reports, I have been working away at bits and pieces over the last week, and have completed items 1 and 2 from my “to-do” list
from last Tuesday. I just need to leave all the painty bits to harden a bit, and then I’ll start putting it all back together. Hopefully.
I haven’t quite reached the stage of getting pissed off and leaving it until April - although there have been days when it’s bloody freezing out in
that garage, and the temptation to abandon it is strong. But no, I’m going to get it back together and running by the end of the year. There we go -
foolish promise made.
Progress would be faster if I didn’t keep going “oh this bolt is a bit rusty” and booting up the blast cabinet every 5 minutes. But it’s fun though -
so what can you do?
Anyway, the idea is to get it back to the engine tuner early in the new year, and that then gives me time to get on to re-aligning the driver’s door in
January or February. I also need to fix the heater because the controls are jammed in one position. Not that it makes any difference to the amount of
heat produced, but it’s nice to be able to slide the controls about and feel as if you’re changing something.
:: Wednesday, December 11, 2013 ::
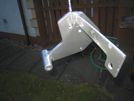 Last bit of painting to do - the alternator bracket. I painted it black the other day, and today I overspray it with a translucent silver, so it comes up
nice and shiny. It doesn’t look like chrome, but it does look like very clean metal.
Then it’s on to the first step of rebuilding. I have 10 brand new fuel injectors, bought from a garage clearance at a knock-down price. I decide to use
those, instead of refitting the original injectors. So the first step is to fit them to the fuel rail. I put the fuel rail upside down on a towel, and
put some oil inside the port in the rail, and around the o-ring on the injector. I make sure that I have the electrical socket lined up to where the
loom will be, and then “pop” the top of the injector into the rail. It takes a surprising amount of pressure, but it does go. Then I slide on the wee
clip that holds it into the rail.
Repeat for the other 5 injectors, and it’s ready to fit to the manifold. Again, a smear of oil inside each injector port in the manifold, and some on
each o-ring, then press them into the manifold. This is a really fiddly bit - I fitted the 3 along one side, then lined up the other 3 and pushed them
in. Fiddly though it is, it’s a lot easier than trying to line up 8 of the wee bastards simultaneously, into the top of a Cerbera engine.
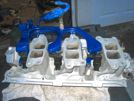 Then 4 small bolts hold it all together.
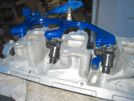 From another angle, you can see the spring clips that hold the injectors into the rail. Yes I know there’s one missing, it doesn’t matter once it’s all
together, but assembling it with those things popping out at random is a nightmare.
By this time it’s getting dark and near dinner time, so the real reassembly will have to wait.
:: Thursday, December 13, 2013 ::
A new day dawns, bright and early. Unfortunately, I am neither bright nor early, and by the time I’ve sorted through my emails, and prevented my daughter
from butchering a parcel delivery man (it’s a long story involving a delivery man who thought he was the master of the “whatever” shrug, but found out,
almost at the cost of his life, that he’s just an amateur), it’s getting on a bit.
To the bat-cave! I start by smearing a very thin film of Blue Hylomar around the inlet ports in the head, and around the channels that carry coolant to
heat the manifold. Then I smear some copper-based sealant along the faces where the heads join the block, to fill the join.
Ditto with blue Hylomar on the bottom of the manifold - around all the ports and faces. Then after making sure it’s the right way round and the right
way up (the mating faces are slightly different front-to-back and side-to-side) I lower the gasket over the two studs, a bit more sealant on the cork
faces between the cylinder heads, and then lower the manifold into place, over the studs.
Then there are six long bolts that go through the manifold and into the block, and two nuts that go on the two studs. You have to be very careful when
tightening these, to pull the manifold down evenly, in the proper sequence, so that it doesn’t get distorted, and then leak.
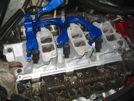 I haven’t photographed any of that last bit, because my fingers were covered in Hylomar and I didn’t want to get it all over the camera. Here’s the
manifold in place though, showing the tightening sequence, which you would expect to be the reverse of the loosening sequence, but it’s not. The bolts
have to be tightened in 4 stages - first, tighten all of them to 6 Nm (I had to go back round the sequence twice until they were all the same), then
12Nm, then 18Nm, then 23 Nm
Next step is to replace the distributor. First I check that the crankshaft hasn’t moved from the timing mark, and then line up the rotor arm with where
it was when it came out (good job I kept the photo on a handy web site eh?). The idea is - lower the distributor in, then turn the rotor arm so that the
skew gears engage with the camshaft and turn the distributor shaft into its “timed” position. Except it doesn’t - no matter how much I try twiddling the
rotor arm while pushing, it won’t engage in the gear at all. After fiddling with it for absolutely ages, I give up.
Like Mr Zanussi, I decide to try the appliance of science. I put a 19mm spanner on the crankshaft bolt, and with the distributor still in place, turn the
engine backwards a bit, then forward, so that the camshaft meshes into the distributor, and not vice versa. That works! The rotor arm is in the wrong
place though, so I pull it out, turn out by one tooth, and try again. Almost - the mark now lines up, but I wouldn’t be able to get the electrical
connector in or out because it’s pointing into the cylinder head!
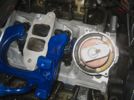 Out again, turn it by one more tooth, turn the crankshaft back then forward to the timing mark, while watching the gears pull the distributor down, flush
with the block, then rotate the distributor body so that the timing mark and the connector lines up, and it’s perfect! That lets me fit the distributor
clamp bolt.
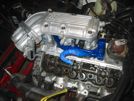 Then I fit the plenum. Again, blue hylomar on the mating surfaces, place a new gasket, put the plenum on, and then tighten the 6 Torx bolts to 9Nm. .
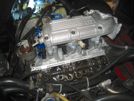 Here it is from the other side.
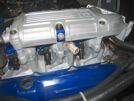 Then it’s on to the rocker covers. The gaskets I have don’t have the adhesive surface to stick to the underside of the covers, so it’s more blue hylomar,
then fit and tighten. I don’t tighten them too much - I only nip them up so that the gasket is in place but not overly compressed. I also noticed that I
forgot to refit the wee blue bracket that holds the coil on, so I have to take one of the plenum bolts back out to fit that.
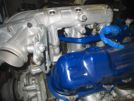 The other side.
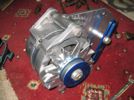 Next steps are all the coolant and electrical connectors, but I need to clean up and go to meet someone. Before I do though, I assemble the alternator
onto its mounting bracket. Bling!
:: Sunday, December 15, 2013 ::
Right, today is the home straight - we are going to get this thing started.
So without further prevarication, I spend ages polishing the idle speed control valve, first with a scotchpad and then with metal polish.
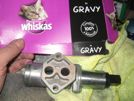 I don’t have a gasket for it though, so it’s time to make one. For those of you have haven’t tried this before, here’s how you make one. First, find a
bit of not-too-thick cardboard.
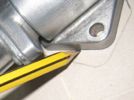 Then put the valve on it, and draw around it, and cut out that basic shape with scissors.
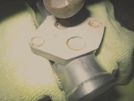 Then (this is the good bit) put the gasket on to the component, and lightly tap around the edges of all the holes, with a ball peen hammer. The edge of
the casting cuts through the cardboard.
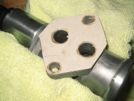 Et voila! Gasket complete!!
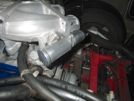 So after a thin smear of hylomar, the ISCV is fitted.
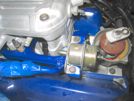 Then I fit the fuel pressure regulator - a little oil on the o-ring and in the socket, and then fix it in place with two small bolts.
 On to refitting the engine wiring loom - first I plug in the injector wiring - I forgot to mark them before I took them off, but it’s pretty clear from
the shape of the loom, what goes where. I think. The back two are maybe not quite so easy to get right.
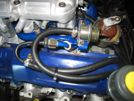 Then connect up the fuel pipes, being careful to note which is the feed (straight into the fuel rail) and which is the return (from the pressure regulator).
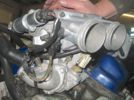 Then I pull the loom round to the front, being careful to route it above the coolant hose stubs, and plug in the ISCV, the Throttle Position Sensor and
the 2 coolant sensors.
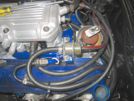 Then it’s on to fitting the vacuum pipes - first the thick one from the plenum to the crankcase ventilation connector in the right-hand rocker cover, then
the smaller hose (the one with the red stripe) on to the fuel pressure regulator.
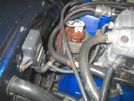 Then connect the big hose from the brake servo, and the smaller pipe that goes to the MAP sensor (the other end of the one on the fuel regulator) and the
T-piece that goes to the back of the plenum.
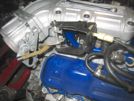 Then I refit the throttle cable bracket on to its two bolts into the side of the plenum, and clip the operating arm back on to the throttle mechanism.
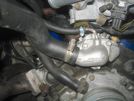 Nearly there! Next job is the 3 coolant pipes under the front of the plenum (at the thermostat). The thick pipe comes from the swirl pot, the middle size
pipe comes from the heater, and the smallest one is a bypass hose that goes into the top of the swirl pot.
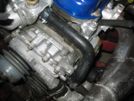 Then there is a 4th coolant pipe between the timing case and the underside of the manifold.
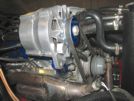 Finally, I fit the alternator, which I have already mounted on its bracket, so it’s just a matter of holding it in place while I get two 13mm bolts in
from the front, and the larger 17mm bolt in from the top, between cylinders 1 and 2. I connect up the electrics and then fit and adjust the fan belt.
Last step is to refill the coolant. I have kept the old coolant, which is still clean, in a bucket, so I remove the swirl pot cap, make sure the radiator
bleed valve is open, and start to pour the coolant in the swirl pot. After a bit, I can hear a trickling sound, which I realise isn’t the noise of water
running around inside the engine. At this point, I realise. How did I get the coolant out in the first place? I disconnected the bottom hose. Did I
remember to tighten it up again? No. I got too excited.
So I refit the hose clamps and tighten them, all the time trying to avoid kneeling in an expanding puddle of coolant. Arse.
So with that problem resolved, and the system refilled and bled, it’s on to the final step. I reconnect the battery.
I turn the key. Engine turns, but doesn’t start. Try again. A kick of life, but still no start. Try again. Yay! We have ignition! I go around all the fuel
connectors and the injector seals with a bright torch, checking for any signs of fuel leaks, but it looks ok.
Unfortunately, the engine is still running a wee bit fast, but that might be the cold start system. It doesn’t get any better as the engine warms up though,
so I check that the idle stop is fully unscrewed. It slows down if I remove and plug the wee vacuum pipe in the back of the plenum (which disconnects the
fuel pressure regulator and MAP sensor).
It also seems to be running rich and slightly uneven - although that may be because its indoors, so the sound is bouncing around the garage, and the exhaust
fumes might be more obvious.
I need to set the ignition timing properly with the timing light, and then see if the MAP or pressure regulator is making a difference.
:: Friday, December 27, 2013 ::
Merry Christmas, sports fans. Hope Santa was good to you and your S.
Mine got sod all. It’s sat in the garage for 2 weeks while I try to summon up the time and energy to diagnose why it’s running so badly. It’s so bad that
I don’t want to try to diagnose it inside the garage - I’ll end up gassing myself, the clothes I was wearing on 11 December are still stinking of
hydrocarbon-enriched exhaust gas. Between high winds, sluicing rain and freezing cold, there’s only been one day where I could have got the car outside,
and that was yesterday, and I didn’t have time.
However, the problem could be:
1. Ignition timing - I’ve set it roughly but it needs to be set up with a timing light;
2. The rear two injectors might be connected up the wrong way around;
3. fuel pressure regulator (although it was working fine before);
4. The MAP sensor (which I had doubts about before so bought a new one);
5. The wrong injectors fitted (although I can’t see why that would make the car idle too fast, unless they are pumping a LOT more fuel in at idle);
6. an air leak on the inlet side (the problem I started off to solve!).
The first one’s easy, but then I want to eliminate an air leak before I go faffing around any further. I’ll try a vacuum gauge, and see what reading I
get. I would also like to carry out one of those smoke tests, like the engine tuner did last month, but that bit of kit costs about £1,000, so that’s a no-no.
Or is it? What do I need? I need something that makes smoke, and a way of getting that into the engine, and then a way of slightly pressurising it.
Pressurising it is easy: I’ve got the compressor, and also a mini-compressor for an air gun and then an even smaller on for beach balls and paddling pools
and other plastic inflatables… Making the smoke isn’t too hard either, it’s getting it into the engine without blowing myself, the car, the garage and
half the street to smithereens that’s the hard bit, I’ll have a think about that while I eat my way through this here tin of Quality Street.
Hang on… Quality Street tin and a bit of hose… I think I’ve cracked it Gromit!
{tvrgit retires to batter his way through the rest of the Christmas sweeties so that he can use the empty tin… I may be some time…}
P.S. Does anybody know - do Army and Navy shops sell surplus bomb disposal suits?
 Last bit of painting to do - the alternator bracket. I painted it black the other day, and today I overspray it with a translucent silver, so it comes up
nice and shiny. It doesn’t look like chrome, but it does look like very clean metal.
 Then 4 small bolts hold it all together.
 From another angle, you can see the spring clips that hold the injectors into the rail. Yes I know there’s one missing, it doesn’t matter once it’s all
together, but assembling it with those things popping out at random is a nightmare.


