The later TVRs, like the Griffith etc, apparently have real wood veneer on the dash panels. So have the later models of the S, and even the wedges, according to the stuff I've read on various forums. Mine, though, are a painted metal effect, which is (a) not very convincing as a wood effect, and (b) chipping off in chunks. So while I was doing the carpets, I decided to re-cover the dash panels.
I started off by looking for veneer panels - there's a wide choice but not locally, and I'm a wee bit reluctant to order unseen - you're more likely to get the bit with uneven burrs or some other defect. I've also been looking at vinyl wrap film (which looks pretty good to be honest, and is probably what most car manufacturers use). and also wood paint finishes.
I have been reading about guys trying to veneer panels and just not getting the right conditions, so either the veneer splits when it dries, or it absorbs the glue and looks crap, or it doesn't come up nice when it's lacquered. Now I am sure that a lot of people have done it with no difficulty, but I am a wee bit put off. Also, I have to say that I've looked at burr walnut veneers, and while some of them are really nice, quite a lot more have patterns that I think would look horrible. Or they are too grey.
So I have decided that I am going to try a vinyl finish and see what it looks like. If it's rubbish, I'll peel it off and think again.
After a browse around various web sites, including classic car and kit car forums, I find a very nice gloss finished wood effect, a bit sized 120cm by 40 cm - more than enough. My concern though is that if it's a bit off the end of a roll, the grain might lie vertically instead of horizontally, and that would look silly. Eventually I decide on a red cedar burr finish that looks quite nice, not too dark, and not too expensive. So I order plenty, so that the direction of the underlying grain doesn't matter - I'll be able to cut the bit I need lengthways or sideways.
To get the panels off the car, first you need to follow these steps on the page for replacing the carpets:
Remove radio and centre console;
remove gear knob and gaiter;
remove the front offside wheel arch;
disconnect and remove the steering column.
So now it's on to removing the dash panels. I know that there are a number of tiny nuts up behind the panel, about 5 or 6 I think, although I'm not sure because my dash is different from most (mine has a separate bit on the glove box, most have a continuous wood panel and the glove box drops down underneath).
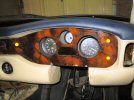 After much contortion and inspection, I work out that the right hand side of the dash is held on with 3 nuts - 2 to the right of the rev counter, and one
above the oil pressure gauge. That last one is a right bugger to reach, but I get there eventually.
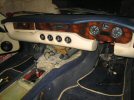 This shows the location of the 6 bolts holding the dash on, plus another 2 in the glove box lid. The top left one is an absolute pain to even see, never
mind reach with a spanner.
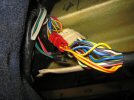 But now I know where I need to get to. It's away up at the top of this photo, where the loom disappears.
To reach that last bolt, I undo various cable ties holding the wiring loom up in the passenger footwell,
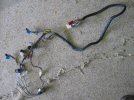 Then I disconnect the loom at the red and white connectors. That bit of the loom goes to the centre console, so I remove it. You can see
here the two window switch connections (with the blue tape), the four switch connectors, and the wiring to the cigar lighter and the mirror switch.
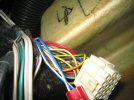 Now we can almost see what we're doing. The nut I am trying to reach is behind that heater duct, where the yellow arrow points. You can see the glove box
above the white connector, and the two self-tappers holding the glove box hinge.
The nut is still not easy to reach - I can just get a finger tip on it, but I can't see it. I wedge myself upside down in the footwell so that I can get my arm up round the various obstructions, with a stubby 10 mm spanner. I can only get about 1/12th of a turn at a time, so the process is - fiddle about blindly till the spanner goes on the nut, turn it 1/12 of a turn, remove the spanner and turn it over, fiddle about blindly till the spanner goes on the nut, turn it 1/12 of a turn, remove the spanner and turn it over... you get the idea - and all the time using a spare finger to hold back the excess leathercloth so that the spanner doesn't scrunch it up against the nut.
The nut isn't tight, but it's too tight to remove with fingers only (especially as I can't really get my fingers on it, between the two panels) so it's a slow and laborious process, a bit like performing dentistry on a giraffe by shoving your arm up its arse, so it's not long before my arm is killing me - between the upside-down muscle pains, the needles and pins in my hand, and the skin flaying off my arm, I have to stop for a rest every wee while.
Finally the nut drops off the back and the panel can be pulled forward.
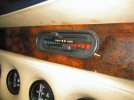
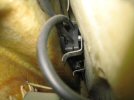 The heater control is still holding the panel on. It comes out from the front, but it's held in from behind by two u-clamps with bolts
through. They are almost impossibe to reach. I prise the bottom of the dash out and wedge some bits of wood in, to leave space to get my hand up. I also
have to remove the oil pressure gauge - two 8mm nuts hold it in from behind. Now at last I can get my hand up behind the heater controls and undo the two
7mm nuts and remove the brackets. Just - it's dead fiddly and you have to do it by touch alone.
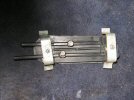 That lets me pull the control panel out, and disconnect the cables (after marking the top one with blue tape), The panel is now free! I gently prise the
plastic warning light panel off the back of the dash panel, and put it away carefully.
My hands and arms are scratched to ribbons...
Then I remove the glove box lid with a stubby screwdriver, and then remove the
internal leather trim from the back of the lid - it's only glued on so it's just a case of gently prising it off with a flat blade. When I lift that up,
I can remove the two nuts holding the wood trim panel on.
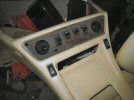 Then I remove the switch panel from the centre console. Again, that'e easy - 4 nuts through the holes you see here, and it's off. Then I note the order
of the switches, and then take them out of the panel, and give them a clean with some WD40 and a toothbrush.
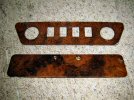 Here's the switch panel and the glove box lid.
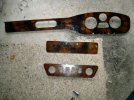 Here's the three panels together - This photo doesn't really do justice to how bad they look - you can see the missing chunk, but you can't
see the flaking lacquer or the "ploughed field" gloss finish.
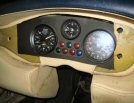 This shows how the instruments are mounted into a separate panel which is held in place with 3 of the 5 bolts.
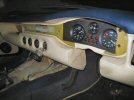 And this shows the whole dash with the facing panel removed.
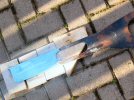 The next step is to remove the old wood effect paint. It doesn't dissolve with nitromors, so it's out with a flat sheet sander and some 60-grit paper. I
find some wee bits of wood that are slightly thicker than the length of the threaded studs on the back of the panels, and put them underneath to support
the panels so that I don't bend them while sanding (remember the bits of wood I used to prop the body off the chassis a year ago? Never throw anything
away!) I've chosen to do this outside because it's windy and that helps with the disposal of the sanded off material (after checking that my neighbour
hasn't got her washing out, obviously - I'm just a considerate kinda guy).
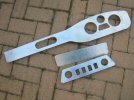 After half an hour of sanding, and then another 10 minutes with a Dremel to clean off the edges of the panels and the inside edges of the instrument and
switch holes, they look like this. Maybe a brushed metal finish wouldn't look so bad eh? I notice a number of neighbours looking out to see what all the
racket was. Maybe I'm not as considerate as I thought...
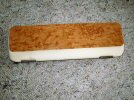 I've got enough vinyl to cover the big panel three times and the small panels twice (or various other permutations are available). I decide to start with the
easiest panel - the glove box lid, because it's got no holes in it. So I cut a bit of vinyl along the grain, and clean off the panel. Then I peel off the
backing and lay the vinyl on, pushing it into place with a rubber spreader that's meant for grouting tiles. It's not too bad but the curved corners are a
bit tricky.
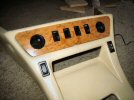 So now it's on to the switch panel. Again, I lay the vinyl on with my rubber spreader doodah, then stretch the vinyl over the edges, using a bit of heat to
stretch the vinyl over the rounded corners. Then I cross cut the switch holes and apply a wee bit of heat, and stretch the vinyl back through and stick it
to the back. Then it's on to the round holes for the eyeball vents, using the same technique - heat to soften the vinyl, run my finger round the hole edge
pushing and stretching the vinyl back, them cut the centres into segments, stopping 2 or 3 mm from the edge of the hole, then more heat and stretch the
material through the hole and stick it down. It looks not too bad at all.

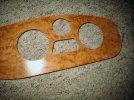 Now for the big panel. Again I add a bit of heat to soften the vinyl as I stretch it, as I lay the vinyl on with the spreader, then heat the vinyl as I
stretch it over the curved edges, It goes on perfectly. Then I cut out and trim the hole for the heater controls - I cut out the centre, put in a few nicks
almost to the edge of the hole, and then heat and stretch the vinyl through the hole and stick it to the rear of the panel. Then I glue the warning light
panel back onto the rear of the panel.
I do the speedo and rev counter holes, the wee hole for the clock and the hole for the warning lights in exactly the same way -
Then I dismantle the heater control, take off the knobs and sliders, and clean it up with WD40.
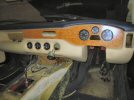 So it's on to replacement, starting with the main dash panel. It slots into place easily, and then I lift the instrument cluster onto the back of the thread.
I was going to refit the panel with M6 wing nuts, but they don't fit here - the threads are too close to the side of the rev counter, but it's easy to get
standard nuts on and do them up with a long socket. Then the single bolt in the centre - I slip a washer and wing nut on and tighten it up. Same with the
bolts beside the glove box. That was easy!
Then it's on to replacing the heater control, Connecting up the cables is easy, especially since I marked which one was top. The cables each have a loop in the end that slips over a thread on the back of the control, then a nut and lock nut holds each inner cable in place. Then the outers are clamped to the edge of the control. I put the controls into the dash, but I need to fit the brackets to the back and it's just impossible to reach and reassemble using fingertips only..
So - a bit of lateral thinking. How about if I just fix the control to the front panel, and then push the whole assembly through the hole in the dash? I remove the trim panel again (surprisingly it only takes about 5 minutes, not 3 days - practice makes perfect!) so that I can pull the trim panel forward. I have to re-shape the bracket a bit because it's too wide to fit through the dash hole, but a couple of minutes with a vice and a hammer sorts that bit. I also have to straighten out the legs of the bracket because now it'll be spacing only on the front trim panel, not the double thickness of the trim and dash. I manage to get the brackets and nuts on, and tighten them up. Then I wriggle the whole lot back into the dash and refit the dash mounting bolts. Sorted!
Then I refit the oil pressure gauge and finally check up the back of the dash for any loose wires, or hanging bits of skin - my arms are shredded again.
Then it's time to refit the glove box lid. First I stick the trim back down on the back of the door, and clamp it together with a couple of bits of wood and a couple of g-cramps. When it's dried I refit the hinges and the locking catch.
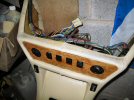 Then I refit the switch panel to the console, and replace the console wiring loom while I still have my notes (and some memory of how it came apart).
That's it ready to go back on the car - connect up the fresh air hoses, plug the loom in under the dash, and it's sorted!
Then it's a matter of refitting the steering column, the centre console and all the other bits, as detailed in carpets article.

 And here's the finished job - it's a lot lighter than the old finish, but I like it - and if I do change my mind, it's easy to replace!