:: Clutch Replacement ::
:: Why? ::
In my case, I was finding it more difficult to get the car into first gear, then there were huge loud grindy crunchy gear moments when selecting
reverse.
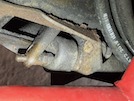 First stage was to check the clutch operation. The actuating lever at the gearbox has two holes - a large inner hole, and a smaller outer hole.
Initial research on Pistonheads suggested that the bigger hole is for hydraulic clutches, and the outer hole is for cable clutches, but that turned
out to be bollocks - the small hole is for the original clutch cable, and the big hole is to let the nipple on the end of the cable pass through
before you fit it. That makes sense. The TVR clutch actuator rod should be fitted in the small hole.
Next step is to check the slave cylinder. I empty the master cylinder using a vacuum bleeder or just a spray bottle nozzle and pipe - youstick it
in the cylinder, and use the trigger spray to suck fluid out of the cylinder
Then I remove the clutch pipe at both ends.
The slave cylinder is held on to the mounting plate with 2 bolts which are very rusty, and also pretty inaccessible. The mounting
plate, though, is held on with only one 17mm nut and bolt through the bell housing, which is oily, but not rusty.
The next job is to undo the two mounting bolts and separate the cylinder from the bracket.
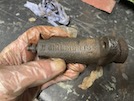 Here's the slave cylinder....
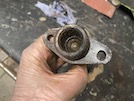 And here's how manky it is inside. I decide I'm just going to change that while it's off, so I order a new one.
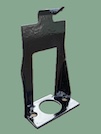 Then I clean up the mounting bracket, rub it down and give it a coat of primer, and then satin black paint.
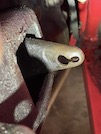 Then I examine the clutch release arm - it doesn't look as if it has worn badly.
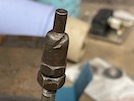 The diameter of the "ball" on the end of the rod is 11.5mm. The wee "nipple" on the end is 6mm diameter.
The small hole in the clutch arm is just over 6mm. Thee big hole is 11mm diameter. That means that the ball is only 0.5mm bigger than the big hole,
so that's going to wear through in no time. This confirms that the actuator should be in the small hole, as it was.
You can also see in that photo that over the last 113,000 miles, the actuator arm has worn a groove into the end of the rod. That's not good, and
also needs to be fixed.
To fix that, I remove the ball-end and locknut, and look through my boxes of assorted shit to find a bolt with the same thread
- it's not metric, its 3/8 UNF I think. Whatever it is, I find that it's the same as a 1957 Chevrolet's valve cover bolts, of which I have a few
spare allen bolts. I tighten the end and locknut onto one of those, clamp it in the vice, and fill the groove with weld.
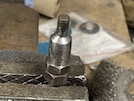 Then I clamp the bolt into an electric drill, clamp the drill in the vice, and use a hand file to re-shape the end. There's lovely for you.
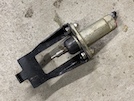 I adjust the rod to the length that it was (6 unused threads showing under the locknut) and refit it to the new slave cyinder, then bolt the cylinder
to the mounting bracket.
At this point, I discovered that the clutch arm has detached itself from the back of the thrust bearing, and has then detached from the wee prongs
on the far side of the bellhousing, that hold the arm in place and provide a pivot point. The only way to fix this is... to remove the gearbox to
get inside the bellhousing. This is, as they say in polite dinner parties, a right bugger.
I also discover that the my clutch hydraulic pipe pipe has different connectors on each end. They are the same diameter, but the master cylinder
end has 20 threads per inch, and the slave end has 25 or 26 turns per inch. The new slave cylinder has 20 tpi. I need to change that connector
before I put it back together. Which might be a while...
On the bright side, I already have a new clutch and plate, that I would be as well to fix at the same time. As far as I am aware, the car is still
on its original clutch, at 113,000 miles, so might as well do it. I will also have better access to change the gear lever saddle, which is worn and
rattling a wee bit, and I couldn't get at it with the box in the car.
:: Gearbox Removal ::
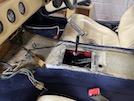 First the easy bit, before lying upside-down. I remove the centre console - two wee screws at the back, unplug 3 electric connections and the aerial
from the back of the radio, and that's done! Then I can remove the gear knob, the leather gaiter and then 6 screws holding the rubber gaiter
underneath.
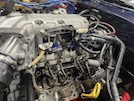 Then round to the engine bay - I remove the left-hand spark plug leads, then remove the distributor cap, the rotor arm and the left-hand valve cover.
This is all to allow the engine to tilt backward if necessary when I'm waggling the gearbox off the back.
Right - next task is to remove the exhaust. I remove the 3 nuts and bolts holding the downpipes to the manifold, and support the front section of the
exhaust on a box, then undo the two middle bolts holding the silencer up, and then the single bolt at the rear, holdig the exhaust up first, then
lowering the front and the rear, and pulling it out the back.
Next I remove the starter motor - disconnect the battery and then the two cable connections to the starter motor. The motor is held to the bellhousing
with 2 x 13mm bolts. The top one is a pain to access but I get it with a socket, a ratchet and an assortment of extension bars - not too long or you
hit the chassis, not to short or you don't clear the motor.
Right - next are the propshaft bolts. They need a 15mm spanner and they are very very tight. You have to jam the propshaft with a bar or
something to stop it turning while you welly some torque into loosening the bolts, one at a time. Remember to mark the position of the propshaft
and pinion so that you can put them back together in the same place.
With the bolts all off, there's a crossbrace on the chassis that prevents you removing the propshaft.
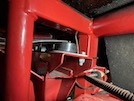 The online advice is to drop the front of the diff. This isn't as easy as it sounds. You can't just undo the two big bushes holding the diff frame
to the chassis, then lower the diff nose, and lift the back of the propshaft over the frame. Ask me how I know.
So I decided to loosen the diff in the frame - it's held in with two bolts on each side. I loosen the top rear bolts, and remove the bottom
front bolts. The offside one fouls against the chassis - I have to remove that top chassis mount in the photo, jack the diff up slightly higher,
remove the bolt and then let the jack down again. I can then pull the diff down a couple of inches, the frame tips back, push the diff half-way
back up and the propshaaft (just) wiggles backwards into the space above the frame.
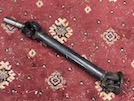 And that get you to here!
Then I disconnect the wiring to the reverse light switch and the speedo sensor, and tuck the wires out of the way for now.
So now the back of the gearbox is held up by the chassis mounting. Fortunately, because mine is an S3C, I have the removable mounting crossmember,
so I don't need an angle grinder for this bit. The bracket is held in place by two bolts on each end, then the mounting is held to the bracket by
two long bolts through a spacer. I support the gearbox with the jack and take all of those out.
At this point, I was expecting the bracket to just fall out, but it doesn't - it's held in tighter than a 50p piece in an Aberdonian's hand on poppy
day. I try pulling on it and levering it with a variety of crowbars of ever-increasing different sizes, but nope...
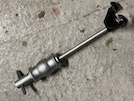 I end up employing this - it's a slide hammer for removing internal bearings, with half of a spring compressor bolted to the business end. That
does the trick!
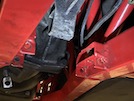 Then I remove the big bolt through the bottom of the mounting, and remove that from the gearbox.
Then I remove the 2 bolts at the top of the bellhousing into the back of the engine block. They are difficult to access, and tight, but a ring
spanner with an extension level gets them out!
Then I can lower the back of the gearbox and tilt the engine back slightly with a jack under the crankshaft pulley, with a plastic tray to catch
the oil that comes out of the tailshaft. That lets me get on to the next 2 bellhousing bolts witha socket and extension. I also remove the 2 nuts
and bolts in the bottom, holding the bellhousing plate to the bellhousing itsef.
At this point, you need the help of an isstant - I had Dave. We dropped the gearbox down and then removed the reverse light switch because it was
catching on the bottom of the handbrake lever when you pulled the gearbox back.
Then we had to remove the gearlever which was a catch-22 - you need to take the gear lever off to get the box out, you need to take the bolts out
to get the lever out, and you need to take the box out to get at the stupid torx bolts without chewing them to bits. Two came out, one had to be
loosened with a chisel...
Then we jacked up the front of the engine again, and managed to figure out exactly how much to turn the box (to within about 1 degree) so that it
fitted down through the space in the chassis.
Beware of the ret of the gerbox oil that runs out while you're doing this!
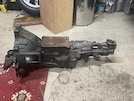 And here we are - one Ford Type 9 gearbox, and it's only taken us an hour... (plus who knows how many hours over the past week just taking bits off
to get it to this stage.)
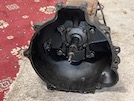 It looks like the front oil seal is leaking, the inside of the bellhousing has fairly fresh oil running down it. Maybe the rear crankshaft oil seal
is leaking too - needs to be checked. I also notice that the clutch release lever is detached from the thrust bearing AND has come out of the
locating pin at the far end.
At this stage, I measure the input shaft and order a new spigot bearing (there's two different diameters, so make sure I get the right one!).
:: Clutch Change ::
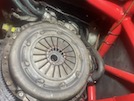 TFirst job is to remove the clutch from the flywheel. It's held on with 6 x M8 bolts around the pressure plate. Break each one loose, working opposite -
i.e. 12 o'clock, 6 o'clock, 2 o'clock, 8 o'clock, 4 o'clock, 10 o'clock, then go round again loosening each one a bit at a time until the pressure
plate is loose, then detach it from the flywheel (with a little leverage to get it off the dowels), noting which way round the clutch plate is fitted.
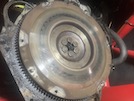 Here's the back of the flywheel before cleaning off the clutch dust - no scores, but maybe a trace of oil contamination?
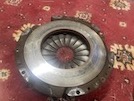 and here's the pressure plate... again maybe just a smear of oil contamination?
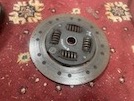 and the friction plate (flywheel side upwards). To be honest, it's not as badly worn as I expected, if this is indeed a 100,000 mile clutch. As I
said before, I haven't changed it, and I've done 50,000 of those miles... Unless it was changed (and not mentioned on the invoice) during the
chassis rebuild in 2020.
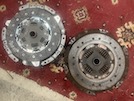 Here's the old and new clutches together - you can see some marking on the flywheel face of the old one, but I don't think that looks too serious.
Next, I remove the spigot bearing. I have an internal bearing puller that I bought ages ago for something else (can't remember what) so I fix that
into the spigot, tighten it up and slide hammer it out. Forgt to take a photo though!
Next, I try the new clutch plate on the gearbox splines. Many many years ago, I struggled to refit a gearbox to a Ford Cortina after
a clutch change, and couldn't figure out why it just wouldn't go on - then found out that the new clutch had the wrong spline pattern and the input
shaft wouldn't go through. Again, better to find any problems now, than after you've tried to lift the gearbox into position.
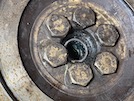 Next task is to knock the new spigot bearing into the end of the crankshat with a wee bit of grease and a socket of the right diameter as a drift.
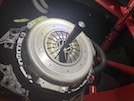 Then I can refit the clutch, using an alignment tool to centralise it, and then tightening up the bolts gradually in a cross-pattern until I get
to 20 lb-ft (yes I used a proper torque wrench and everything - AND I used it correctly - tighten until it clicks once, then go round all the bolts
again, and then a third time, to make sure they're all even).
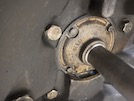 Anyway - with the clutch fitted to the engine, we're just about ready to refit the gearbox!
:: Prepare Gearbox ::
In parallel with all of that, I have a few tasks to perform on the gearbox while it's out.
First - the plastic saddle in the gearlever. I had a go at this 10 years ago but couldn't get the third torx screw out with the box
still in the car. Now the gearlever is out, it should be a piece of piss!
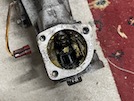 Here it is - it just clips over the top of the selector shaft. I get a hold of the old one with long nose pliers, and pull it off. Then a dab of
grease on the new one, and clip it on.
Then I decide to fit the lever to try it, while the box is out of the car (better to find any problems now, than after you've hefted half a tonne
of gearbox into position, to find you have to take it out again, eh?). I'm not refitting those stupid torx screws again though - I go to have a
dig for some short M8 cap bolts.
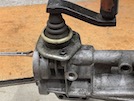 Gear lever refitted, moves nice and firmly to all gear positions, hardly any slack at all now. Task 1 completed!
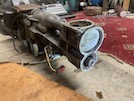 Task 2 - gearbox rear oil seal. This is a relatively simple process - lever the old one out, drift the new one in with a socket the right size.
Next task - when we were removing the gearbox, there were a couple of webs on the tailshaft that were just catching on the mounting bracket on the
chassis.
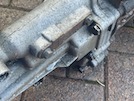 5 minutes with an angle grinder removes this...
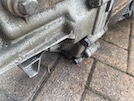 to this, and
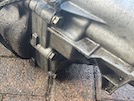 this...
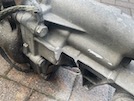 to this. It's not much, but it should make refitting just a little easier eh?
 Next, the front oil seal. To get to it, you have to take off this cover, which is held on with 10mm bolts. Yopu can't get a socket on the bottom
two though, because theres a gearbox web that gets in the way... so you have to use a wee open-ended spanner
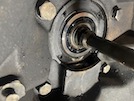 With that housing off, you can see where oul has been leaking down.
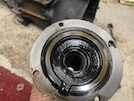 And here...
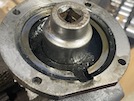 so we get that housing in the vice, with a cloth wrapped several times around the shaft to prevent damage, and lever out the old seal, then drift
in the new one with a socket that's the right size.
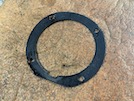 The gearbox bose does have a seal in there - mine is a rubber seal that's old and a bit crispy...
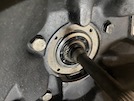 A nice new cork gasket should do the job!
Then I take out the oil filler plug and turn the gearbox on its side to drain the last of the gearbox oil out of it.
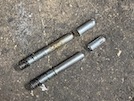 While that's draining, I make up a couple of guide pins to fit into the back of the engine block, to help guide the gearbox into place, and also to
hold the engine back plate while we do that. Pretty simple - find a couple of longer bolts with the correct (M10) thread, cut them down to around 3
inches, round off the ends, and then cut a screwdriver slot just in case they are too tight to hand turn back out again. You can see one in place
here, beside the flywheel and clutch.
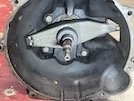 Then I put back the oil filler plug, turn the gearbox upright and refit the clutch arm and new clutch release bearing.
So that's it ready to refit to the car!
:: Refit Gearbox ::
Again, I call on Dave's assistance with this stage. With him underneath to lift it, and me up top to hold up the tailshaft with a webbing strap, we
(well, he) managed to lift it into position on to those studs. We got another couple of bolts started in their threads, supported the back of the
box on a bit of wood across the chassis rails, and then replaced the other bolts then the guide studs (thankful for the screwdriver slits in the
ends) and tightened up all the bellhousing bolts.
Grinding off those wee bits of casting made it a lot easier ging in, than coming out!
Then it's time to start refitting all the other bits... and there appears to be lots of them!
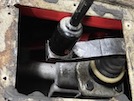 I start with the gear lever - I lower the gearbox slightly and insert the lever, and then insert the bolts and tighten them up. I have to start the
bolts from underneath though, because the hole in the tunnel isn't big enough for a hand holding a bolt...
Next, I lift the gearbox back up into place, and insert the rubber mounting over the brackets and under the box. It's a tight fit but eventually,
after some strategic jiggling and joggling, it goes into place. I bolt it up into the gearbox, and then insert the cross-brace, which was a tight
fit to remove, so needs a bit of percussive persuasion to go back into place so that I can insert the 4 holding bolts and tighten them up, not
forgetting the gearbox earth strap!
 Then I can insert the two long bolts down from the top, through the mounting and the bracket, and lower the jack under the tailshaft, then tighten
up those two nuts as well. Gearbox in and supported! I'll need to paint over the hammer marks in that bracket though...
Next, the propshaft. I've had the front of the diff supported on another webbing strap, so as not to put too much strain on the diff rear mounting.
I remove the strap and lower the diff and rotate its supporting cage downwards... then put the propshaft up from the front, into the gap, and engage
the other end in the splines in the back of the gearbox, and leave the propshaft sitting on the chassis for now...
Then I rotate the diff carrier back down to align with the threaded holes in the diff, and insert one of the front mounting bolts. I can't get the
other one in because the chassis is in the way, so I put the jack under the diff and lift the whole assembly up, until that second bolt is clear of
the chassis... insert bolt, then tighten all 4 mouning bolts up...
I had to take the right-hand diff rubber mounting off to get that other bolt out in the first p[ace, so now I have to lower the diff again to
replace that mounting. Then jack the whole lot up for the final time, and insert the diff carrier mounting bolts upwards through the rubber mounts
and into the chassis.
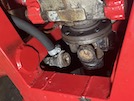 Now I can insert the 4 propshaft bolts, making sure to align the propshaft to the marks I made on the pinion flange.
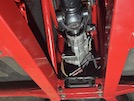 Back to the gearbox and I reconnect the speedo wiring (the red connector dangling here - that will be tie-wrapped up!) and insert the reverse light
switch (the black wire up the right hand side of the gearbox here).
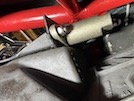 The next step is to replace the clutch slave cylinder. I build it onto is bracket with the two holding bolts, and then clip the bracket into the
bellhousing, and secure it with the bolt through the bellhousing at the front. Then I adjust the pushrod until there's only the tiniest bit of free
play.
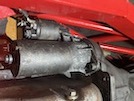 Then I replace the starter motor. Pretty simple - hold it into the bellhousing from underneath, and insert the bottom bolt and get it started...
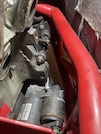 then insert the top bolt from above and tighten them both up. Then connect the two electrical wires.
Next step is the nearside exhaust manifold, which I am replacing with new gaskets. Getting the 6 bolts started is always a fiddly task, but
eventually, just before my fingers go numb with the cold and the awkward angle needed, they are all in, through the gaskets, and tightened, and the
lambda sensor wiring reconnected.
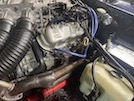 Then the distributor cap and rotor arm.
Then I go around the engine bay tie-wrapping any wiring that I have loosened, then underneath to tie-wrap the reverse light and speedo sensor wiring
to the chassis and gearbox.
I can't refit the clutch hydraulic pipe , because the one I took off has the wrong thread on the fitting at the slave cylinder (the new cylinder
has a different thread from the cylinder I took off) and there's a sharp bend right behind the old fitting thet means that I can't just cut it back
and put a new fitting on. It's 1/4 inch pipe (not the 3/16ths that the brake lines are) and imperial fittings...
So I make up a new pipe from the master cylinder to the slave. First, I try the new fittings I bought in both cy
linders as a final check that they are the right size and thread, and then I cut a bit of pipe to the same length as the old one (plus a wee bit to
allow for flaring), slide the fittings on, and flare the ends.
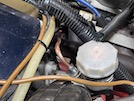 Then it's a matter of bending the master cylinder end to shape using an old box spanner as a former, and bending it a little at a time to the "hook"
shape, then a reverse bend to go down the side of the bulkhead,
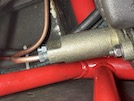 Then it bends over the top of the gearbox, with another formed u-bend to go into the slave cylinder.
That all sounds very easy - but in reality, it took many many cycles of "crawl under car - trial fit - remove - come back out - bend a bit more -
try again" until both ends fitted in place, and it followed a sensible route... No photos of this stage because, well, I was concentrating!
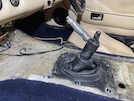 Then I replace the centre console and gear lever. First replace the rubber boot (ford Transit Mk1 apparently but now unobtainable).
Then there's two electrical plugs up behind the glove box - a 3-pin one, and one that has about 18 pins (I didn't count them...) that connects all
the console switches and dials. With those connected, put the leather gaiter over the lever, then I can push the console back into place under the
dash, making sure to pull the radio wiring and the aerial cable through the gap. The console is fixed in with two screws at the rear.
Then I pack all of the electrical gubbins in the footwell on top of the footwell cover, and shove that up behind the dash into place. There's no
finesse to this, it's a bit like trying to apply first aid surgery to a disembowelled Dalek.
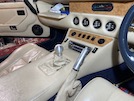 Finally, fit the gearknob and tadaaaa!
I connect up the battery temporarily, and check that the switches and dials (and the radio) in the centre console all work.
Then I fill the gearbox with oil, using a big syringe that holds a pint at a time and would keep Keith Richards buzzing for a fortnight. You fill
it with gear oil, skoosh it in (twice) and then a wee bit more until it reaches the level of the filler plug. Plug back in, and nary a drop spilled!
Then it's time to refit the exhaust - 6 wee nuts and bolts on to the manifolds, 2 bigger nuts and bolts on the sides of the silencer then one bolt
at the back.
Then I get back underneath and bleed the clutch with my vacuum pump. Wheels back on, lower it back to the ground, jump in, start it up and reverse
it out of the garage.
She goes!
 First stage was to check the clutch operation. The actuating lever at the gearbox has two holes - a large inner hole, and a smaller outer hole.
Initial research on Pistonheads suggested that the bigger hole is for hydraulic clutches, and the outer hole is for cable clutches, but that turned
out to be bollocks - the small hole is for the original clutch cable, and the big hole is to let the nipple on the end of the cable pass through
before you fit it. That makes sense. The TVR clutch actuator rod should be fitted in the small hole.
 And here's how manky it is inside. I decide I'm just going to change that while it's off, so I order a new one.
 Then I clean up the mounting bracket, rub it down and give it a coat of primer, and then satin black paint.
 Then I examine the clutch release arm - it doesn't look as if it has worn badly.
 The diameter of the "ball" on the end of the rod is 11.5mm. The wee "nipple" on the end is 6mm diameter.
 Then I clamp the bolt into an electric drill, clamp the drill in the vice, and use a hand file to re-shape the end. There's lovely for you.
 I adjust the rod to the length that it was (6 unused threads showing under the locknut) and refit it to the new slave cyinder, then bolt the cylinder
to the mounting bracket.


