:: Diary - April 2013 ::
:: Tuesday, April 2, 2013 ::
Well I finished that urgent job yesterday, so it's back to TVR-fettling! First I nip down to Halfords and buy another exhaust clamp. While I'm there,
I notice that their metal polish price tags are still wrong. Bugger it, I can't be bothered.
So, the first job is to repair that hose bracket - not because it's urgent, but just because I want to play with my welder. First I grind down the new
use clamp, just to make sure there's no zinc plating etc that's going to splatter everywhere, then I set it all up and align the bits on a couple of
bricks. Oh yes, all the latest technical gear, me.
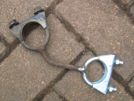 I weld up the bracket, and then tidy the weld up (it doesn't need much, I'm getting better!)
Right, once I've put away the welder, I get to play with air tools! I'm like a dog with two doodahs as I descale more of the front of the chassis, and
also the radiator bracket / shroud thing. Then I fit a wire brush to the grinder just for the last few bits.
As I work away, I realise that the whole lower chassis rails really need done, but I'm only doing the front at present. It had hardly any paint
left on it - or so I thought till I realised that I've spent 2 days descaling the thing.
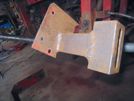
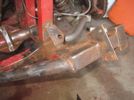
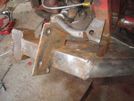
On some bits, the powder coat and Hammerite just falls off when you look at it, but in other places it sticks like shit to a blanket.
So that's it ready to degrease, and then etch before painting.
I'll need to wait though, because my client phoned, he's not exactly a master of comprehension, and he wants a further report on something that's
bleeding obvious. This will take a week. I've got till tomorrow. Great.
(I manage it though, by getting up at 4am, and working on it continuously until 3pm. This is gonna cost him. Big time.)
:: Saturday, April 6, 2013 ::
 It's a lovely clear morning (but freezing cold) so I decide to have a wee run in the Porsche to take some photos.
By the time I get home, the weather has warmed up a bit, so I decide to get back out to the garage.
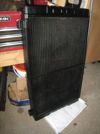 First job is to tidy up the radiator. I give the headers a clean up with a wire brush (just a hand held one) and then clean out the cores with a softer
brush, so that I don't damage the cores and fins. Then I spray it with matt black radiator paint, with one coat angled from the right, then another coat
angled from the left, to make sure the paint goes between the fins.
While that's drying, I degrease the front of the chassis. First I put down a tarpaulin so that the garage floor doesn't get soaked, then spray on the
degreaser, and wash it off and dry it as best I can.
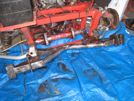 Then I spray all the bare bits with "Metal Ready", which is an etcher / rust treatment as the first stage of the POR paint system. You spray it on and
leave it for 30 minutes, making sure it doesn't go dry (spraying it every 10 minutes to so does the trick, I've used this before!)
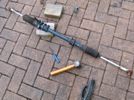 While that's doing its thing, I take the steering rack and first, remove the chassis clamps, then I punch a wee mark into the pinion to mark where the
steering column goes back, then use the wire brush again to scrape off all the loose paint and greasy bits. I was going to paint it, but somebody
"borrowed" my masking tape, so it's on long-term sick leave. I do find a tin of brush-on satin black, but when I take the lid off, it's a solid block
inside. Bucket. That's West Lothian rhyming slang.
Then I wash down the front of the chassis again, and dry it off.
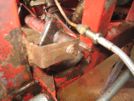 Then I remember that I meant to disconnect the front brake hoses so that I can paint the chassis brackets. That doesn't take long. I connect them back
together to stop fluid pishing everywhere. Then of course I have to clean the drips off the chassis again…
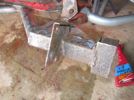
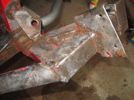 So that's the chassis ready for painting. I'm not starting it today though, I'm going to leave it to dry out properly. I put 4 bolts into the rack mounts,
so that I don't get paint down the threads.
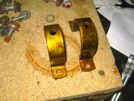 Last thing for today - I use the grinder wire brush to clean up the steering rack brackets, then paint them with a tin of "yellow anodise" effect spray
I bought years ago for something I can't remember. Whatever it was, it's not that colour now. They look ok, but a bit too yellow to look like anodising.
Then I pull out the tarpaulin to get all the water outside. The floor is soaking. The tarp has got more holes in it than a political manifesto, or
Jimmy Savile's alibi.
You've got to laugh.
:: Sunday, April 7, 2013 ::
It's TVR Car Club day today. Except my TVR is still in bits. Oh dear, what to do? I know! I'll just take the Porsche.
I meet up with Dave and Jim and we head through to the meeting. Dave has to ask me to turn the heater down because he's sweltering. Jim doesn't look
particularly toasty, oddly enough.
Service at the hotel meets all my expectations. I expected it to be rubbish, and it is. First I have to wait in a queue like a Russian bread shop just
to order my lunch, so by the time I get through to the dining room, there's no space at the usual table. Hugh makes some excuse about trying to save a
seat for me, but I know it's just because he doesn't want his wife to know the type of boys he mixes with.
I suddenly remember my plans to make the site "member-only" so that you have to log on. Keeps out the undesirables. Don't know why it comes to mind
now, though…
Anyway, I go off to sit somewhere else, and after what seems like ages, I am approached by a guy who looks like he's been sleeping in the street since
he got home late and pished from last weekend's rugby match. He mutters something about "pished" and "change" so I tell him I haven't got any, so he
can clear off and leave me alone, and no I don't want a "Big Issue" either, even if it is his last one.
He's persistent though, even for a street seller, and keeps muttering away. Eventually I realise that the noises he's making through his face-fuzz
mean that he's a waiter, and they haven't got any fish left, so do I want to change my order. Well, no I don't really, but I haven't got choice, have
I? He shambles back off to the kitchen with a style and grace you don't see at the Savoy. Well apart from round the bin store.
While I'm waiting (I had plenty time for this), I wonder if my revised choice costs the same as the original (because I don't expect to be offered a
refund if it's cheaper). While I'm back at the bar, I meet the owner, who isn't usually in at weekends. He's not happy. They've run out of fish apparently.
His staff have told him that it's a big turnout today, usually there's only 12 of us. I correct this assumption by the use of the word "bollocks". Last
month there were fewer people than usual, because of the weather, but even then, there were more than 12. I also tell him that it's more and more obvious
that there's no managers in at weekends.
He's even not happier.
I decide not to mention Boxcar Willie the waiter, and go back to the table to wait for the chicken I ordered, to die of natural causes.
After the chicken, there's another wait, and by the time a pudding appears, I'm not sure if the dessert from lunch or the starter for dinner.
Fortunately they have a wedding on next month so hopefully we'll go somewhere else. At least they have given us a month's notice this time, instead of
telling us when we turn up. What a difference it makes having the owner around, eh? If I'm unlucky we'll just rearrange it for another Sunday at the
same venue. Hope they've got lots of weddings on.
:: Tuesday, April 9, 2013 ::
I spent the whole of yesterday (and I mean from when I got up until after tea-time) building a new web site. Apart from my own obviously effing
brilliant web site you are reading now, there are a few other owner websites with blogs and stuff. But the main web site for the TVR S Series is
TVRSSeries.com, run by a bloke who likes his pies. It's a brilliant site, full of useful
information, specifications, articles and advice on the S Series, and is an essential resource for owners (not like the rambling gobshite you read here).
Anyway, the site disappeared in mid-March, and nobody has been able to contact the owner. I decided that, if it had gone, I would try to rebuild a
new site with all that information (or as much of it as I could gather) and host it at
TVRSSeries.co.uk, run by a different bloke who also likes his pies. So I spend most of
Sunday night and all of yesterday gathering this info and building the site, buying a new domain name etc.
Just as I finish adding most of the documents and links, Pies pops up and says "sorry lads it'll be sorted soon" - so now I've got half a web site,
redundant…
Never mind, today it's back to my own car. I start by cleaning up the steering rack and masking off the gaiters etc, and then hanging it on the clothes
line and spraying it black. While I am waiting for it to dry, I realise that I forgot something… I have lost the mark I made on the pinion, to show
where the universal joint goes back on. Refitting the rack is gonna be fun… Tough tit, nothing I can do about it now.
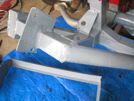
For my next trick (this is like the Tommy Cooper of car maintenance), I decide to paint up the front of the chassis with POR15 rust preventer - the
same stuff I used on the outriggers and trailing arm.
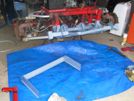 Just like that!
 chassis, paint - paint, chassis
 "The wife sent me into the attic yesterday for something. God it was 'orrible - filthy and smelly and covered in cobwebs."
"Still, she's great with the kids."
Where was I? Oh yes, the chassis. It could do with another coat in places but I'll let it dry first.
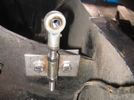 Then I fit the shiny new stainless bonnet hinges to the bonnet, not that I'll be refitting the bonnet any time soon, at this rate.
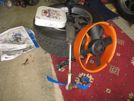 There's my carefully-stored parts, ready for refitting. I used to store them on shelves but they kept falling off and breaking. If I keep stuff on
the floor, it can't fall any further, can it? Clever, see?
:: Wednesday, April 10, 2013 ::
I didn't do much to the car yesterday. I had to go to the hospital to get my sides sown up after splitting them when Adrian started texting me Tommy
Cooper jokes.
All better now, so today it's time to paint the chassis red. I am using the same paint that I used on the trailing arm, so to ensure it dries before July,
I am a wee bit more generous with the proportion of hardener. A bit too generous, as it turns out, because the first coat is dry before I've finished it,
and the paint is turning to jelly in the custom-made mixing cup (a coke tin cut in half) before I am finished the second coat.
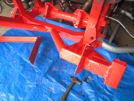 It looks good though! And before you say "oh that's a little hammer", it's not - as Father Ted says, "No Dougall, that's a big hammer, far away".
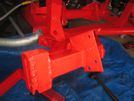 This is the bonnet hinge bracket I had to get repaired a few years ago after it split apart.
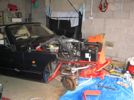
By the time I have finished tidying up my staff, the paint is bone dry. Too much hardener! I've just about finished that tin of paint, though - that
one litre (it's actually a US Quart) of paint has done two coats on both outriggers, a trailing arm, the rear of the chassis at the petrol tank, and
now this whole front bit.
So that's it ready to start putting everything back together. I'll let the paint harden for a day or two - I need to wait for 4 new rubber grommets
I have ordered, so that I can mount the radiator back in. Plenty other stuff I can do in the meantime though!
:: Saturday, April 13, 2013 ::
See when I said on Wednesday that I was ready to start putting the car back together? Well I was wrong. I forgot that I need to sort out the two metal
pipes that connect to the top and bottom of the radiator. They are steel, and rust. I painted the top one years ago so it doesn't look too bad. Looks
can be deceptive though!
So I start today by pulling off the short connecting hoses, and wire brushing the surface rust and loose paint off.
What finish to go for? I've got aluminium effect paint, I've got blue Hammerite that matches other bits and brackets in the engine bay, and I've got
matt black, satin black and gloss black. I could also polish them up and lacquer them.
I'm not really into "bling" though - the look I'm going for is "clean and tidy". So I decide to paint the pipes in what was their original finish,
using satin black radiator paint. I remove the bracket that holds the thermo switch into the top pipe, but leave the switch itself in place, and mask
it off. Then I spray the pipes, and spray the switch bracket in gloss black for a wee subtle contrast. I should really get new nuts and bolts as well though.
 While that's drying, I take the "thread-keeper" bolts out of the steering rack brackets, and carefully slide the rack into place, and replace the
clamps, using new bolts and washers (high-tensile A4 stainless steel).
Then I fit the taper joints into the steering arms. I bought new nuts, but the tapers have a UNF thread, not metric, so I have to put the old nuts on,
for now.
Then I footer about for ages fitting the steering column to the pinion, because I've lost the alignment mark I made. First I have to centralise the
rack. I mark the pinion clearly, then count 3 full turns lock to lock. Then turn it back a turn and a half, to the centre. Then I measure from the
centre of the steering taper to the chassis on each side, and make sure they are equal.
Then I centralise the steering wheel, and take the key out again to lock it in place. That lets me trial-fit the top joint, so that I can see where
the bottom joint is aligned, and were it has to go on, and I mark it. Then take the top off again, fit the bottom joint, refit the top one, and bolt
it all up. It measures as central, it looks central, but I won't know till I drive it.
It's tea-time though (I didn't start till mid-afternoon) so that's enough for today.
:: Sunday, April 14, 2013 ::
Back to the TVR. Today, boys and girls, we are going to fit the radiator. Can you say ray-di-yate-or? tvrgit git can, usually preceded by another
tricky word "fu-kin-stew-pit".
First though,I have to refit the front brake hoses to their chassis bracket. Cloth down to catch any drips, then disconnect the pipe, put the goes
connector through the bracket and spin on the clamp bolt, and quickly reattach the metal pipe connector. The whole operation takes only a few seconds,
to minimise drips, then I tighten up the locknut and the pipe connection, then on to the same on the other side.
Then I make a big sign saying "Bleed Brakes" and put it on the steering wheel, because I'm a forgetful old git, and I can't do it just now because I
don't have a pedal-pushing assistant.
Then I fit the metal bracket that goes around the radiator. It fixes on with two M6 bolts on each side, so I fit it loosely but don't tighten it up
yet, so that I can adjust it to get the radiator in the right position. Then I run two strips of sticky foam up the edges of the radiator mount, for
the radiator to sit against.
I've bought new grommets for the radiator to sit in, but they are a bit less substantial than the ones I took out.
So at last, on to the radiator. I slide the pins on the bottom into the chassis brackets, and push the top into the bracket - I have to pull the
bracket back, making sure I don't either bend the radiator in the middle, over the edge of the chassis, or pull it too far back to that there's a big
gap in the middle (and the top of the radiator is too high and too far back). Then I tighten up the bracket bolts and the top mounting bolts.
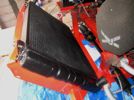
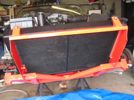 It's starting to look like it should!
Then I fit the lower radiator pipe, between the engine block and the bottom radiator stub. God it's fiddly to get back in that space between the chassis
and the wiring, and the suspension unit. If I hadn't taken it out, I would swear it could never fit!
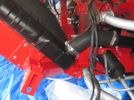
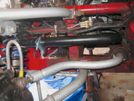 Then I fit the connecting hoses to the engine and the radiator, and the clamp I repaired, to hold the pipe in place, away from the chassis and
suspension unit.
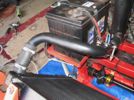 Then I fit the top hose and pipe from the swirl pot to the radiator, and connect up the thermo switch.
Next is the radiator fan itself. I have bought two lengths of M8 threaded rod, which I cut to 640mm. Important tip when cutting threaded bolts or rods
by the way - put the nut on first, then cut, then file round the edge of the cut to bevel the thread, then take the nut off, which cleans up the cut
thread and makes it easier to do up later. Oh you knew that already? Well you can skip that bit then.
Then I put a locknut and washer on each end of the rod, with one of them wound in a double of inches too far. Then I thread one of the rods through the
top fan clamp, push the "long" end of the threaded rod through the bracket shroud, and that lets me get the other short end in place. I move the lock
nuts out to where they should be, and put another washer and nylon nut on each end. With a spanner on each nylon nut, at least one of them has to tighten
up (even although I can't grip the rad) and when the first nut is in position, I tighten the lock nut, which clams the road and lets me tighten the other
end. Then I tighten that lock nut as well.
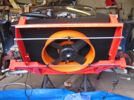 Then I fit the other rod through the two lower clamps, and wiggle that into position using the same method as above, and tighten the clamp bolts and
connect up the wiring.
I make sure that neither the fan nor the orange housing, is touching the radiator, and then switch on the ignition and test the fan to make sure it works.
Next step - replace coolant.
Ah.
I was sure I had some - I had gallons of the bloody stuff already mixed, when the Cerbera was demonstrating its membership of the Singing Kettle fan club
(for readers south of the border, "The Singing Kettle" is a hugely successful children's show here in Scotland, playing to packed theatres of cheering
and wailing kids and long-suffering parents. I took my son once, he was only 5. Which shows they have been going for a bloody long time. Their business
plan is simple but effective - turn well-known songs and nursery rhymes into moneymaking singalong hits, like "Ye canny throw yer granny aff the bus"
(not without a pre-arranged alibi and a chance of a share of the inheritance), and "The wheels on the bus go round and round" (until the rickety old
shed breaks down, or some dozy old fart gets on and can't find his bus pass). Traditional songs for modern times, indeed.
Anyway, I can only find 3 litres of pre-diluted coolant. Not enough.
Next step - buy coolant.
:: Monday, April 15, 2013 ::
Right, boys and girls, can we remember the tricky words we learned yesterday? OK after me…
fu-kin-stew-pit.
Very good! Now the other one:
ray-di-yate-or.
Excellent! Now put it all together…
Splendid!
And strangely prophetic…
I went out and bought a gallon of coolant - with a 50:50 mix that gives me 10 litres of coolant. Should be enough! So I mix it with water, loosen the
bleed valve on top of the radiator, put a cloth around it to stop coolant running everywhere, and pour the new coolant into the swirl pot. Eventually
it starts to come out of the bleed valve, so I screw it shut and top up the swirl pot.
I am just about to start the car, when I notice water dripping from the bottom right hand corner of the radiator. I must have splashed some on, but no…
I dry it off, and it seems to be running down the front edge of the end tank, from somewhere near the top. I loosen the two mounting bolts and push it
back, and it's running down between the radiator and the foam I stuck to the bracket.
After much drying and shining of bright lights, and looking for close-up glasses, the water seems to be emerging from a tiny pinhole on the edge of
the end tank, where the paint is scraped slightly. Closer inspection reveals a tiny soldered seam that has been scraped slightly, possibly when I was
fitting it.
All right kiddies, I need those words you were practicing a minute ago. Altogether now…
Yes, exactly.
I drain my nice clean coolant back out into a bucket by removing the bottom hose, and then remove the top hose and pull the radiator out and empty that
into the bucket as well.
Right, I have a choice. I can either take the radiator to a specialist and have it repaired, or I can have a go myself. If my repair doesn't work, I'll
still have to take it to a specialist. If it does, then I won't. What's to lose? My philosophy of "suck it and see" has evolved into "fuck it and hope"
so let's have a go.
First I wire brush all the paint off the join, and then get a soldering iron, and melt some solder along the join, trying to be careful not to apply
too much heat and risk melting other solder elsewhere.
Once I've stuck solder along the join, I get my blow lamp and wave it over the join, and watch the solder melt in smoothly. Just enough till it runs,
not so much that I'm going to heat up any other bits.
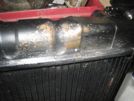 It looks ok, but I won't know until I refit it. Not today though because I have work to do. I do manage to get enough out of the last of my radiator
paint to cover the repair though.
In other news, my Sprint magazine arrived today from the TVR Car Club, and I have only gone and won the monthly photo competition with a picture of
the Cerbera! Goes nicely with my last win in 2004 (I think it was). Two successes in three entries! There's another photo of the Cerbera on the
"Events" page - if I had known it was going to be that famous, I'd have kept it. Mebbe.
 Here's the winning photo!
Anyway, back to the car. Next step - replace coolant.
Been here before!
:: Tuesday, April 16, 2013 ::
I hope you've been practicing those words we learned. We'll be needing them in a minute.
I refit the radiator, as I did before - no need to explain it all again. Then I refill the system, and there's the tiniest bead of water forming through
an invisible pinhole.
Drain system (losing a lot of it over the floor), remove radiator, wire brush, apply a touch more solder and flash it with the blow lamp on its lowest
setting (a high setting gives too much heat and also tends to blow the solder away from the lamp).
Refit, refill, and it seems to be ok. I start the car, and as it warms up, I see one tiny bead form really slowly - it's more of a "sweet" than a leak,
but I've come this far…
Leave it to cool a bit, then drain system (losing even more of it over the floor), remove radiator, wire brush, apply a touch more solder and flash it
with the blow lamp on its lowest setting.
Refit, refill, and it seems to be ok. I take the car right up to where the fan cuts in, and there's no sign of any leaks anywhere.
That went well, and it's still only 10am.
The stainless hinge kit didn't include the clamp that sits inside the square section of chassis, or the smaller bolt that holds it in place once you've
got everything adjusted, so I nip out to buy a couple of M12 bolts, along with some washers and sundry other odds and ends.
That lets me fit the hinge brackets and bolts, ready for fitting the bonnet. The pivot bolts are about 2 inches (or 50mm in new money) longer than the
old ones, so I'll have to cut them down a bit, or the front of the.bonnet will have more lateral movement than Nick Clegg at a Tory Party conference.
Then I sit down to read "Sprint" properly, and there's a great article about William's S in Norn Iron. We met him and his big pal Mike at S Club a few
years ago, and it's good to see the VSP is going strong!
Other news in Sprint is that we have a new S-Editor. Yes I decided to give it up a couple of months ago, for various reasons I don't want to go into.
Suffice to say that I just didn't want to do it any more. The new editor is still keen, bless him, so I might send him a couple of articles.
I think I might put the wheels on and move the car out of the garage as it is, so that I can clean the front of the tub, and other bits that you
normally can't see or reach. It might be easier to refit the bonnet outside as well, without scraping it on garage doors and walls and shit.
:: Wednesday, April 17, 2013 ::
No work on the car today, because Ive been a bit busy. But I thought I should mark the date, because it's 10 years today since I bought my wee car.
I remember the "oh no what have I done", and then the trepidation of driving it home that first day. Sine then, this wee car has brought me a lot of
pleasure, not just when driving it, but even when I have been up to my elbows in muck, while it's been spread in bits all over my garage. It's been
exasperating at times, but it's all worth it.
The S Series must be the most under-rated car TVR made, falling as it did between the loud and striking Tasmins, and the later Griffith, Chimaeras
and Cerberas that were such a step on from the traditional british look that had characterised TVRs up until that time. So many people, even in the
TVR Car Club, just don't "get" the appeal of the S. Compared to the cars before it, and after it, it's not very fast. On paper. It's not very
comfortable. Can't deny that. But see when you're driving along the open road, and not having to slow (much) for corners, and you're able to wring its
neck, it's absolutely, unbelievably, unarguably brilliant.
I speak as someone who owned a Cerbera for 4 years, at the same time. Nobody can deny that the Cerb is one of the fastest cars TVR (or anyone else) has
ever made. It was great fun. But it wasn't the same simple enjoyment of the S.
I've enjoyed driving it. I've enjoyed fixing it. I've enjoyed improving it. But most of all, I have met some wonderful people, shared lots of memorable
trips and experiences, and made some good friends. No names, you know who you are.
I need to get it back together and get out in it!
I renewed the insurance today, it's been with the same broker all that time, so I was hoping for a birthday discount. What I got was a flirty bint who
kept saying "Oh I love your accent, I could listen to it all day…" Good job it wasn't a videophone, eh?
:: Sunday, April 21, 2013 ::
First job - bleed the brakes. I bought one of those Eezibleed kits nearly 20 years ago (the one you connect to your tyre and use the pressure to
fill the system). I've never got the bloody thing to work though. But I'm too stupid to give up, and seeing as I know have a compressor so I can blow
the tyre up again easily, I let the tyre down to 10psi, but it still leaks when I connect it up. So I try it at 5 psi - and it still leaks. Bloody
useless waste of money. Wish I had kept the receipt from 1995…
Next option is the vacuum pump. That sometimes works, and sometimes doesn't. It's in a good mood today so both front brakes are bled in 5 minutes.
Then I put the front wheels back on and lift the car down off the axle stands, and take it outside so that I can clean the bits you can't access when
the bonnet is on.
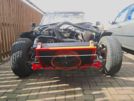
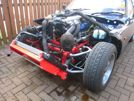 That includes the front of the bulkhead, and under the battery tray
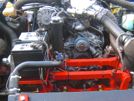 I also clean up the front of the engine, including the water pump and thermostat housing etc.
While that's all drying out, I lay out the front inner wings on the grass, take off the rubber edge trims, and spray them with black stone chip, ready
to go back on after I've refitted the bonnet.
Next step is to refit the bonnet - and for that I need to waylay an unwilling helper.
While I was working the other day, we were looking at a site and beside it, was a yard, fenced off with a 6-foot high close boarded fence with barbed
wire on top. Nobody knew what it was used for, so I stuck my camera over the wall.
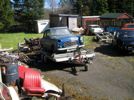 This is the photo - it's like a scrapyard (or my back garden when I was younger) - there's a Ford (Popular I think) on the trailer, and two Ford
Anglias (the white one and the black one - the black one doesn't have a front wing but I identified it by using my FBI-like photo enhancement skills).
I'm not sure what the orange car in the background is - Cortina estate I think.
:: Thursday, April 25, 2013 ::
Well my quest for a willing helper to replace the bonnet on the TVR has been unsuccessful so far, partly because it's been blowing a gale and I don't
really fancy hang-gliding underneath it from here into the side of the town centre and being arrested as a terrorist because I've crashed into a shop
that sells pressure cookers. Besides, I have work to do.
While I am doing that work, though, my daughter arrives home (the one that was ready for decking the man who couldn't get up the hill in the snow). Just
as she gets out, a full-livery Volvo traffic car) pulls up behind her, and the two officers start up a conversation with her, obviously focussing
on the lights. Seeing as it's broad daylight, I guess it must be brake lights.
I wonder whether to go out, or leave her to it, despite the risk of an outburst of "why don't you go and catch real criminals" or something. But no,
she's obviously far too scared to say anything at all.
The policeman gets out his wee pad and starts taking details, so I decide to see if I can head them off. I go out and ask, and right enough, it's brake
lights, both of them. "Oh I've got some spare bulbs in the garage" says I, and disappear into the depths. I do have spares, but God knows where, so I
reach into the TVR's boot, unclip the rear light bulb holder, and take out a fog lamp and reversing lamp bulb. Back out to the car with bulbs in hand, and
start dismantling the boot trims.
The nice policeman says "OK that's fine as long as it's going to be fixed." and scrubs his wee pad thingy. Ticket cancelled!
They jump into the Volvo, all smiles, she's pissed off that I didn't leave her to deal with it herself (her sister soon puts that right) and I set about
working out how to get to the bulbs on a Corsa.
First you take the whole back light unit off. Then you have to split the holder from the lenses - it's held on with 3 springy plastic catches that obviously
snap together easily but have to go right up to 99.9% of their breaking point, before they disengage again. The bulb holder has obviously been designed to
fit easily into the lens, but nobody thought to try it while there are bulbs in it. I don't know what sideways force you can exert on a wee glass bulb, but
they are obviously stronger than they look.
There's nothing obviously wrong with one of the old bulbs, but I change them anyway, everything replaced, hurrah!
Except the brake lights still don't work.
Hours later, I have managed to deduce that it's the switch at the pedal (the LCD high-level brake light is working so I thought it couldn't be the switch,
but it turns out the switch is two-pole - one for the high-level light, one for the two ordinary lights). I take the switch out. Is it a simple "screw in"
job? No. It has another complicated "push to fit" arrangement that snaps together easily, but getting the bloody thing out again from under the dash is like
a gynaecologist removing the tonsils of an upside-down giraffe.
Switch seems to be ok, but still no brake lights. I'll buy a new switch tomorrow.
Oh yes, I was supposed to be doing that work…
:: Thursday, April 25, 2013 ::
I have to go to Dundee first thing. Just as I'm ready to leave, the other daughter leaves for work, and is back in the house 2 minutes later. "My car is
making a funny noise." It's not a funny noise, not funny at all - her front spring has collapsed overnight, and the broken end is milling a new groove into
the wheel rim. So I have to drop her off at work, and then head for my meeting, late. On the way back, I go to the Vauxhall garage and buy a switch. I also
stop at Halfords and buy 2 new bulbs for the TVR.
When I get home, I jack up the Fiesta, and have a look. The spring is only just catching the wheel, but enough to ensure that the car won't go backwards. I
put the wheel on with some washers to space it out a bit, and get it back about 15 feet out of the way.
Then I decide to just make a wee start, you know, just see if it's going to come apart easily. I've got other stuff to do, so can't spend too long.
2 hours later the strut is off, having put up a helluva fight. I don't have a long reach spanner to get to the top nut though, so no changing springs today.
And anyway, my finger has only just grown back after trapping it in the compressors last time. So I take the whole thing to a friendly garage, along with the
new spring I had already (I bought a pair last time), and they agree to swap it over tomorrow.
Right, back to the other car's brake lights. I change the switch, still no lights. Just to eliminate possibilities, I take the lights apart again, and put in
the brand new bulbs. Brake lights work!
I put the old bulbs back in the TVR. They work.
Conclusion: Vauxhall Corsas can just take a dislike to perfectly serviceable bulbs and refuse to use them. Something to do with their CAN system, apparently.
You can't even test things with a meter, because it doesn't provide a supply unless it can detect a bulb to supply. Here's me with a Higher Physics, but
every day is still a school day.
There is another conclusion: see if you think TVR forums are bad? You've never tried Corsa forums. Christ alone knows what language they are written in, but
you've never read so much shit unless you've witnessed a lengthy prison "dirty protest" by a group of graffiti artists with "Delhi belly". Pages and pages of
tripe, imparting very little useful information whatsoever, unless you're into "dump valve effect" speakers and "lowerin' yo ride like u filled it with
30-stone homies". Or something.
Right. About this work I have to do...
But first, a wee browse on-line. What's this? The TVR meeting venue is holding a family BBQ on the day we are due to be there, in July. I wonder when (or if)
the hotel will get runs to telling us?
:: Sunday, April 28, 2013 ::
I know I said that I wasn't going to write about the Porsche, but I thought I would share this. You see, I decided yesterday to clean up the cooling
fan - you know, the bit that looks like a washing machine drum right in the middle of a Porsche engine bay. Mine is all rusty and pitted, and looks pish
So, I start with some polish. No difference. A wee magnet test confirms it's not steel, but alloy, so I decide top use the alloy cleaner that works on the
TVR's shiny bits. You spray it on, leave it a bit and wash it off, and it comes up all shiny.
Big mistake. BIIIIIG mistake.
As I wash it down, the fan goes powdery white, instantly. Fortunately it doesn't dissolve totally, but it's buggered.
A bit of research uncovers an owner's site where the guy made the same mistake (and lots of others, it's the Porsche equivalent of my site for TVRs),
because it's not aluminium alloy, it's magnesium. Shit.
So today I decide to remove the fan, and rub it down with vinegar, and it comes up fine (well, back to only being as shit as it was before I started,
not powdery white).
Thing about magnesium, though, is that it oxidises in front of your eyes, literally. So I spray it with white primer, while I think what colour to paint
it. I also clean down the cowling, which was originally black but is now grey.
Once the primer dries, I decide that the fan looks good in white (it matches the rest of the car) so I go and buy some white Hammerite and spray it, and
leave it to dry.
I was planning to do that at some point anyway, but not till I had the TVR back together. It's bad enough having one car spread in bits all over your
garage, without mixing in bits from another one..
Oh and I got my poster of the Cerbera, for winning the TVRCC photo competition. It's good, I think I'll pay for another one of the S.
 I weld up the bracket, and then tidy the weld up (it doesn't need much, I'm getting better!)


